
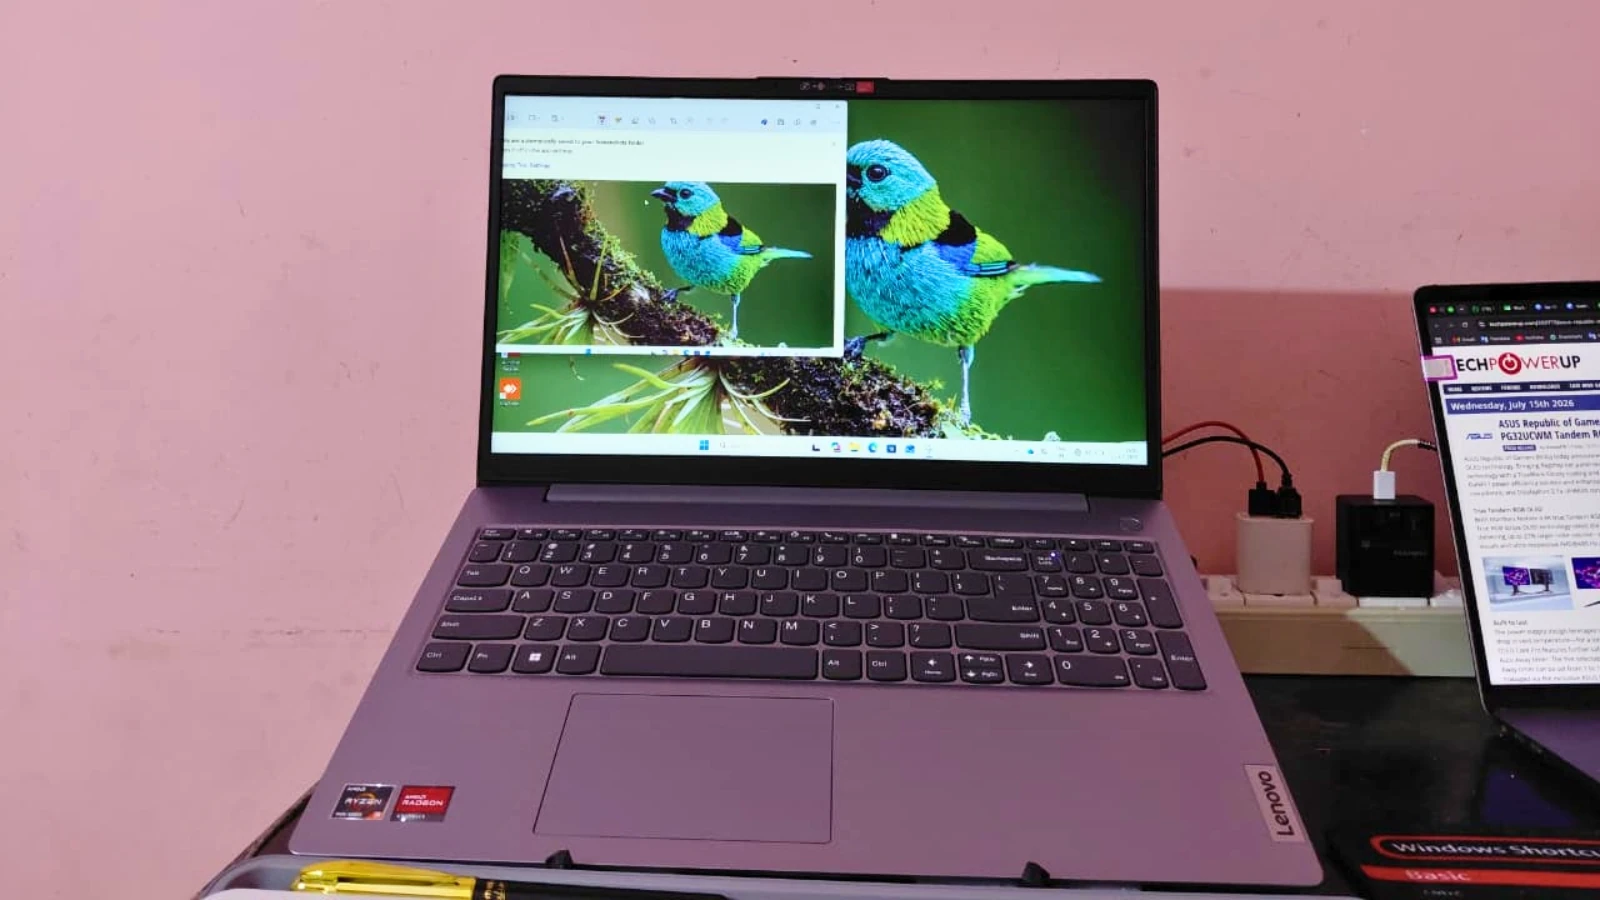
Taking a screenshot on a Lenovo laptop is quick once you know the right shortcut. Windows 10 and Windows 11 already include everything you need, so you don’t have to install any extra software.
This guide explains five simple ways to capture your screen. You’ll learn how to take a full-screen screenshot, capture a single window, select part of the screen, and save screenshots automatically on any Lenovo laptop.
Table of Contents
Screenshot Shortcuts at a Glance
This section helps users compare all available methods without repeating the detailed instructions below.
| Task | Shortcut | Result |
|---|---|---|
| Capture the entire screen | Windows + PrtSc | Saves the screenshot automatically |
| Copy the entire screen | PrtSc | Copies the screenshot to the clipboard |
| Capture the active window | Alt + PrtSc | Copies only the active window |
| Capture a selected area | Windows + Shift + S | Opens the Snipping Tool overlay |
| Take advanced screenshots | Snipping Tool | Supports rectangular, window, freeform, and full-screen captures |
Here are the 4 Ways to Take a Screenshot on a Lenovo Laptop
Method 1: Use the Print Screen Key to Capture Part of the Screen
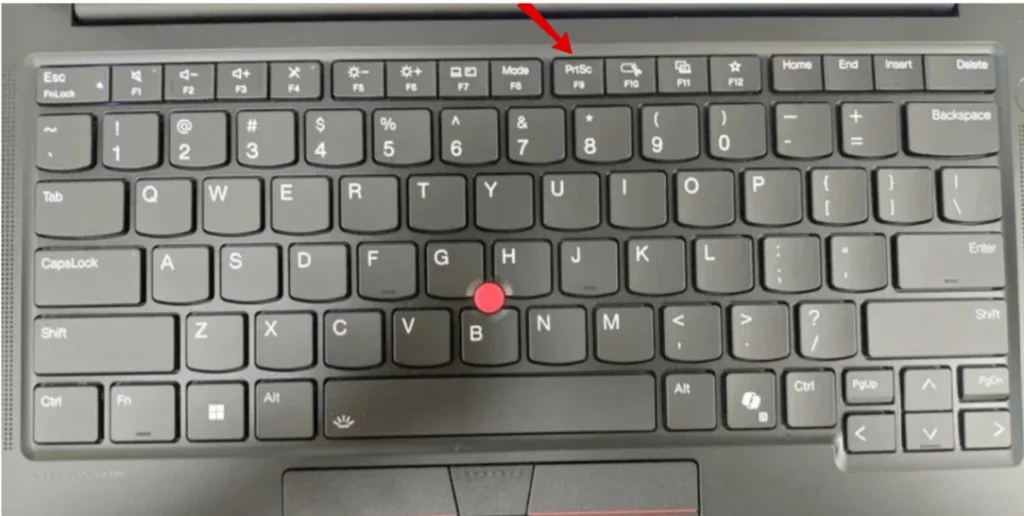
Step 1: Press the PrtSc (Print Screen) key on your keyboard.
If the Snipping Tool shortcut is enabled, your screen will dim and the screenshot toolbar will appear at the top of the screen.
Step 2: Click and drag your cursor to select the area you want to capture. Release the mouse button to take the screenshot.
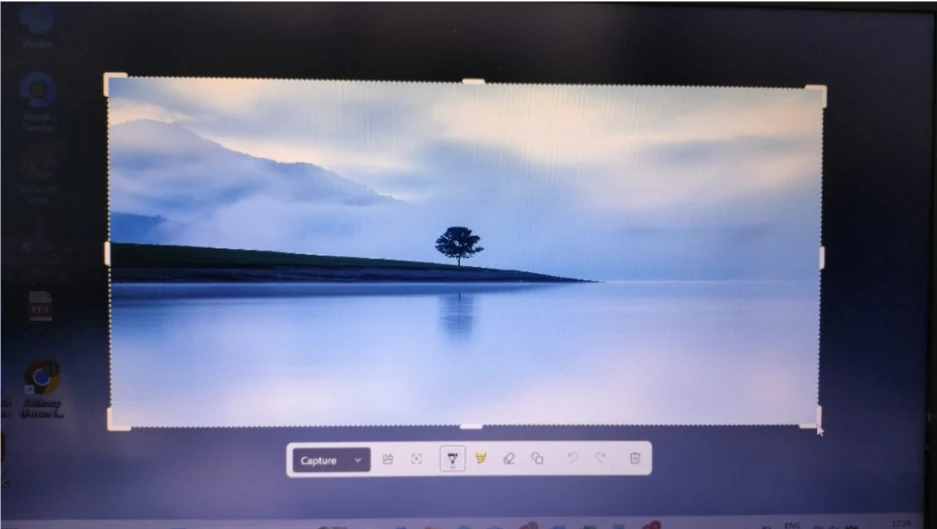
Step 3: Click the screenshot preview to open it in the Snipping Tool, then select Save As to save the image to your computer.
Method 2: Capture Only the Active Window
Step 1: Click the window you want to capture so it becomes the active window.
Step 2: Press Alt + PrtSc. Windows copies the active window to the clipboard.
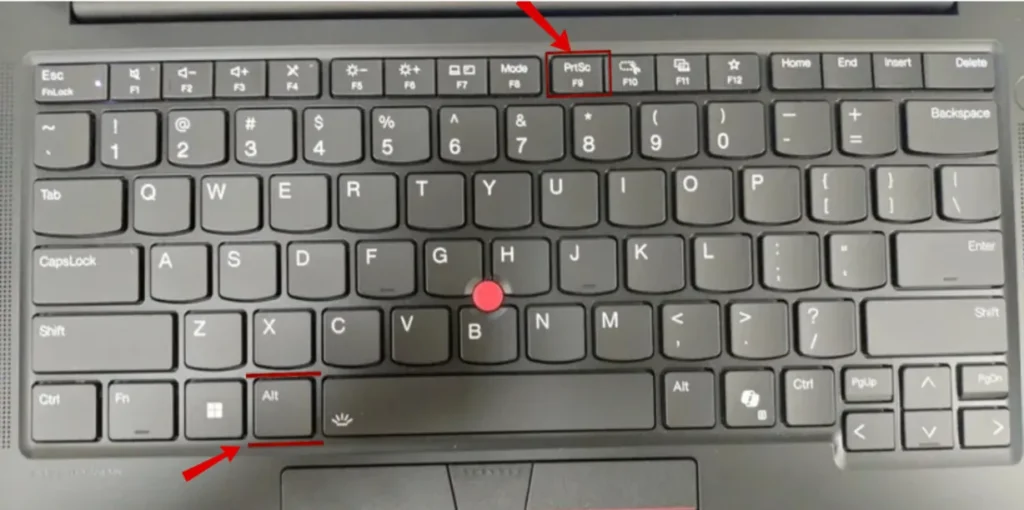
Step 3: Open Paint or another image editor, then press Ctrl + V to paste the screenshot.
Step 4: Press Ctrl + S, choose a save location, and click Save.
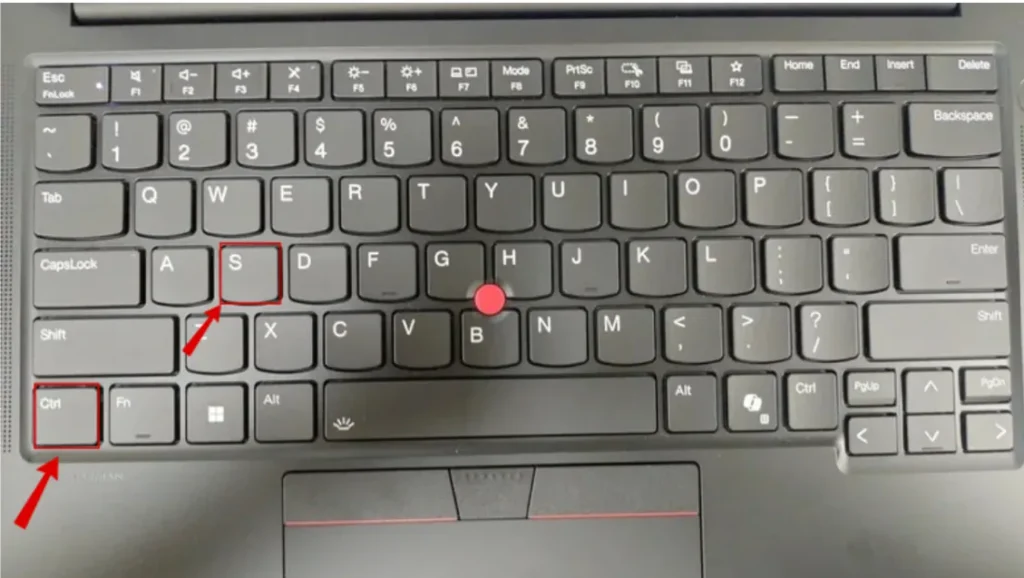
Method 3: Capture a Selected Area with the Snipping Tool
Step 1: Press Windows + Shift + S on your keyboard. The screen will dim, and the Snipping Tool toolbar will appear at the top.
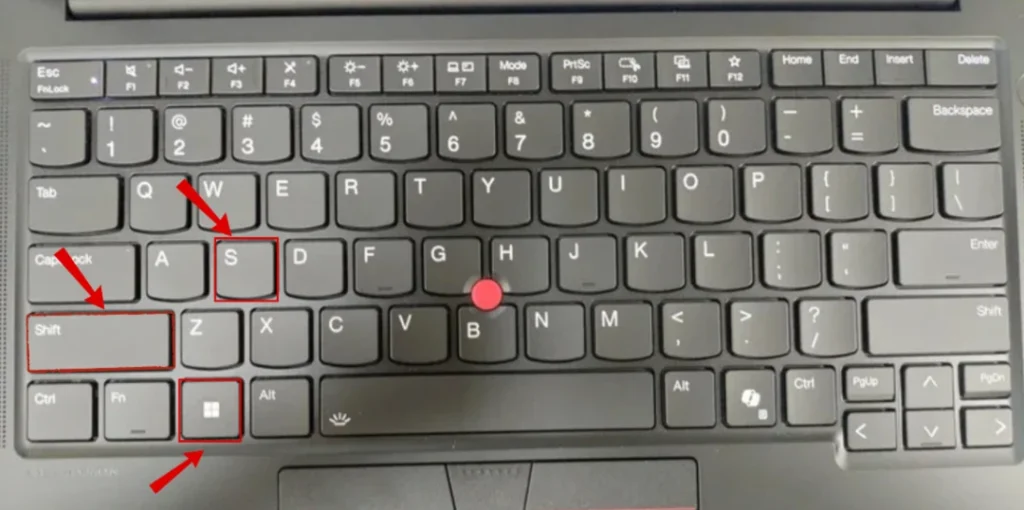
Step 2: Click and drag your cursor to select the area you want to capture.
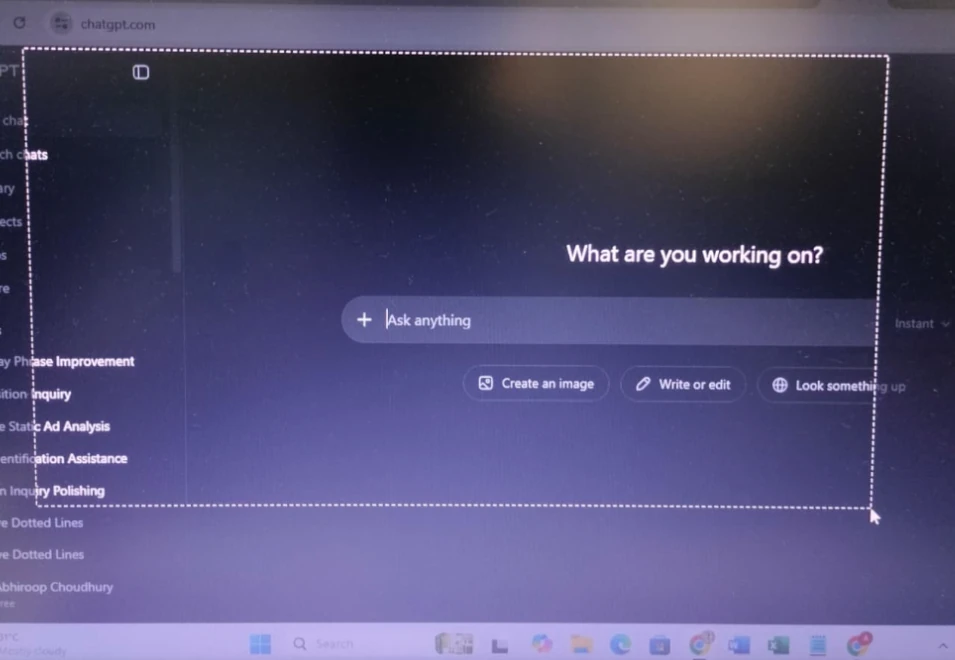
Step 3: Release the mouse button to take the screenshot. The image is copied to the clipboard, and a notification appears in the bottom-right corner of the screen.
Step 4: Click the screenshot notification to open it in the Snipping Tool if you want to edit or annotate the image.
Step 5: Press Ctrl + S, choose a save location, and click Save.
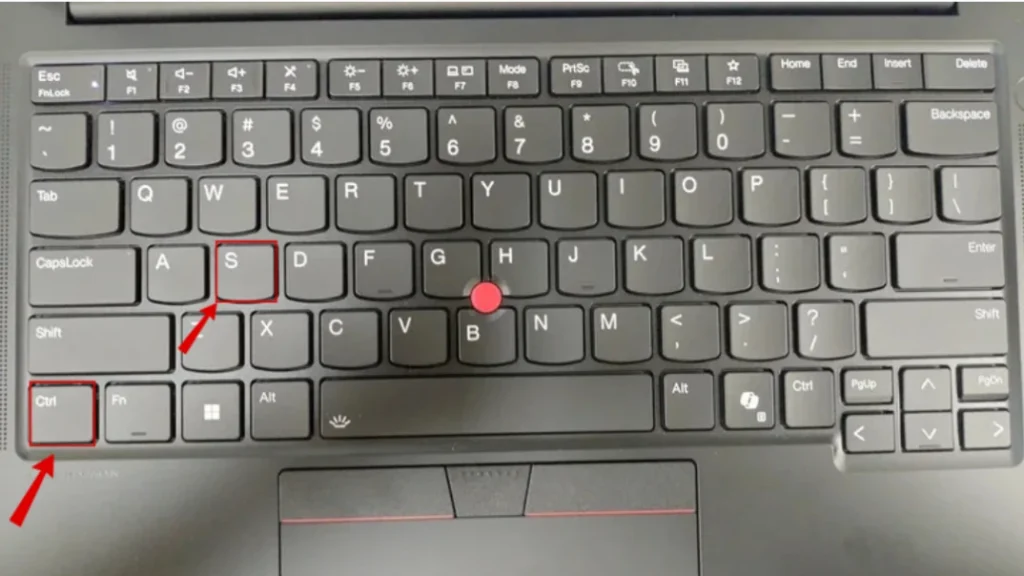
Method 4: Capture the Entire Screen and Save It Automatically
This method captures the entire screen and saves the screenshot instantly. You don’t need to paste it into another application.
Step 1: Press Windows + PrtSc on your keyboard at the same time.
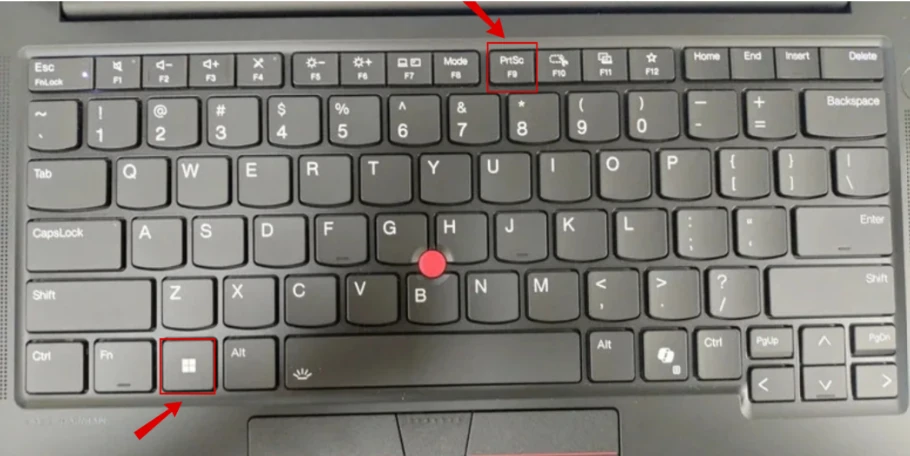
Step 2: The screen will briefly dim or flash, indicating that Windows has captured and saved the screenshot.
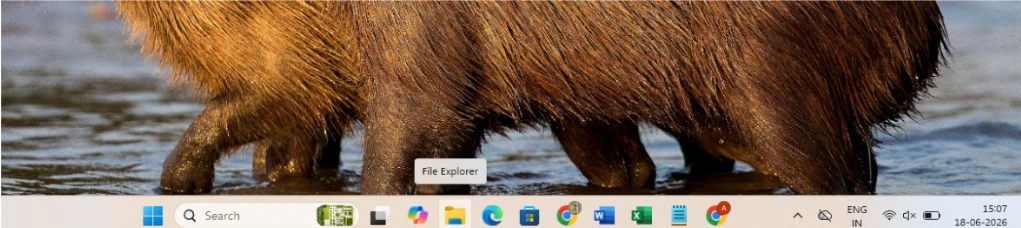
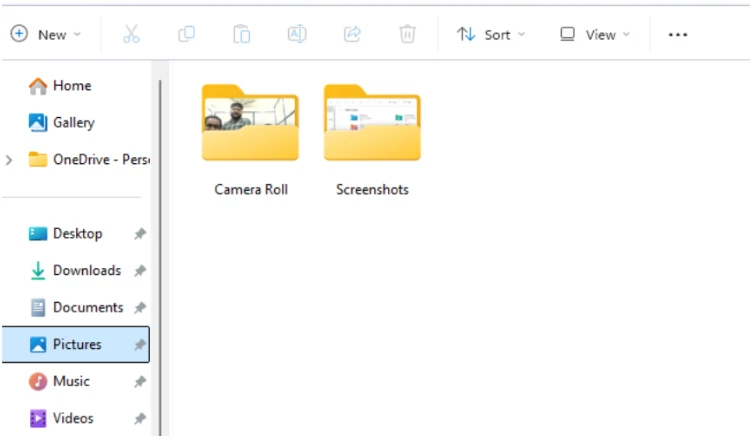
Step 3: Open File Explorer and navigate to Pictures > Screenshots.
Step 4: Find your screenshot in the Screenshots folder. It is saved automatically as a PNG file.
Method 5: Take a Screenshot with the Snipping Tool
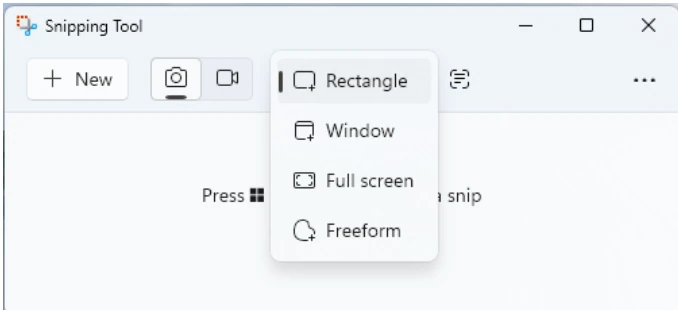
This method gives you more control over how you capture your screen. You can take a rectangular, window, full-screen, or free-form screenshot.
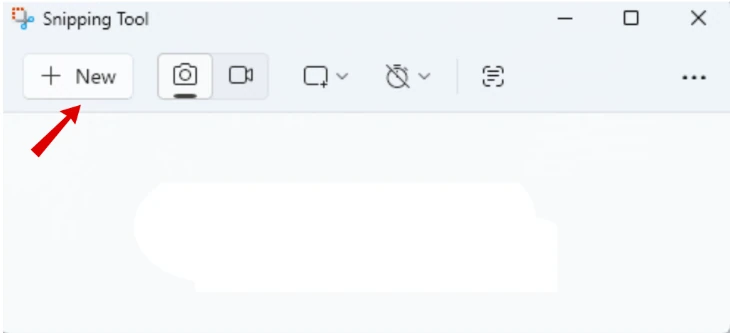
Step 1: Open the Start menu, type Snipping Tool, and press Enter.
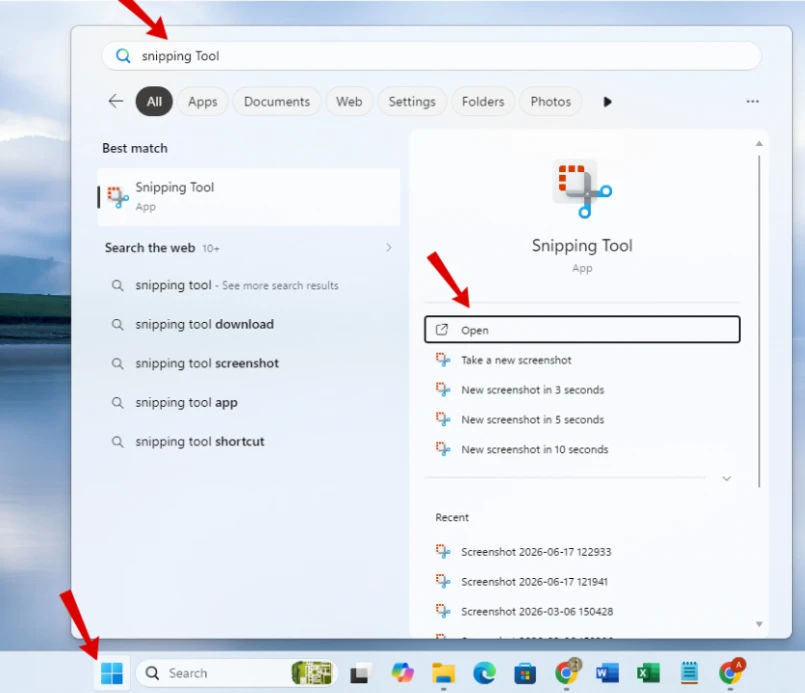
Step 2: Choose the screenshot mode you want to use, such as Rectangular, Window, Full-screen, or Free-form.
Step 3: Click New, then capture the area or window you want to save.
Step 4: Click Save As, choose a location, and save the screenshot to your computer.
Also Read: Windows 11 Update: 5 New Features I Got After Updating
Frequently Asked Questions (FAQs)
Q1. Where are screenshots saved on a Lenovo laptop?
If you press Windows + PrtSc, Windows automatically saves the screenshot in This PC > Pictures > Screenshots. Screenshots taken with PrtSc, Alt + PrtSc, or Windows + Shift + S are copied to the clipboard. You’ll need to paste them into an app such as Paint before saving them.
Q2. Why isn’t the PrtSc key working on my Lenovo laptop?
Some Lenovo laptops require you to press Fn + PrtSc instead of PrtSc alone. If the shortcut still doesn’t work, check whether Use the Print Screen button to open screen snipping is enabled in Settings > Accessibility > Keyboard. Third-party screenshot tools or outdated keyboard drivers can also affect how the key works.
Q3. Can I take a screenshot on a Lenovo laptop without using a keyboard?
Yes. Open the Snipping Tool from the Start menu and use your mouse to capture the entire screen, a window, or a selected area. You can then save the screenshot directly from the app without using any keyboard shortcuts.
Q4. How do I change the default screenshot folder on Windows?
Screenshots captured with Windows + PrtSc are saved in the Pictures > Screenshots folder by default. To save them somewhere else, right-click the Screenshots folder, select Properties, open the Location tab, choose a new folder, and click Apply.
Q5. Can I take a scrolling screenshot on a Lenovo laptop?
Windows doesn’t provide a built-in keyboard shortcut for scrolling screenshots. However, you can capture an entire webpage using Microsoft Edge’s Web Capture feature or use a third-party tool that supports scrolling screenshots.
Conclusion
Windows 10 and Windows 11 make it easy to take a screenshot on a Lenovo laptop without installing additional software. Whether you need to capture the entire screen, an active window, or a selected area, you can choose the method that best fits the task.
If one shortcut doesn’t work on your laptop, try an alternative method or check your keyboard settings. With the built-in screenshot tools covered in this guide, you can capture and save your screen in just a few steps.