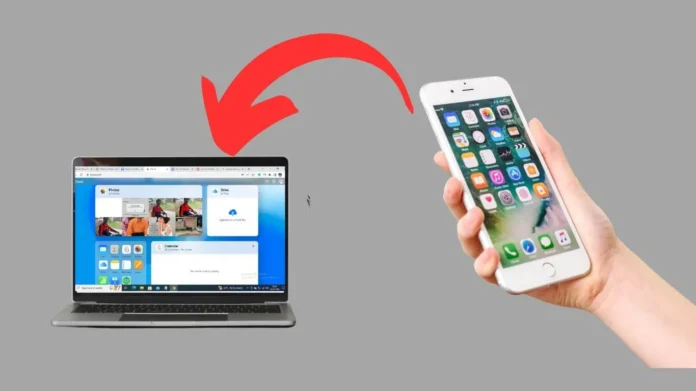
In this digital age, capturing special moments with smartphones like the iPhone has become a daily habit.
However, with limited storage on our devices, we must know how to transfer those precious photos to our laptops or computer.
Whether you’re using Windows or macOS, there are several convenient ways to implement this task.
This blog will guide you through five easy and effective ways to transfer photos from your iPhone to your laptop.
We cover you with the hassle-free iCloud method that seamlessly syncs your images and the efficient cloud storage solution of Google Drive, along with the traditional USB cable transfer.
Let’s step by step look at and explore the different methods, ensuring that we safely transfer and make your memories easily accessible on your laptop!
Benefits of Transferring Photos from iPhone to Laptop
- Free Storage: By transferring the photos from your iPhone to your laptop, you can create more space on your iPhone. This makes your iPhone work better and faster.
- Back-Up: Saving your photos on your laptop is smart because it keeps them safe. If something happens to your iPhone, like losing it or breaking it, you can still see and use your photos on the laptop.
- Edit Photos Easily: PC/Laptop have special apps for editing photos like adobe photoshop, photoX, etc. These apps can do things that your iPhone’s photo editing can’t do. With these apps, you can change the size, cut out parts, and adjust colors in your photos.
Also Read: Transfer Photos From Android to iPhone
5 Methods to Share Photos from iPhone to Laptop or Computer
Method 1: Using iCloud (Both Windows and macOS)


Step 1: Open your iPhone’s Settings and click on your Apple ID name.
Step 2: Tap on iCloud from your screen.
Step 3: Click on Photos and turn on the toggle next to Sync this iPhone.
Let your iPhone Sync all your photos to iCloud.


Step 4: Now, open the browser on your Laptop and Sign In to the same iCloud account you used to upload your iPhone’s photo using your Apple ID and password.

Step 5: A pop-up will appear on your iPhone for login permission, along with a verification code.

Enter the browser’s verification code and click Trust for the “Trust this browser” message.

Step 6: On your browser, click on the Photos icon. Here you will find all your iPhone’s photos.

Step 7: Select the photo you want to download and tap on the download button at the top right of your screen. The images will be saved to your Laptop.
Method 2: Using a USB cable (Both Windows and macOS)
Step 1: Connect your iPhone to your Laptop or computer using a USB cable.
Step 2: Unlock your iPhone and if you see a pop-up message, select Trust This Computer and enter your passcode.
Step 3: On your Laptop or computer, open File Explorer (Windows) or Finder (Mac) and click on This PC.
Step 4: Find your iPhone within the list of connected devices. Double-click your iPhone’s icon to access its internal storage and navigate to the “DCIM” folder.
Step 5: Within the DCIM folder, several folders will contain your photos.
Step 6: Select the photos you want to transfer. Press and hold the Ctrl key to select multiple images while clicking on each photo.
Step 7: Right-click on the selected photos and then click on Copy from the context menu.
Step 8: Now, go to the desired location on your Laptop. Right-click on the blank area of the destination folder and then click on paste from the context menu. Your iPhone photos will be transferred to your Laptop.
Step 9: When the transfer is complete, safely disconnect your iPhone from the Laptop.
Also Read: How To Transfer Photos From iPhone to Android
Method 3: Using Google Drive (Both Windows and macOS)
Step 1: Install the Google Drive app from the App Store on your iPhone.
Step 2: Open the app and Sign in to your Google Account.
Step 3: Navigate to the bottom right corner and select Files.
Step 4: Tap the plus icon at the bottom right corner and then click on Upload from the available options.
Step 5: Next, tap on Photos and Videos and select the photos you want to transfer to Laptop.
Step 6: After selecting photos, tap on UPLOAD at the top right corner of your screen.


Your photos will be uploaded to Google Drive.
Step 7: Now, open the browser on your Laptop—go to google drive and Sign In to the same Google account you used to upload photos on your iPhone.

Step 8: From the left side Menu click on My Drive. Select the photos which you have uploaded to transfer to your Laptop.

Step 9: Right-click on the selected photos and then click Download to save pictures to your Laptop.

Method 4: Using Photo App (Both Windows and macOS)
Step 1: Plug your iPhone into your Laptop using a USB cable.

Step 2: Click on the search bar at the bottom left corner of your Laptop and type Photos.

Step 3: Launch the Photos App on your Laptop.
Step 4: Now, Click the import button at the upper right corner of the Photos app and Choose From a connected device.

Step 5: Change your import destination folder by clicking on Change destination and selecting the desired location where you want to save.
Step 6: Select the photos you want to import and click Import items.

Once your photos are imported, then you can view your pictures on your Laptop.
Method 5: Using Airdrop (Only macOS)
Step 1: Goto Settings on your iPhone. Scroll down and tap on General.
Step 2: Tap on AirDrop and select the Everyone for 10 Minutes option.
Make sure your Bluetooth is turned on.
Step 3: Now, Click on Go from the top bar on your macOS and then select AirDrop.
Step 4: Turn on the Bluetooth by clicking on Turn on Bluetooth. Now, it will scan the nearby devices with Airdrop Turned on, and your iPhone will be listed there.
Step 5: To connect with your iPhone, choose ‘Everyone‘ from the drop-down menu next to ‘Allow me to be discovered by.’ Now you can transfer the photos from iPhone to macOS.
Step 6: Now, select the photos on your iPhone and tap the Share button at the bottom left corner of your screen.
Step 7: Select AirDrop from the available options and click on your macOS device.
The photo has been transferred successfully, as seen in your Downloads folder.
FAQs
Can I Transfer Photos Wirelessly from my iPhone to a Windows Laptop?
Yes, using various methods, you can transfer photos wirelessly from your iPhone to a Windows laptop and Macbook. Here are a few common ways to do it-
Methods 1: Using iCloud Photos
Methods 2: Using Google Photos
Methods 3: Using AirDrop (macOS only)
Methods 4: Using a USB cable
Methods 5: Using Google Drive
Can I Transfer Live Photos or Videos from my iPhone to my Laptop?
You can transfer Live Photos and videos from your iPhone to your laptop using the methods mentioned in the previous question’s answer.
How do I Transfer High-Quality Photos from Laptop to iPhone?
If you want the highest possible quality for your photos on your iPhone, it’s essential to use original files and avoid compression during the transfer process. Using iCloud Photos or a direct USB transfer preserves the original photo quality.
Final Words
Now that you have experienced 5 different ways to transfer photos from your iPhone to your laptop, you can easily manage your precious memories.
Whether you choose the wireless convenience of iCloud and AirDrop or the more traditional USB cable approach, each method is easy to follow and produces satisfactory results.
Remember, regular backups are key to protecting your photo collection, and these methods allow you to easily organize and protect your favorite moments.
So, refer back to this guide whenever you need to free up space on your iPhone or access your photos on a bigger screen, and you’ll be ready to transfer your images quickly.


