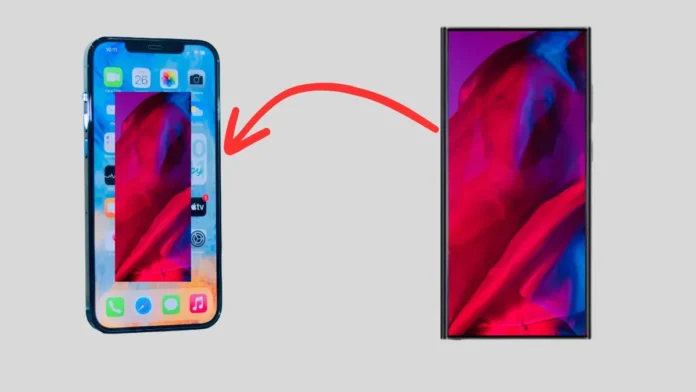
Are you searching for how to transfer photos from your Android phone to an iPhone?
Whether you’re switching from Android to Apple or need to share photos with an iPhone user, there are multiple ways to do this task.
In this blog post, we’ll explore the Top 5 efficient methods to transfer photos from Android to iPhone, with or without a computer.
Transferring photos between different platforms can be a priority for many users, especially those who own an iPhone and an Android device or are planning to switch.
Depending on the size of your photo collection, some methods may be more suitable than others.
While cloud storage solutions like Google Drive offer convenience, they can become costly as your storage needs increase.
However, alternatives like using a third Part App can help you transfer extensive photo collections without getting monthly storage bills.
In this guide, we’ll review and test various methods to provide you with the best ways to transfer photos from Android to iPhone. Whether you’re a dedicated Apple user or an Android enthusiast, we’ve got you covered.
So, let’s explore these methods step by step, ensuring your valuable photo library seamlessly moves from Android to iPhone while sending its original quality.
Also Read: How To Transfer Photos From iPhone to Android.
To transfer photos from an iPhone to an Android device, you can follow these general steps:
Ways to Transfer Photos From Android to iPhone
Method 1: Using Google Drive
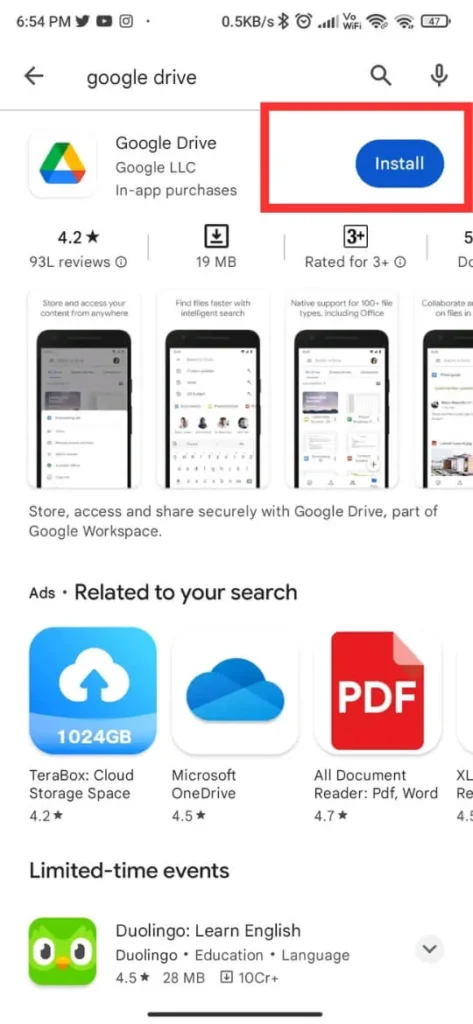
Step 1: Open Play Store on your Android mobile and search “Google Drive” in the search bar.
Step 2: Click “Google Drive” from the search results and install the app on your Android mobile.
Step 3: Open the app and Sign in to your Google Account.
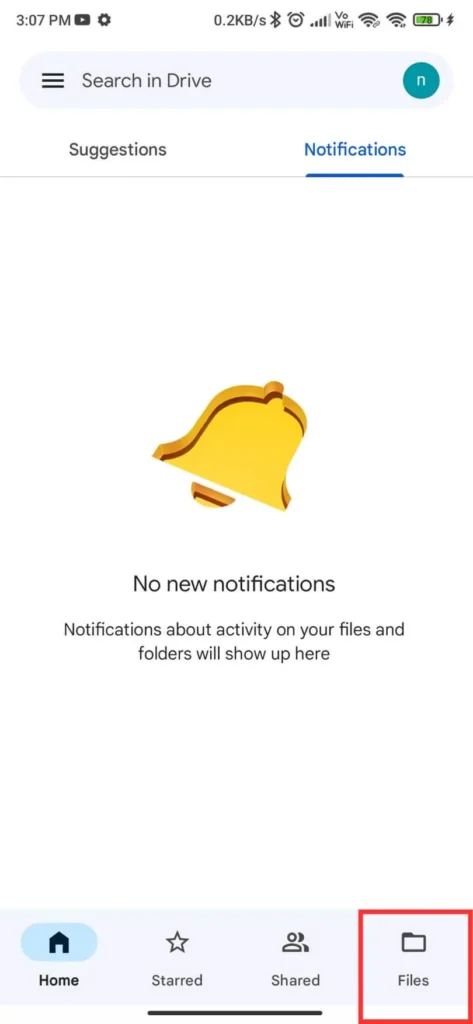
Step 4: Click on Files at the bottom right corner.
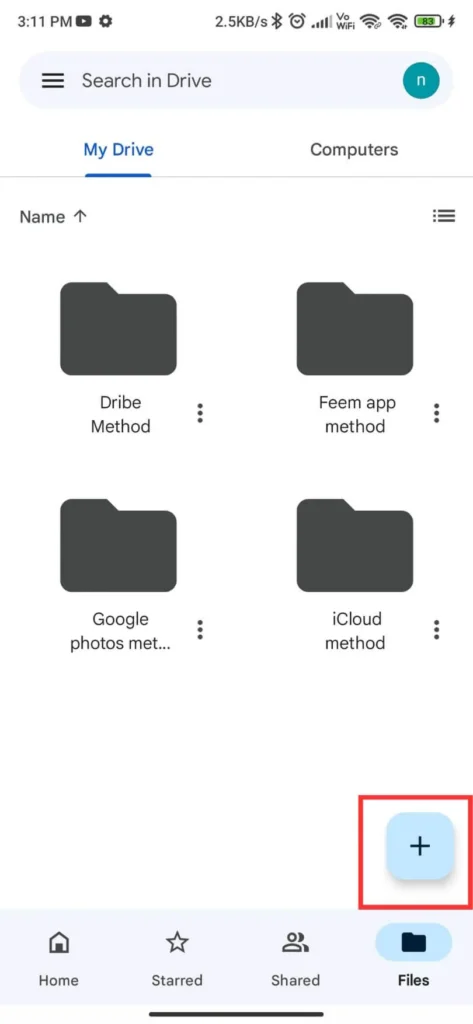
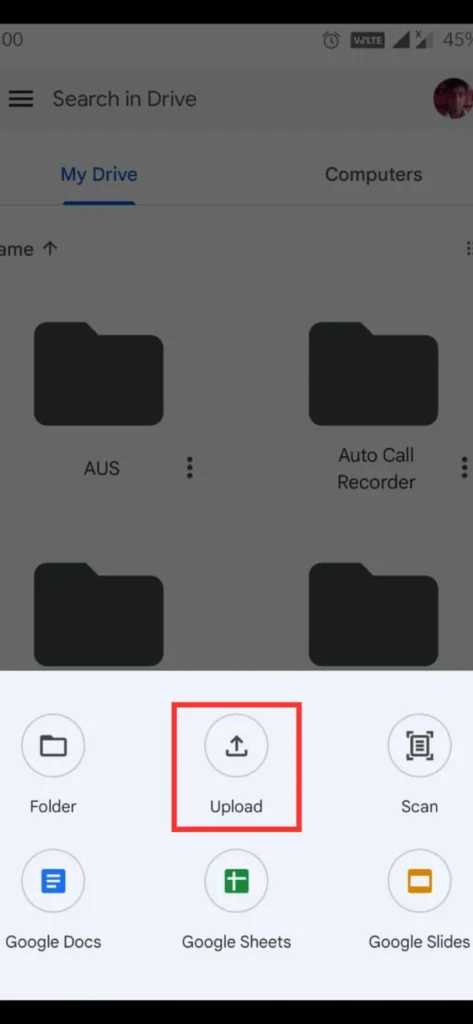
Step 5: Click the plus icon at the bottom right side and select Upload from the available options.
Step 6: Click on Gallery. Select the photos you want to transfer and click on the Right tick at the top right corner.
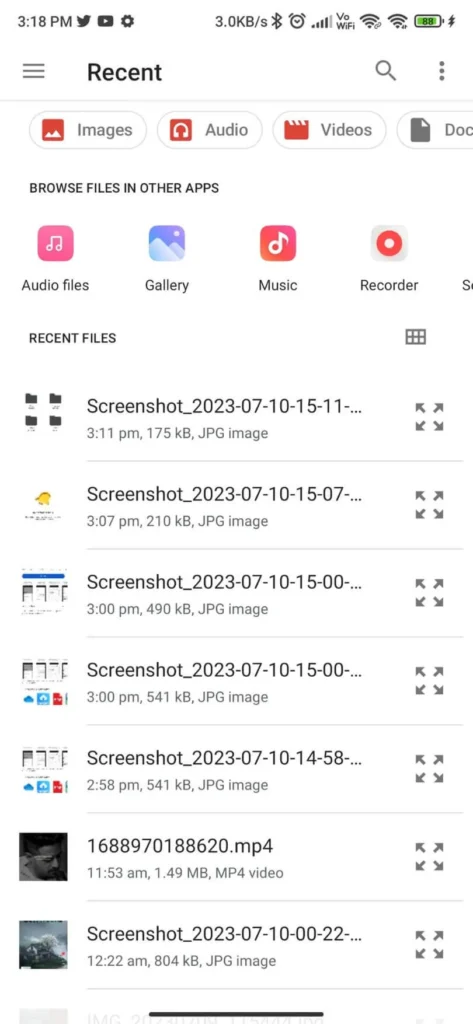
Let all the photos be uploaded to your Google Drive.
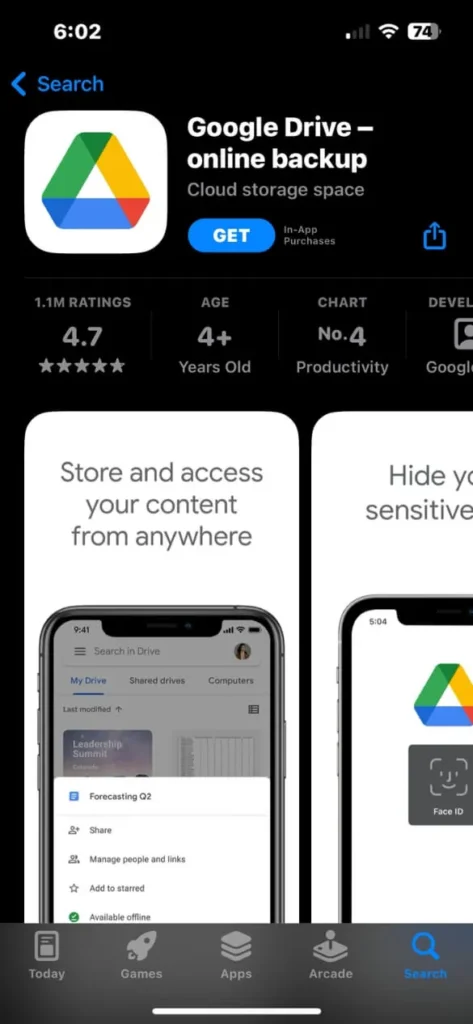
Step 7: Now, open the App Store on your iPhone and type “Google Drive” in the search bar.
Step 8: Click “Google Drive – online backup” from the search results and install the app on your iPhone.
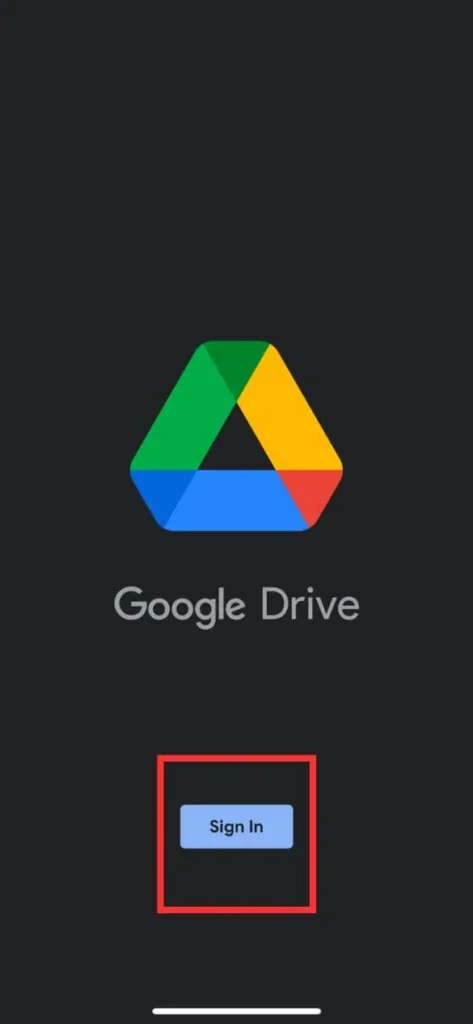
Step 9: Open the app and Sign In to your Google Account, which you used to upload photos on your Android.
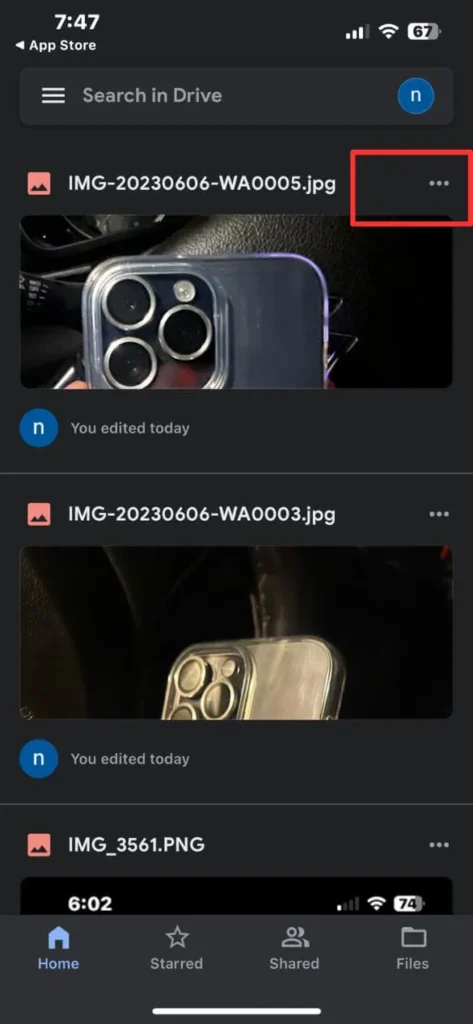
Step 10: Select the uploaded photos and tap the three dots at the top right corner.
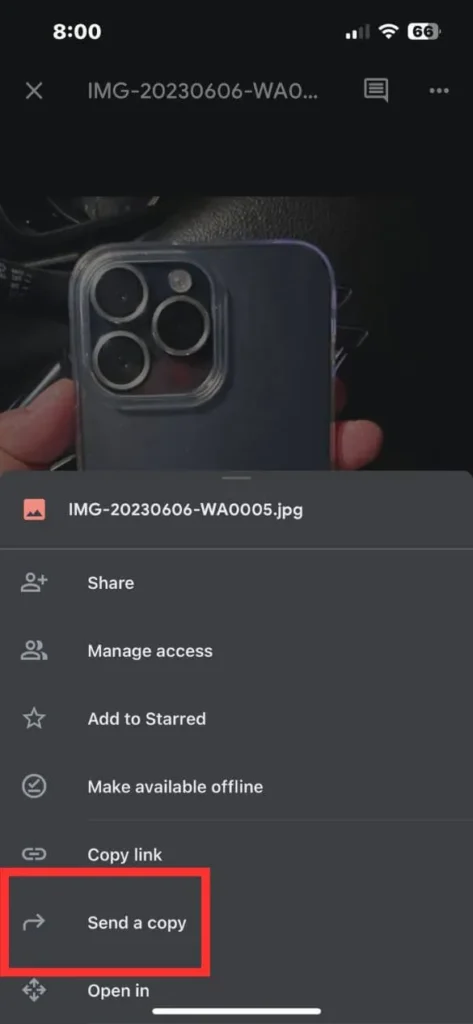
Step 11: Select Send a copy from the available options and click Save Image.
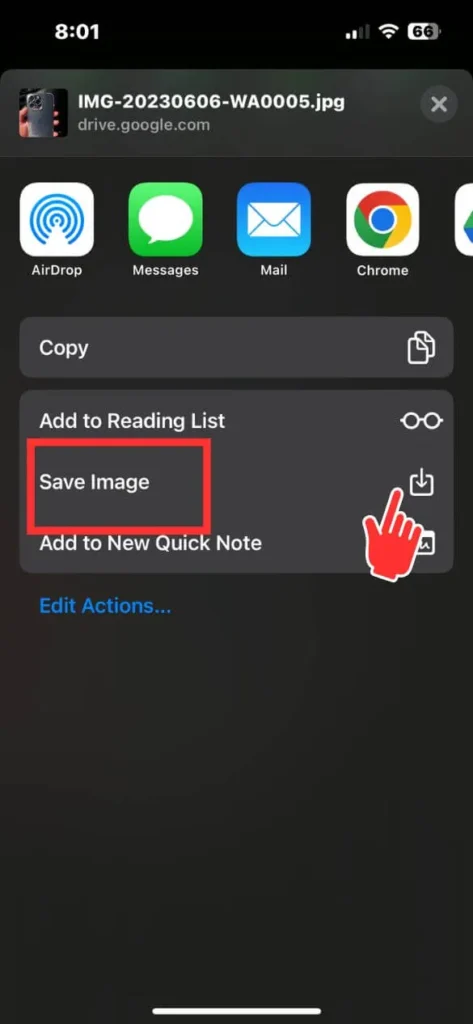
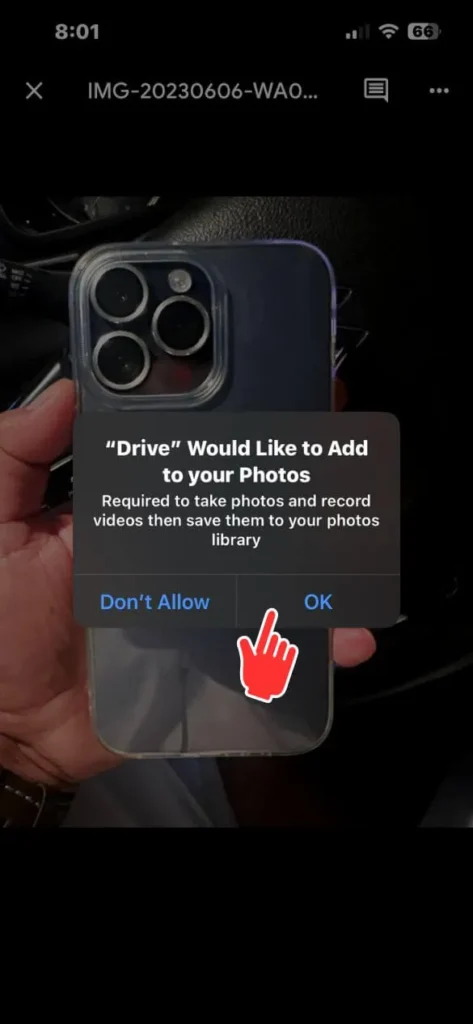
Step 12: Select OK from the pop-up message on your screen to save the photo on your iPhone.
Method 2: Using the Feem app
Step 1: Open the App Store on your iPhone and search for “Feem.”
Step 2: Click “Feem v4 – Share Files Offline” and install the app on your iPhone.
Step 3: Open the Feem app on your iPhone and give all the required pop-up permissions. Also, permit to Allow Access to All Photos.
Step 4: Now, open the Play Store on your Android and search “Feem.”
Step 5: Click “Feem. Share Files Offline” and install the app on your Android.
Step 6: Open the Feem app on your Android and click on Grant Permission. Give all the required permission.
Step 7: Connect both devices with the same Wi-Fi network. Both devices will be connected automatically.
If you don’t have a Wi-Fi connection at home, turn on Android’s hotspot and iPhone’s Wi-Fi and connect the iPhone to Android’s hotspot.
Step 8: Tap on the connected device on your iPhone. Click on Send File at the bottom.
Step 9: Select all the photos you want to share and tap on Send to transfer images to Android.
Method 3: Using Google Photos
Step 1: Open the App Store on your iPhone and search for “Google Photos.”
Step 2: Click “Google Photos” and install the app on your iPhone.
Step 3: Open your iPhone’s Google Photos app and click Back up as “your Google account.”
Step 4: Click on Allow access to all photos visible on your screen. Again, click on Allow Access to All Photos from the pop-up screen.
- It will automatically start uploading all your photos to your Google account.
- If you want to upload only selective photos, pause the backup from the profile icon at the top right corner and turn the backup off.
- Now, select the photos you want to upload. Tap on Back up to upload your chosen pictures to Google Photos.
Step 5: Now, Open the Play Store on your Android and search for “Google Photos.”
Step 6: Click “Google Photos” and install the app on your Android.
Step 7: Open the Google Photos app on your Android and give the required permission. Sign in to the same Google account you used on your iPhone.
- You will see all your uploaded photos of your iPhone on your Android.
Step 8: Now, click on the photo(s) to view and tap the three dots at the top right corner. Select Download to save the image (s) on your Android.
Method 4: Using iCloud
Step 1: On your iPhone, go to the Settings app. Scroll down and search for Photos.
Step 2: Click on Photos and turn on the toggle for iCloud Photos.
Let your iPhone Sync all your photos to iCloud.
Step 3: Now, on your Android mobile browser, go to iCloud.com and Sign In to your iCloud account, which you used to sync iPhone photos.
Step 4: Enter the two-factor authentication code received on your iPhone.
You will be logged in to your iCloud account.
Step 5: Scroll down and click on Photos. Now, click Select at the top right corner and select the photos you want to save on your Android.
Step 6: Click on the three dots at the bottom right corner. Select Download from the pop-up to save photos on your Android mobile.
Method 5: Using a Computer
Step 1: Connect your iPhone to a computer using a USB cable.
Step 2: Open File Explorer (Windows) or Finder (Mac) on your computer.
Step 3: Locate your iPhone in the list of connected devices.
Step 4: Open the iPhone and navigate to the “DCIM” folder.
Step 5: Inside the “DCIM” folder, you should find various folders containing your photos.
Step 6: Copy the desired pictures and paste them into a folder on your computer.
Step 7: Disconnect your iPhone from the computer.
Step 8: Connect your Android device to the computer using a USB cable.
Step 9: Open File Explorer (Windows) or Finder (Mac) on your computer.
Step 10: Locate your Android device in the list of connected devices.
Step 11: Open the Android device and navigate to the desired location to transfer the photos.
Step 12: Copy the images from your computer and paste them into the desired location on your Android device.
Safely disconnect your Android device from the computer.
Also Read: Best Laptops for Freelancers & Online Jobs
Final Words
Transferring photos from Android to iPhone doesn’t have to be a daunting task. With the methods discussed in this blog post, you can easily and efficiently transfer your loving photos to your iPhone without losing quality.
Remember, as you choose your journey from Android to iPhone, compatibility between the two platforms can present some challenges. However, with the solutions in this guide, you can overcome these hurdles and ensure a smooth transfer process.
Take the time to explore each method, follow the step-by-step instructions, and choose the one that works best for you.
