Do you ever face storage issues on a specific drive in your laptop or PC? This is a common problem nowadays: as we save more files, the drive’s storage can fill up quickly. Similarly, installing too many unnecessary applications can also consume valuable storage space.
But don’t worry! If you have a blank drive or multiple drives in your PC or laptop, you can easily increase the performance of your laptop or PC by merging two or more storage drives without losing data.
Things to Know Before Merging Two or More Partitions
Free Space: Ensure that one of your partitions has enough free space to accommodate the data from the other partition you want to merge.
Backup and Data Loss: Back up any important data from the partitions you plan to merge. This precaution is crucial in case anything goes wrong during the process. Keep in mind that combining partitions will erase the data on one of them, so ensure you back up any data you want to keep.
Purpose of Merging Partitions: It is essential to know why you want to combine them. Think about your goal—to free up storage space, better organize your data, or improve your computer’s performance.
Choose the right tool: Built-in Disk Management methods work for basic and common merging; however, third-party partition managers offer more flexibility and user-friendly interfaces.
Ways to Combine Disk Partitions in Windows Without Losing Data
You have two ways to merge two or more partitions on Windows:
- Using the built-in Disk Management tool.
- Using third-party software.
It is often easier to use third-party software than Disk Management.
Method 1: Merging Two or more Partitions in Disk Management
- Step 1: Open Disk Management
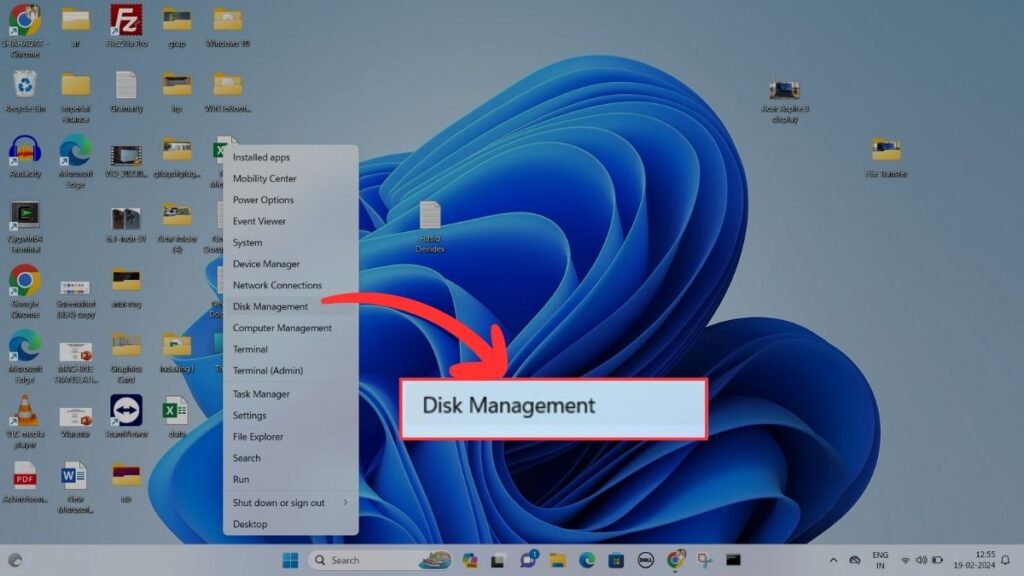
Right-click on the Windows symbol in the taskbar. A menu with various options will appear. Choose Disk Management from there.
Alternate Ways to Open Disk Management
- Click the Windows key, type “diskmgmt.msc” and press Enter to launch the Disk Management console.
- Press the Windows + R keys, type “diskmgmt.msc,” and click OK.
- Right-click on “This PC” and choose “Manage” > “Disk Management“.
- Press the Windows + X keys, and choose “Disk Management.
- Step 2: Select the partition drive and delete one.
Select the partition drives you want to combine. For example, let’s say we want to merge drives C and D. Remember that one of the drives will have to be removed during this process.
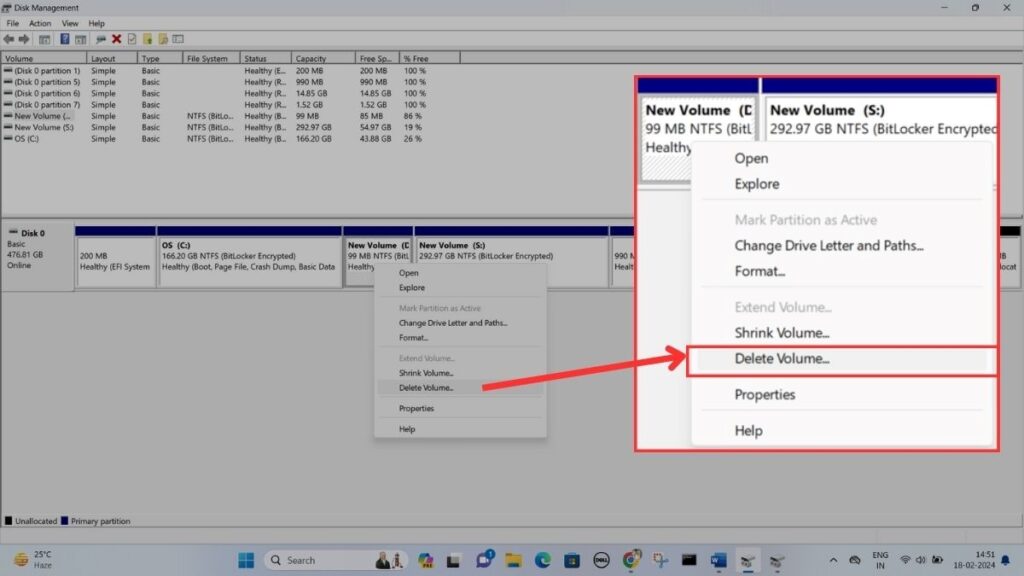
Since the operating system is installed on drive C, you cannot delete it.
Therefore, we will delete drive D.
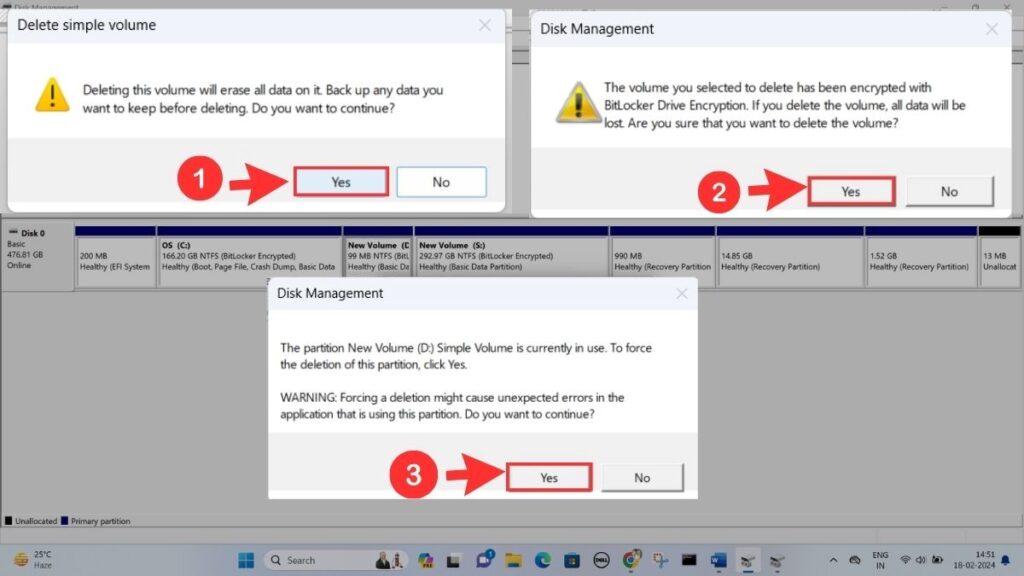
Warning: The data from the selected partition will be deleted. Be sure to backup any important data on the drive you plan to delete.
Important: When deleting a partition in Disk Management, you may receive two or three notifications asking for confirmation. Simply keep clicking “OK” to proceed with the deletion.
- Step 3: Select the Partition to Merge
Right-click on the partition you want to expand and select the “Extend Volume” option.
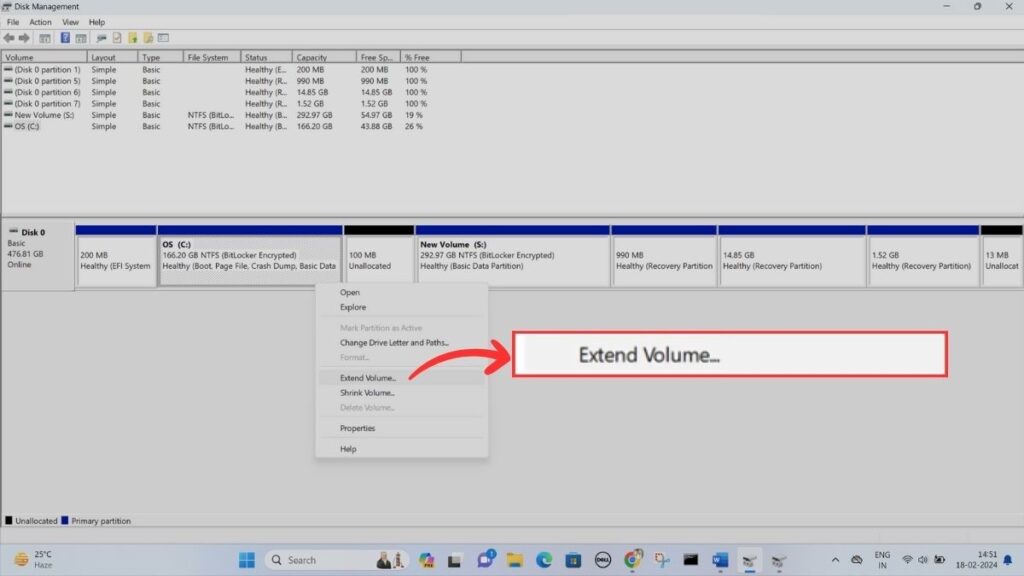
After clicking, it will launch the Extend Volume wizard. Press the “Next” button.
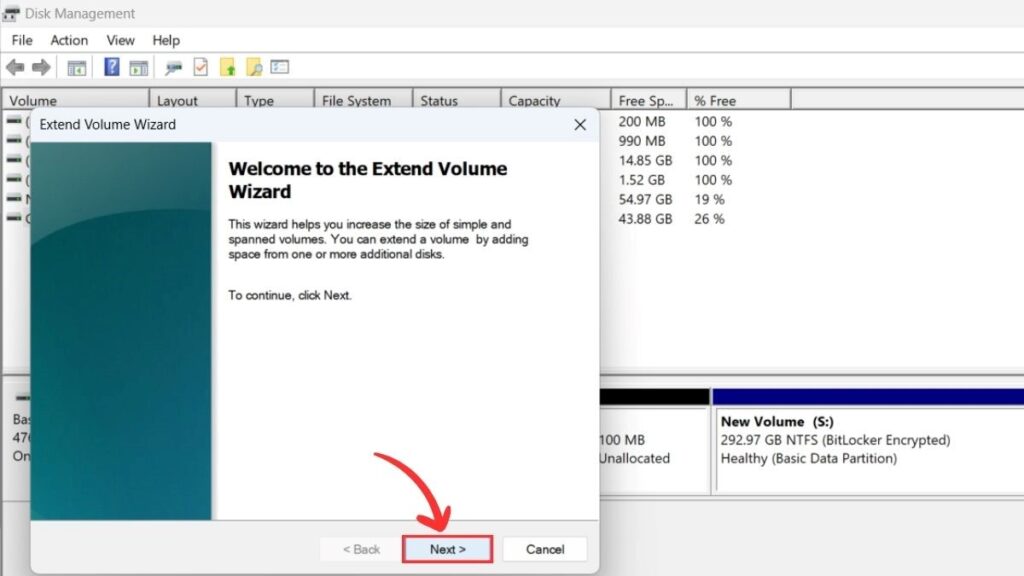
Important: In our case, we want to delete the D partition and merge it with the C partition. To do this, right-click on the C partition, and then select “Extend Volume.”
- Step 4: Confirm Volume Details
Verify the final increased partition size and drive letter. Click Next if correct.
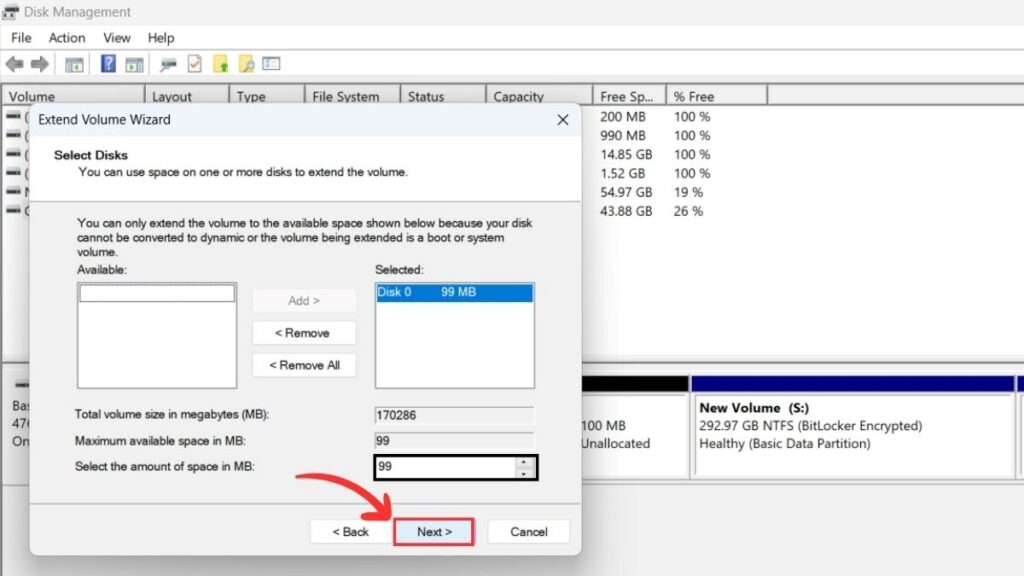
- Step 5: Complete the Wizard
To complete the Extend Volume wizard, verify the selected disk, and click the “Finish” button.
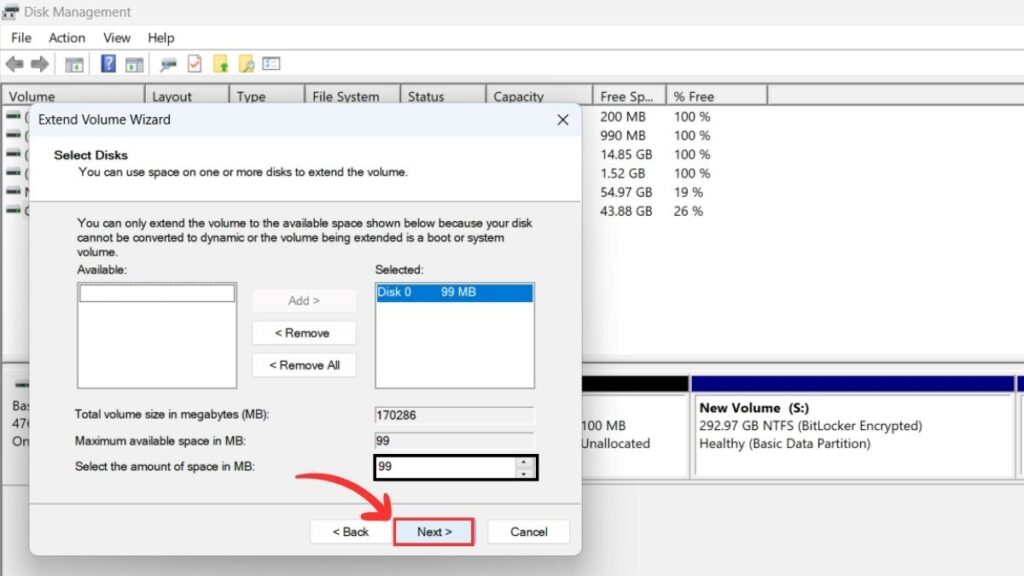
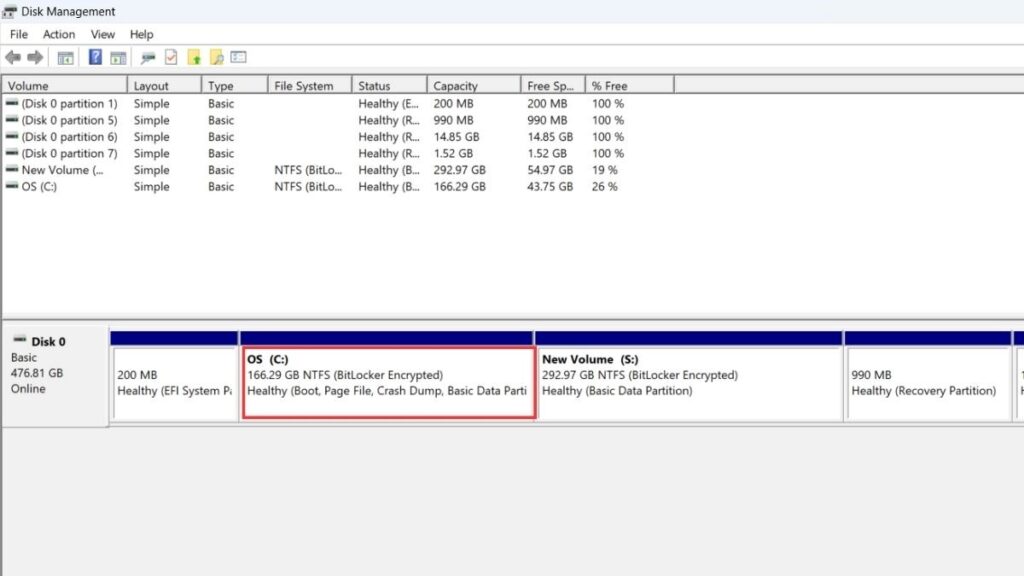
After completing the merging process, restart your computer so that the changes can take effect. You should now be able to see the combined partition in Disk Management.
- Step 6: Verifying the Merge Successful
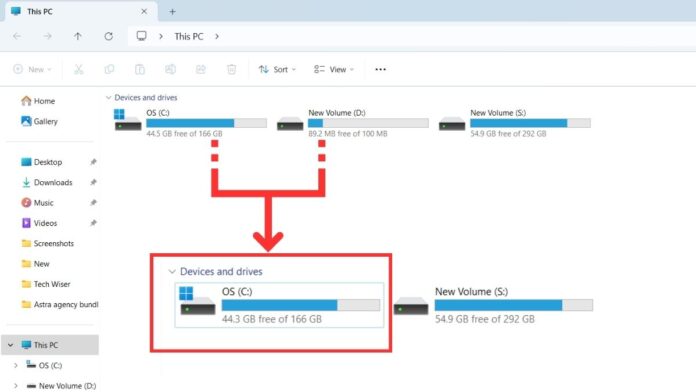
After merging the partitions, verify the successful result by checking if all files are accessible from the newly merged drive in File Explorer, ensuring that the partition has the expected increased free space, and in Disk Management, Confirm that there is now a single partition instead of two.
Method 2: Merging Two or more Partitions using Third Party Application (EaseUS Partition Master)
This EaseUS Partition Master software is available in a free version, which is why we chose it. You can combine two or more partitions by installing other third-party applications like AOMEI Partition Assistant.
- Step 1: Download and Launch Open EaseUS Partition Master
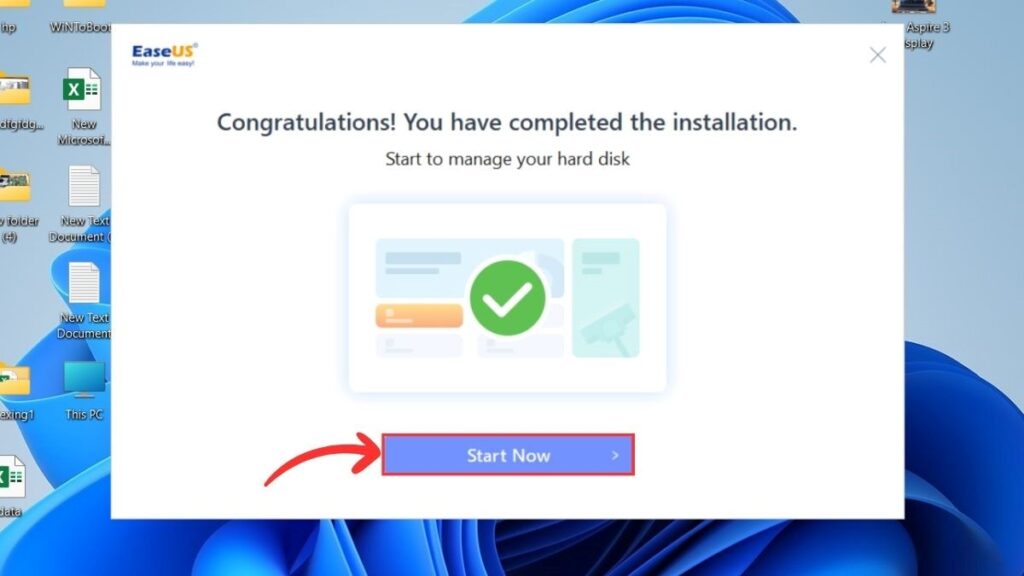
Download EaseUS Partition Master (the free version is available!). Install and launch the software on your computer.
Important: To download, you’ll need to sign up by providing your email. After that, select the free version option and proceed with the download.
- Step 2: Select partition drive and click on Merge
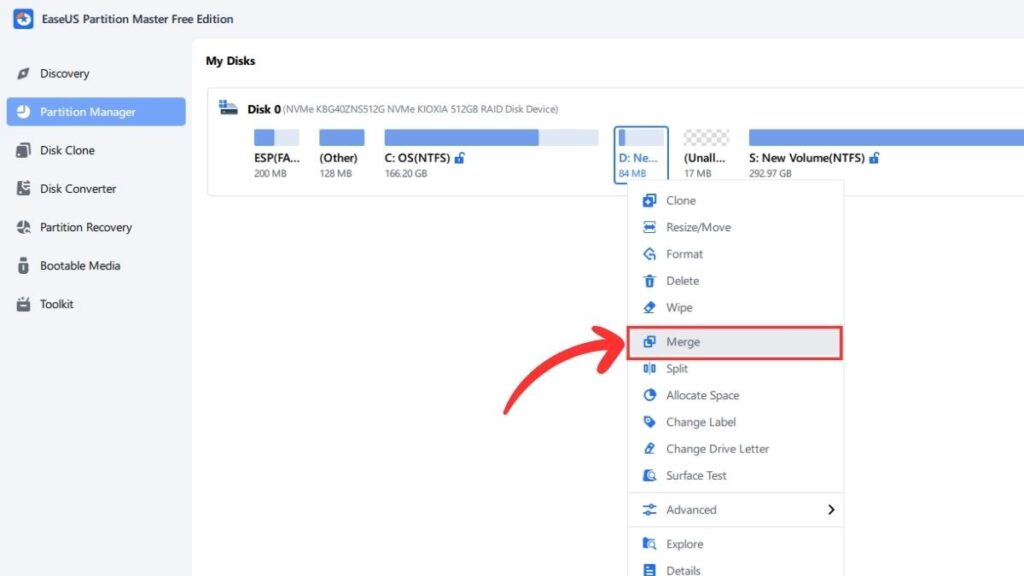
Take a look at your existing partitions. Identify the one you want to keep—this is the partition from which you don’t want to lose any data.
For example, if you have drive D and E, and you want to merge them, decide which one you want to retain.
Right-click on the partition you want to keep (e.g., drive D). From the context menu, select the “Merge” option.
- Step 3: Select the adjacent drive and click on OK
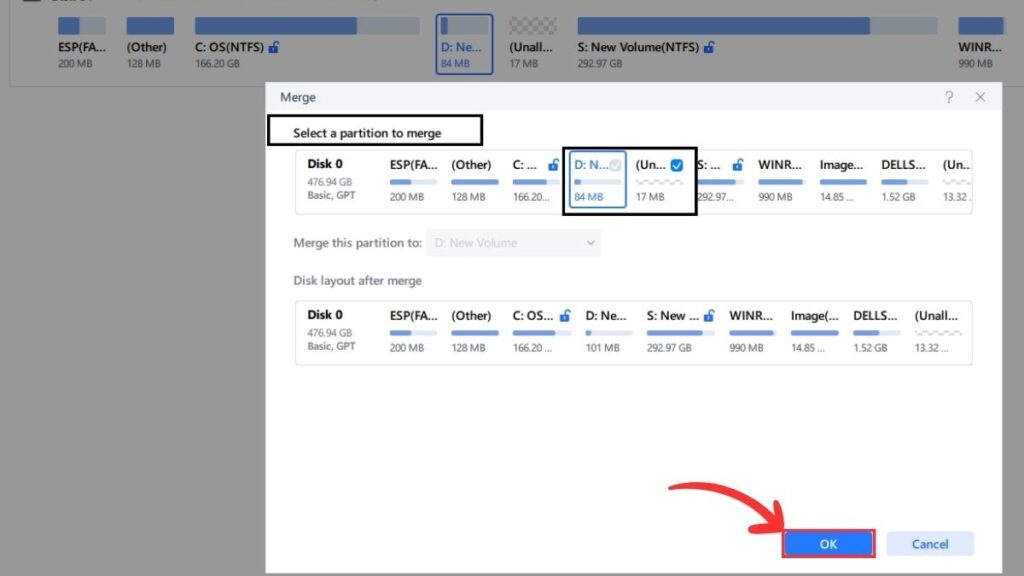
A dialog box will appear, asking you to choose the adjacent partition to merge with (e.g., drive D). Pick the partition that is next to the one you want to keep. Confirm your selection by clicking “OK”.
Important: If you want to merge two drives, remember that data from one drive must be deleted according to the Disk Management method.
Before deleting anything, back up the data you want to keep.
Once the deletion is successful, the space for the merged drive will be shown as Unallocated.
- Step 4: Preview and click on Apply:
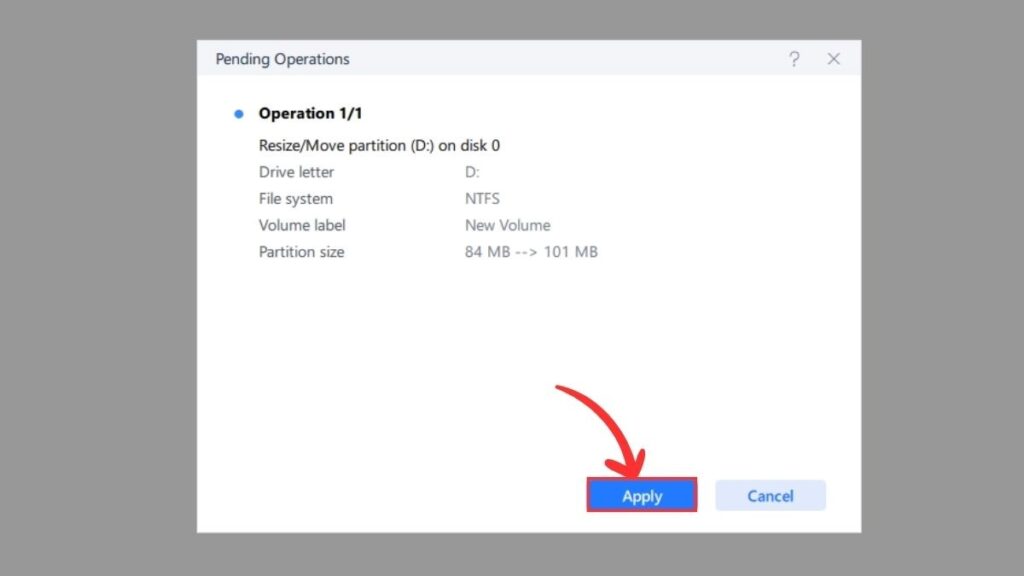
Before making any changes, preview the selected disk or partition. Ensure it’s the correct one and check its volume.
Once you’re done, click the “Apply” button to proceed.
- Step 5: Complete the “Execute Task”
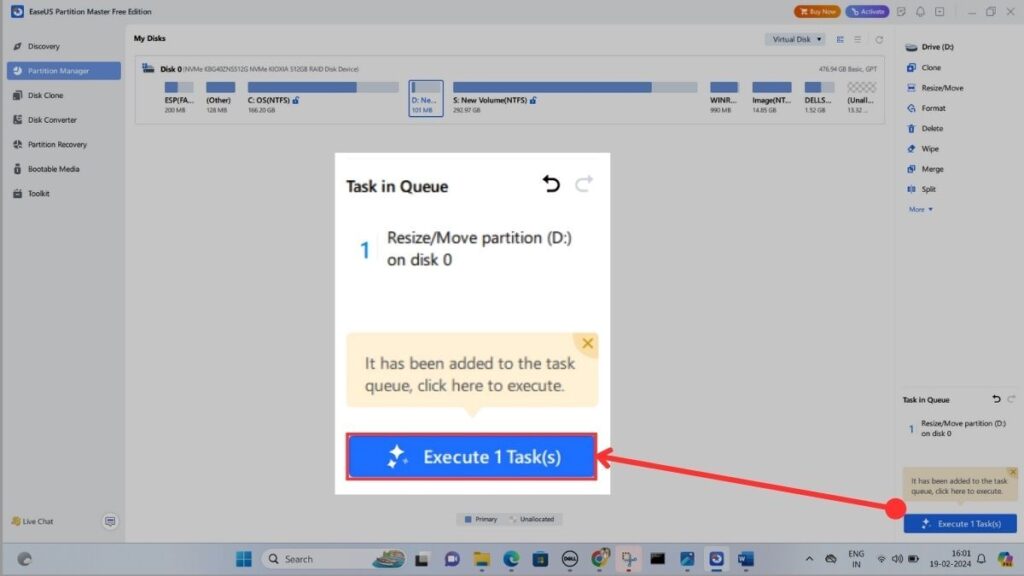
If everything looks good and you are confident about the changes, click “Execute Task.” This action starts the merger process.
After completing the execution task process, a pop-up notification will appear, confirming the operation is a success. Just click on the Done button.
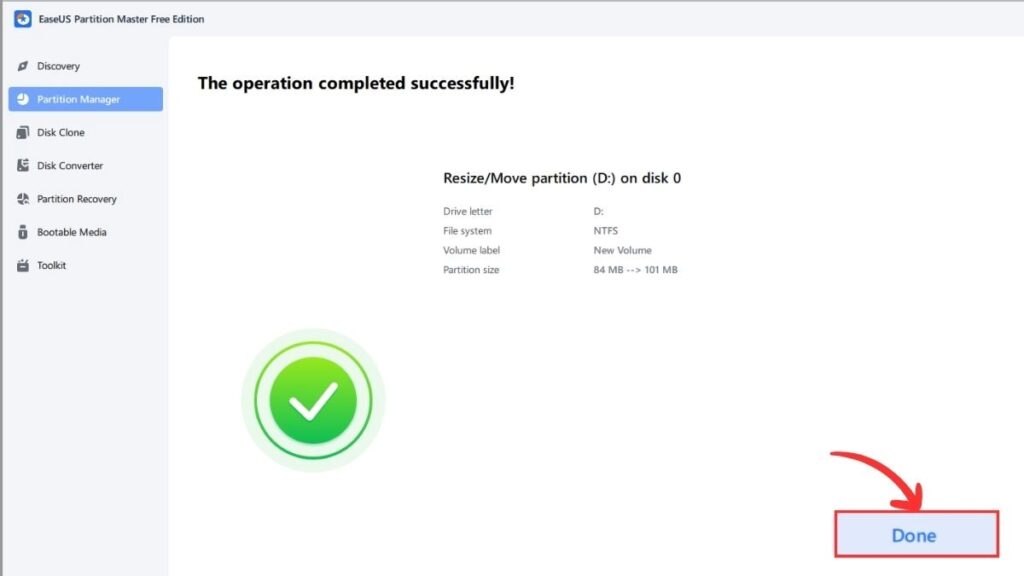
- Step 6: Verifying the Combined Successful
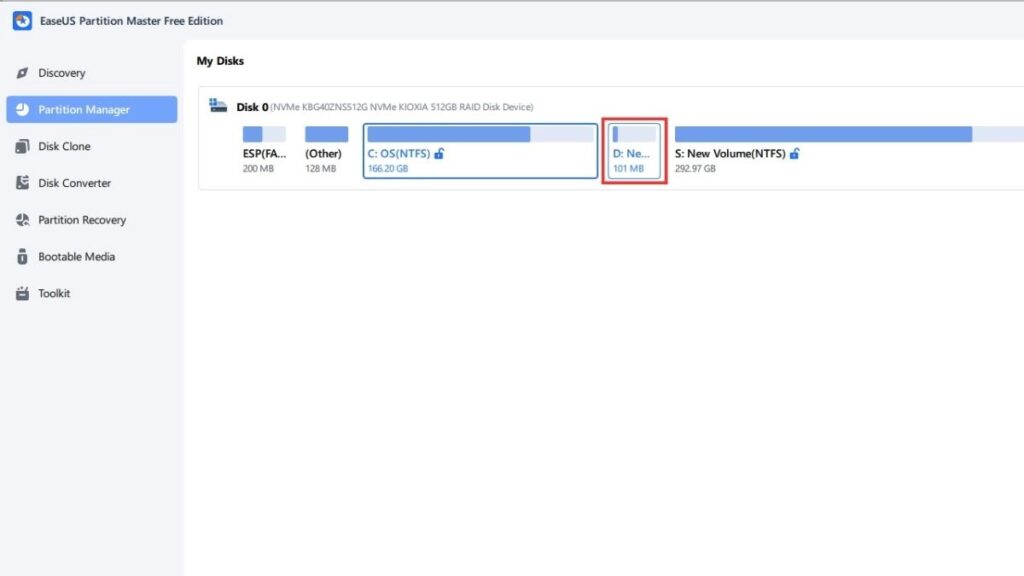
We have successfully merged two storage drive partitions. Earlier, the D drive had 84 MB of free space, and the E drive had 17 MB of unallocated data. After merging, 101 MB of free space is now on the D drive.
Also Read:
- SSD vs HDD: What’s the Difference?
- How to Make Partition in Windows: Easy Methods
- What is Bloatware? Everything you need to know
FAQs
No, you cannot combine the system partition (C drive) in Windows because it contains important files required to boot the computer, so it is best to leave them as they are.
Combining two partitions is usually a quick process unless the partitions being merged contain a very large amount of data. Large amounts of data will increase operation time.
No, you can only merge adjacent partitions on the same physical hard drive.
![How to Factory Reset Acer Laptops? [Step-by-Step Guide]](https://pcvenus.com/wp-content/uploads/2024/04/How-to-Factory-Reset-Acer-Laptops-324x160.webp)

