Ever noticed your Windows laptop or PC slowing down? Applications taking ages to open? Operations suddenly stopping? It could be your laptop or PC’s RAM causing the trouble. These issues often arise when there isn’t enough RAM. So, it’s crucial to check your RAM to see if it’s up to snuff.
Managing the right amount of RAM is key to keeping your laptop running smoothly. If your laptop or PC is running short on RAM, you’ll need to boost it, either by adding more externally or internally.
But, before you jump into upgrades, you need to know how to check your RAM on a Windows 11 PC or laptop.
In this blog post, we’ll walk you through each step of checking your RAM. By the end, you’ll know exactly how much RAM your computer has, how much it’s currently using, and how much is available for top-notch performance.
Table of Contents
Ways to Check RAM in Windows 11
Method 1: From System Settings
Step 1: Click on the Start icon, and select Settings.
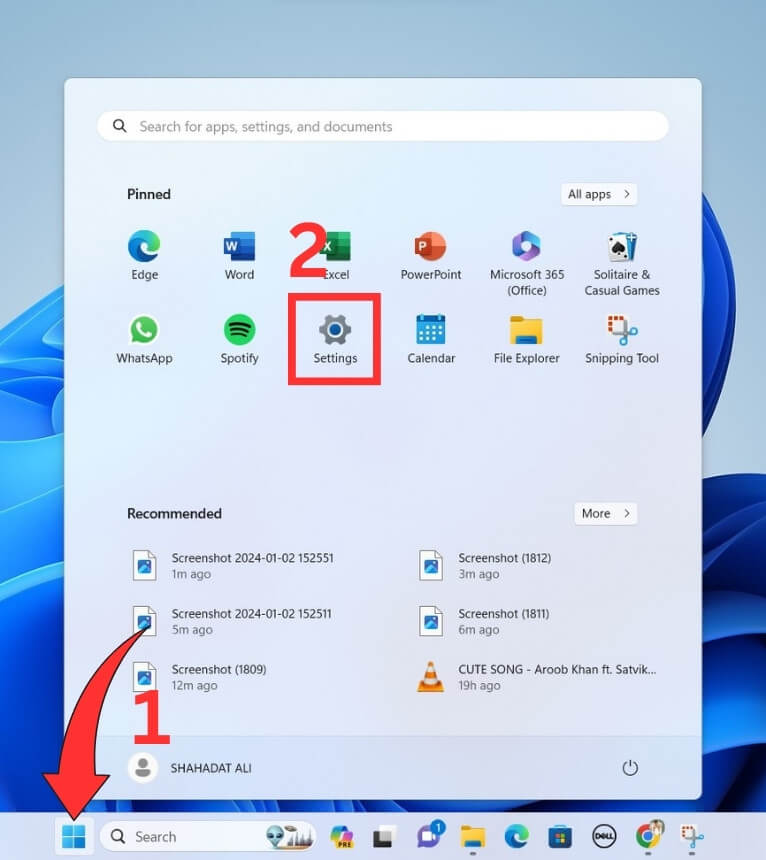
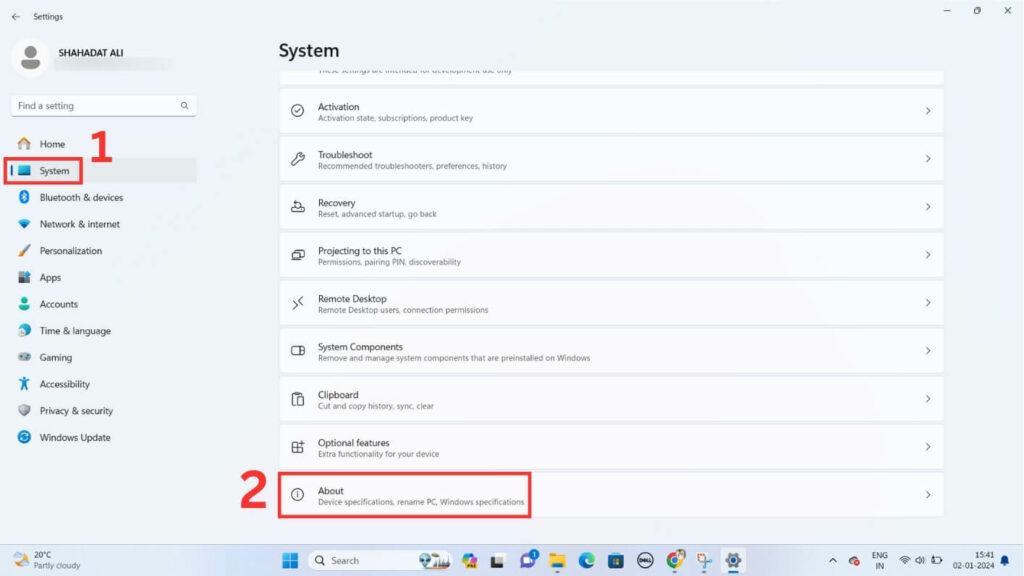
Step 2: From the left pane click on System. Next, scroll down and select About.
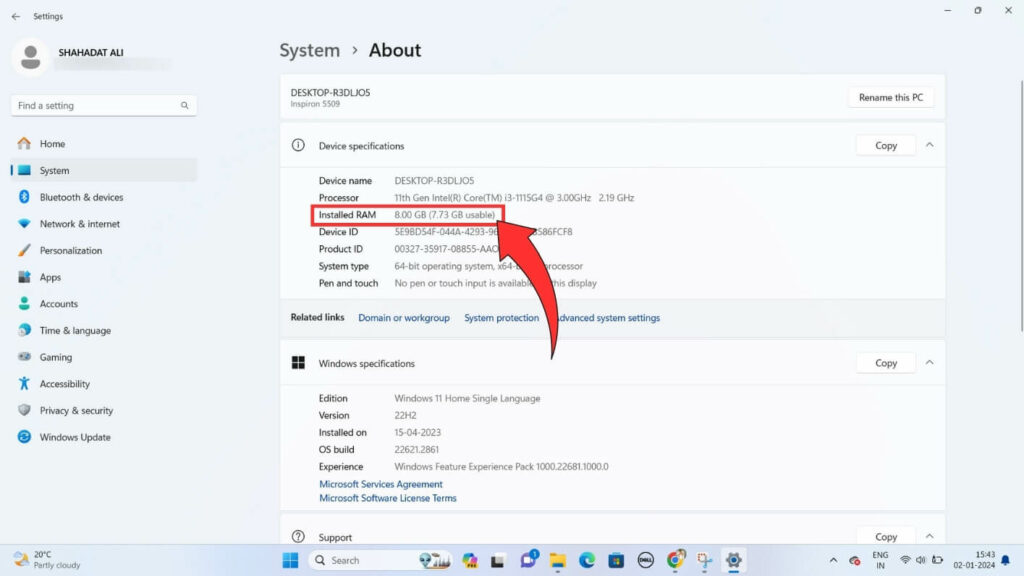
Step 3: You can see the total RAM installed on this device under Device specifications.
Method 2: Using Task Manager
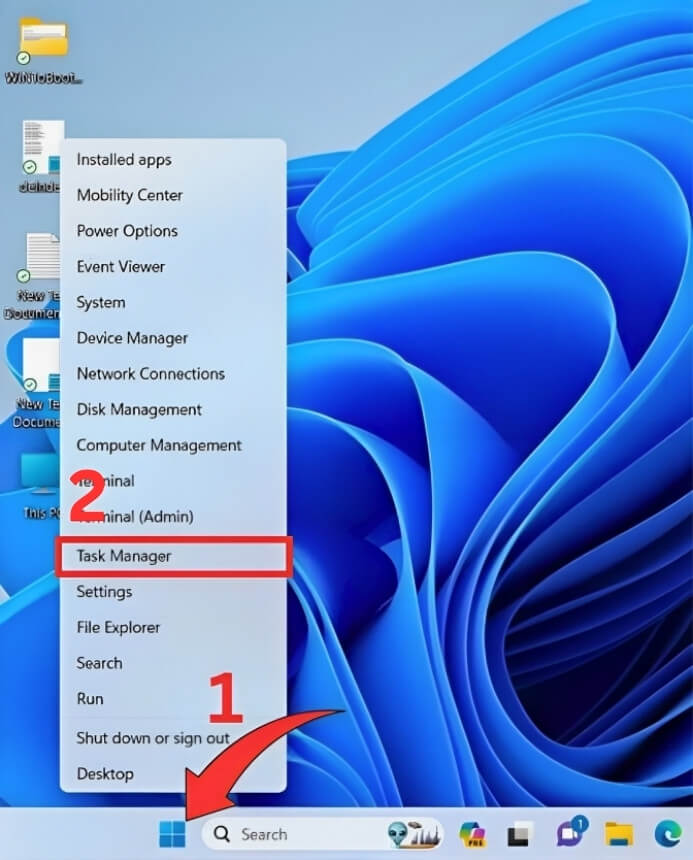
Step 1: Right-click the Start icon, and choose Task Manager from the list.
Step 2: From the left panel click on the Performance tab, and select Memory.
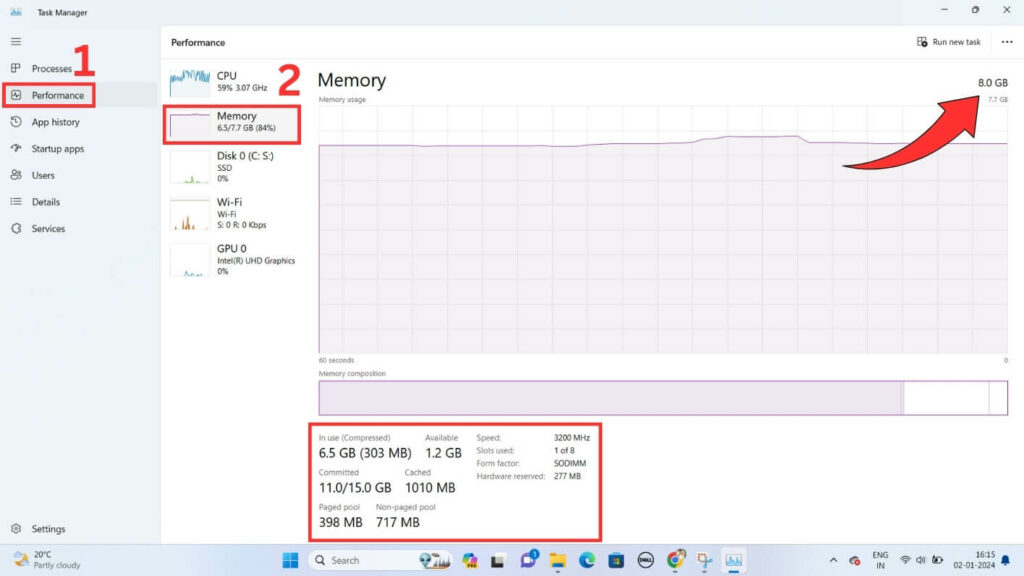
You can see the total RAM on this device, along with RAM specifications.
Method 3: System Information Tool
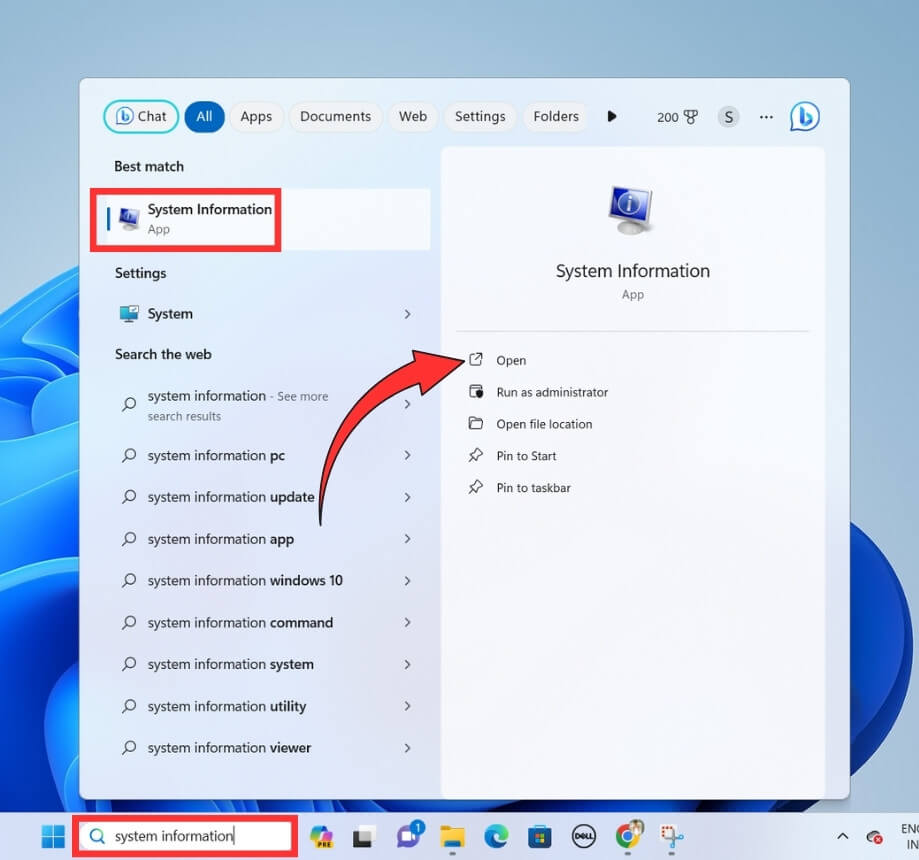
Step 1: Type system information into the search box at the bottom. Select System Information and Open the app.
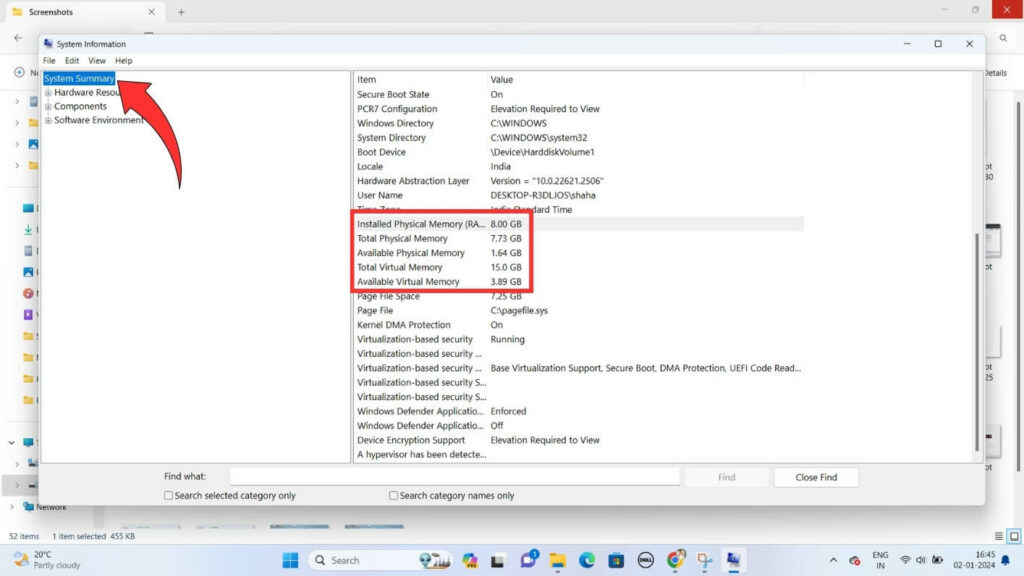
Step 2: Click on System Summary from the left pane. Next, scroll down, and you will get to know about the RAM specifications of your device.
Method 4: Using Command Prompt
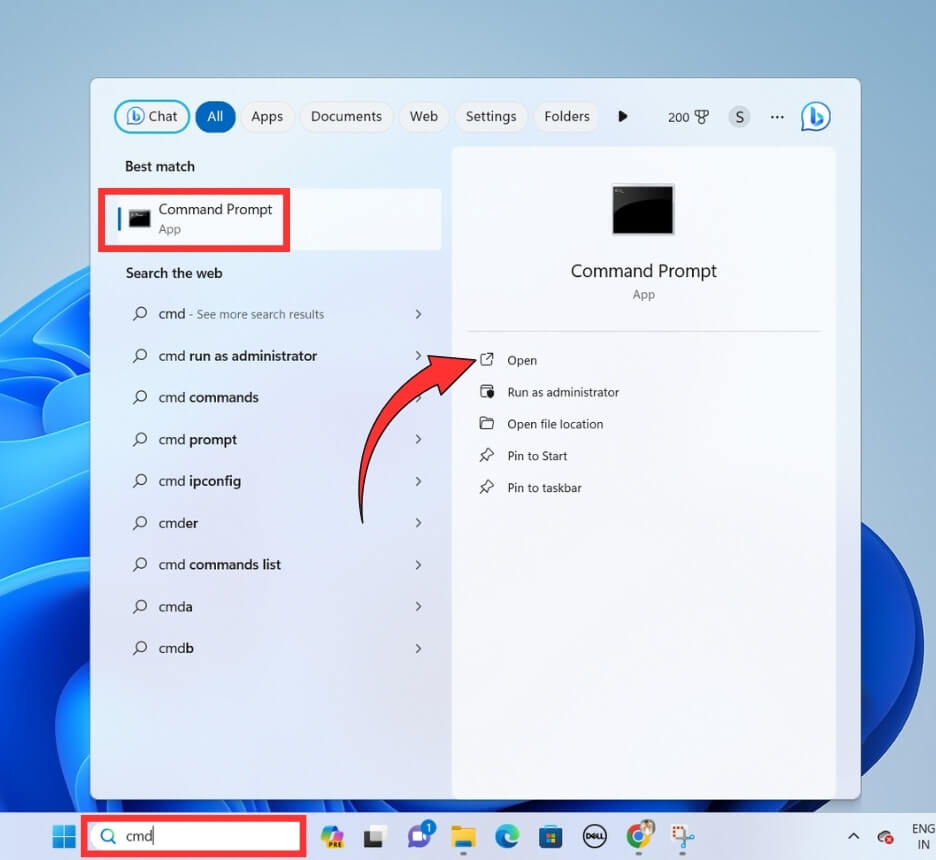
Step 1: Type cmd into the search box next to the start icon, and press Enter.
Step 2: A command prompt window will open. Type the below command, and press Enter.
wmic computersystem get totalphysicalmemoryStep 3: After entering the command, you will get the total memory installed on your device in bytes.
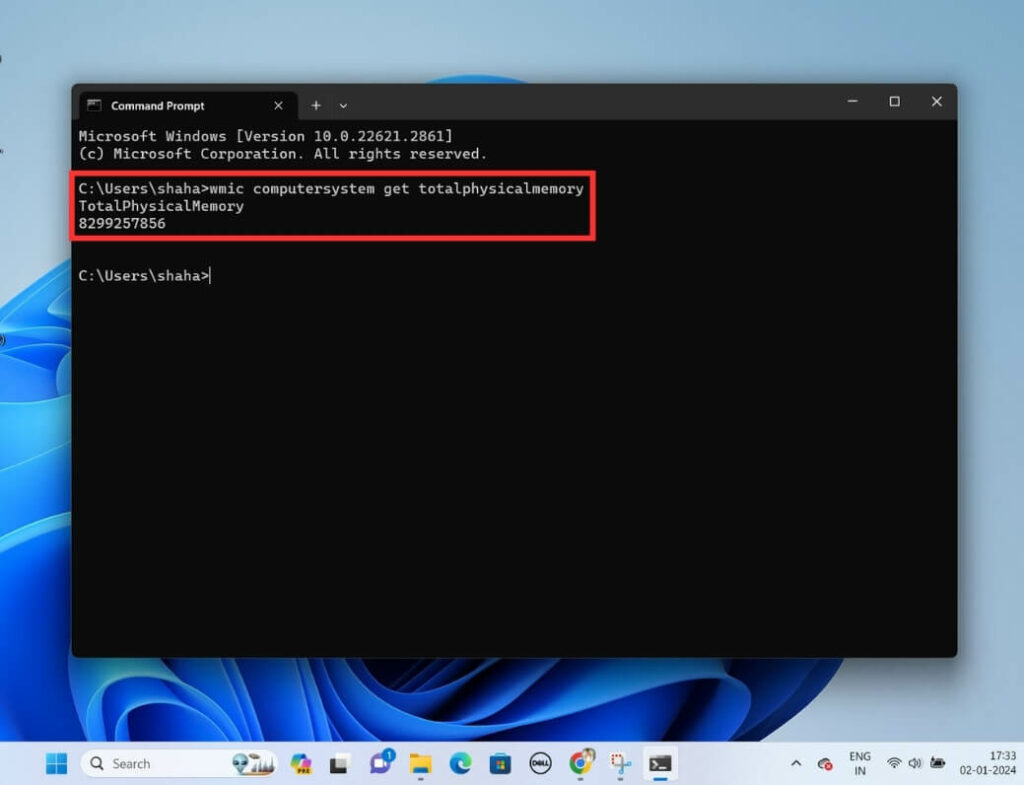
You can use an online byte conversion tool to convert it to GB.
If you need more RAM details, type the command below. It will show you a detailed list of your RAM information.
wmic memorychip list fullAlso Read:
- How to Turn Off Google SafeSearch: Easy Steps
- How to Improve Gaming Performance? [Step-by-Step Guide]
- How to Protect a Zip File: Step-by-Step Guide
FAQs
How much RAM do I need?
It depends on what you are doing with your computer. If you’re just browsing the Internet or checking email, 8GB of RAM is enough. But if you are playing games, doing graphic design, or editing videos, it is better to have 8GB or 16GB of RAM. If you run heavy tasks and want your laptop to perform well for a long time, getting 32GB or more of RAM is a good idea.
Can I upgrade the RAM on a Windows 11 Laptop or PC?
Upgrade the RAM on a Windows 11 PC to improve overall system performance, but it will be challenging on a laptop. Some laptops have soldered RAM, which means it is attached directly to the motherboard and is not removable. Others have accessible RAM slots, but the process may involve removing the panel and voiding the warranty. Be sure to check your system’s specifications for compatibility before purchasing a new RAM module.
Is it safe to use third-party tools for checking RAM in Windows 11?
If you are considering using third-party tools to check RAM, it is important to ensure the security of these tools. If these devices lack proper security, someone could gain access to your laptop, potentially leading to data misuse. Therefore, we recommend following the built-in methods for checking Windows RAM to ensure your data’s safety.
Final Words
Making sure your computer runs smoothly involves a crucial step: checking the RAM in Windows 11. It’s simple yet important. By using the tools already built into the system, you can learn a lot about how your computer uses memory. Keeping an eye on your RAM regularly helps you catch any problems early and decide if upgrades are needed.
By knowing how your RAM is doing and keeping it in good shape, you can make sure your computer works at its best and doesn’t slow down.
