Do you want to shut down your Windows computer at a specific time automatically? By scheduling a shutdown, you can save energy, reduce wear and tear, prevent overheating, and ensure that your system shuts down when you don’t need it.
For example, your laptop’s battery life will also increase because it won’t drain when you are not using it.
You can set a timer for the automatic shutdown and work until then. In this blog post, we will show you how to shut down any laptop or computer automatically, step by step.
Things to Know Before Scheduling a Shutdown:
- You can use scheduled shutdowns when you don’t need your computer, such as when it performs backups, updates
- , or other tasks.
- Save your work before the shutdown. Otherwise, you might lose it.
- The computer will shut down at the set time, even if apps remain open.
- You need to be an admin to change the shutdown settings in Windows.
- You can schedule to shut down once or many times.
Ways to Schedule Auto Shutdown in Windows
The Command Prompt, Run command, and Script methods work only once, triggering an automatic shutdown at the specified time as requested. However, the script method requires you to keep the script bat file open.
If you plan to schedule an auto shutdown regularly, such as daily or weekly, opting for the Task Scheduler method is recommended.
1. Using Command Prompt
Step 1: Press the Windows key on your keyboard. In the search box, type cmd, and click on Run as administrator.
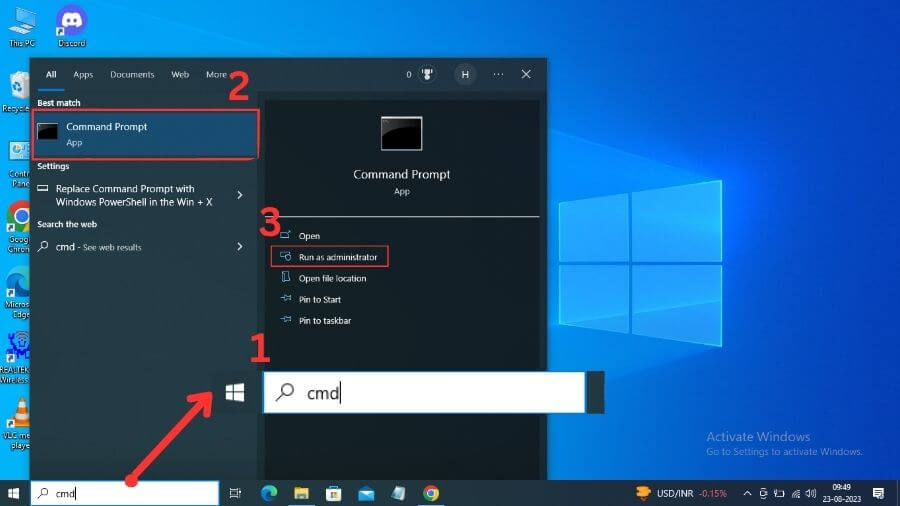
Step 2: After that, a pop-up will appear. Click on Yes.
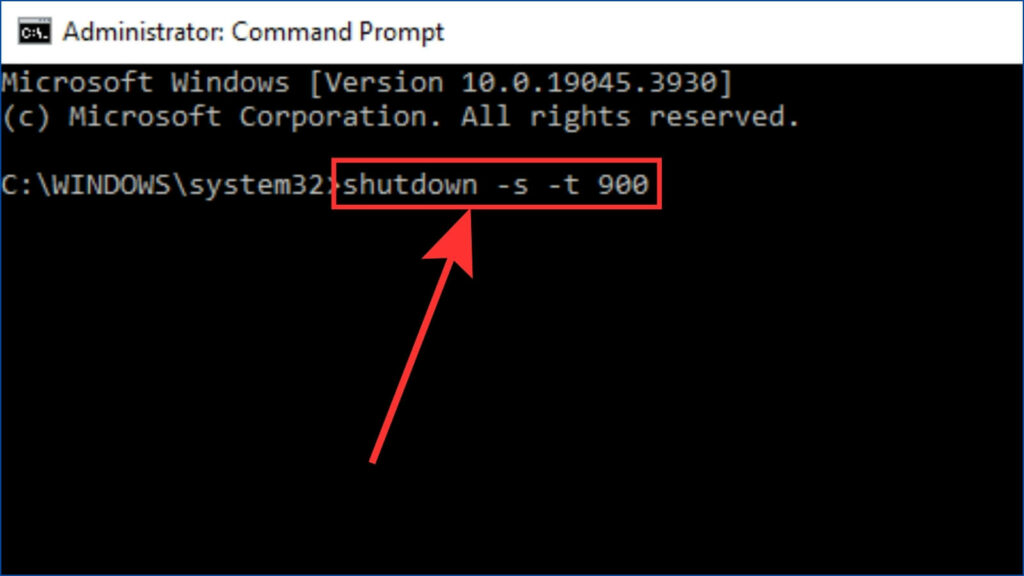
Step 3: Type the following command in the command prompt window and press Enter.
shutdown -s -t TimeInSecondsHere, replace TimeInSeconds with a number. For example, if you replace TimeInSeconds with 900, that means your laptop will shut down after 900 seconds (15 minutes) as soon as you execute the command by pressing enter.
Note: Always remember that the Command Prompt method measures time in seconds, not minutes. You can use this Google time converter tool to convert minutes to seconds.
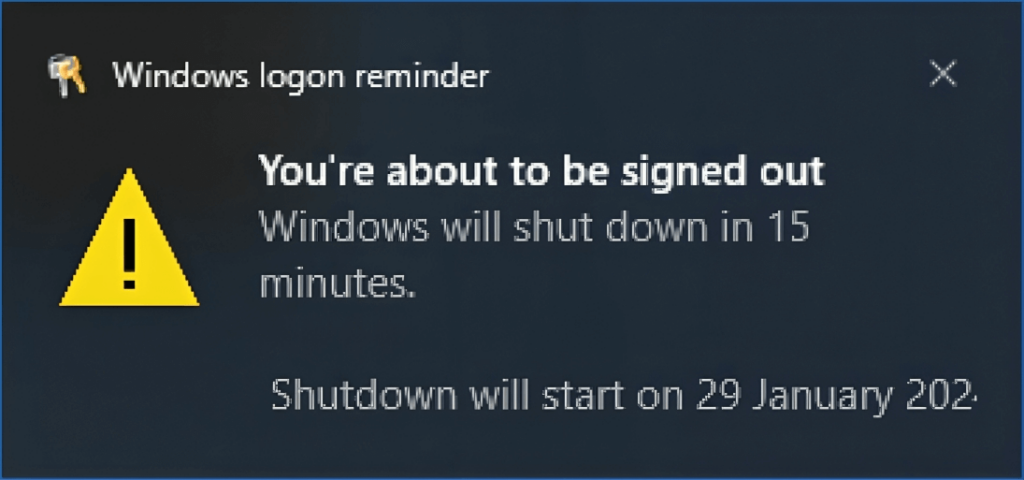
Step 4: Before Windows shuts down, you will get a notification that your laptop will shut down automatically after some time. So, save all your work before the timer ends; if not saved, your entire work may be ruined.
Cancel the Scheduled Shutdown in the Command prompt
Step 1: Press the Windows key on your keyboard. In the search box, type cmd. Next, click on Run as administrator.

Step 2: Type the following command in the command prompt window and press Enter.
shutdown -a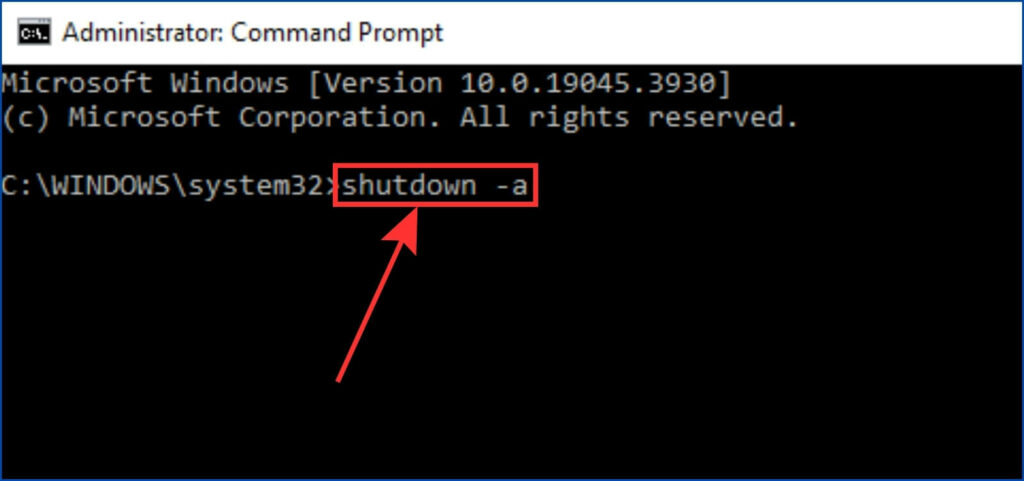
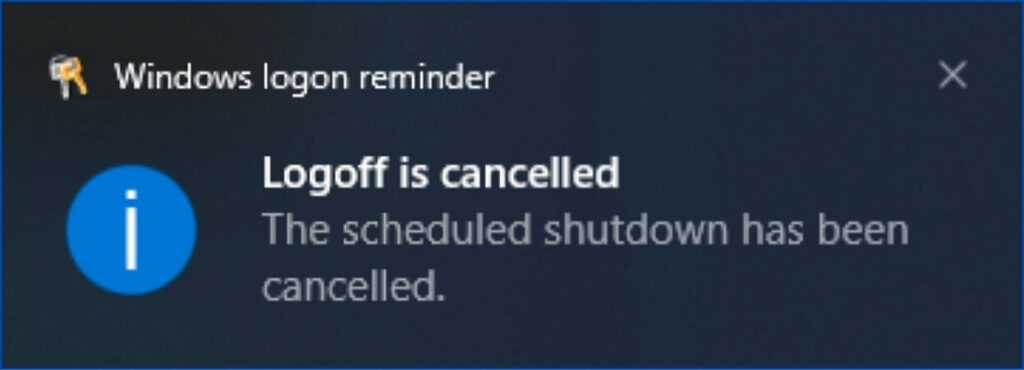
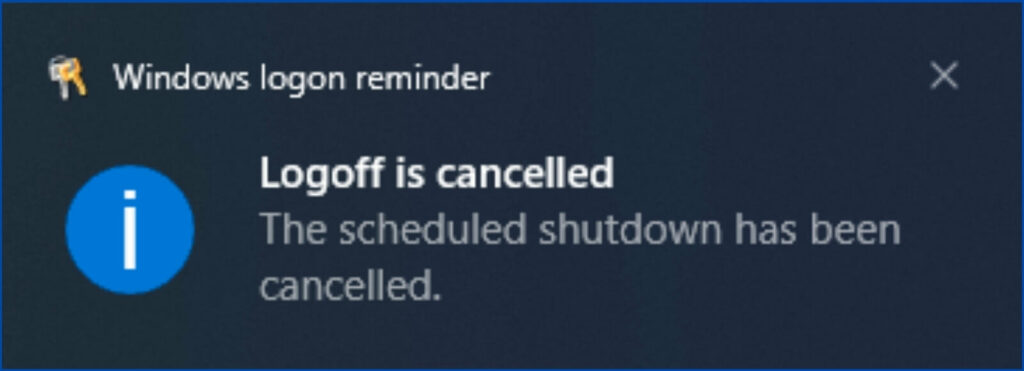
You will get a notification that your scheduled shutdown has been canceled.
2. Using Run Command
Step 1: Press Windows + R on your keyboard to open the run window.
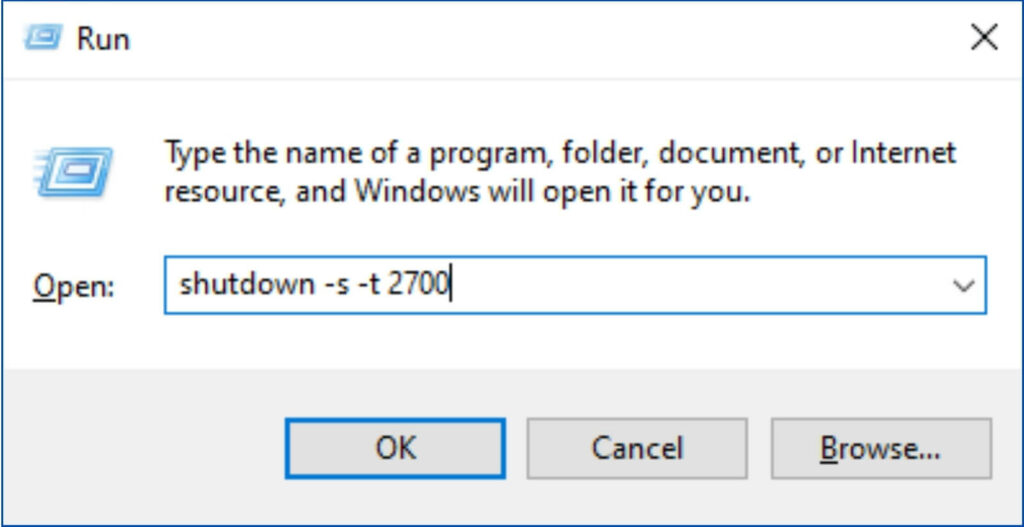
Step 2: Type the following command into the command box and click on OK.
shutdown -s -t TimeInSecondsReplace the placeholder TimeInSeconds with a numerical value of your choice. For example, if you replace TimeInSeconds with 2700, it signifies that your laptop will initiate a shutdown after 2700 seconds (equivalent to 45 minutes). The timer will start after executing the command by pressing the enter key.
Another command syntax to schedule shutdown is given below.
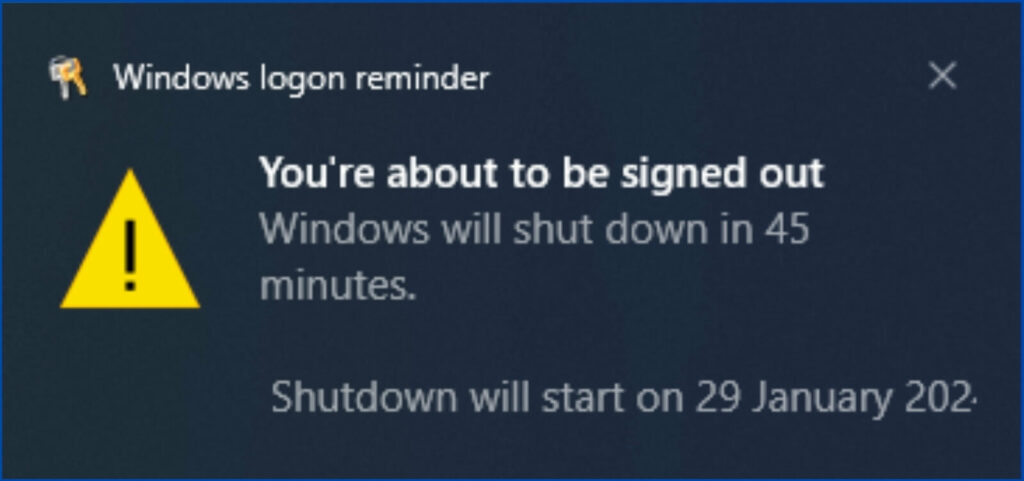
shutdown /s /t 2700Step 3: A window notification will pop up, letting you know that your computer will shut down at the time you requested it to.
Cancel Scheduled Shutdown using Run Command
Step 1: Press Windows + R on your keyboard to open the run window.
Step 2: Type the following command into the run command box and click OK.
shutdown -a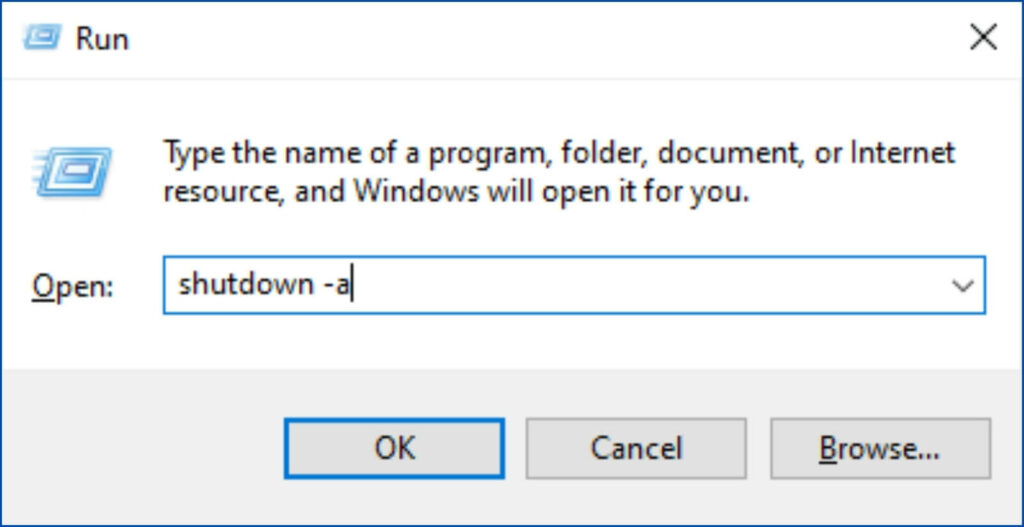
Another syntax to cancel the scheduled shutdown is given below.
shutdown /aYou will be notified that the scheduled shutdown has been canceled.
3. Using Task Scheduler
Step 1: Opening Task Scheduler is slightly different in every version of Windows. Here’s how to open it.
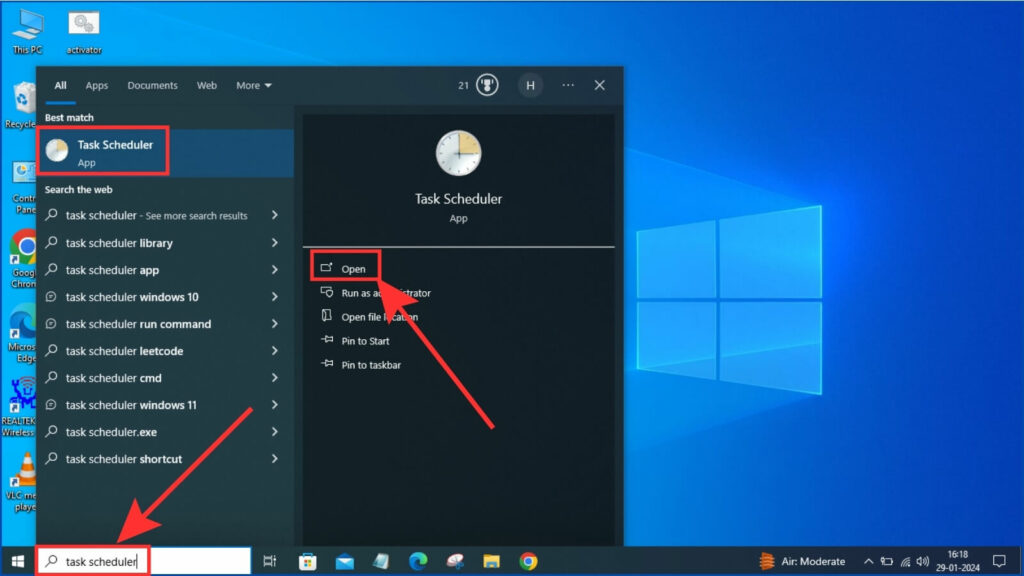
- Windows 11 & Windows 10: Press the Windows key on your keyboard. Type task scheduler into the search box and click on Task Scheduler app from the search results.
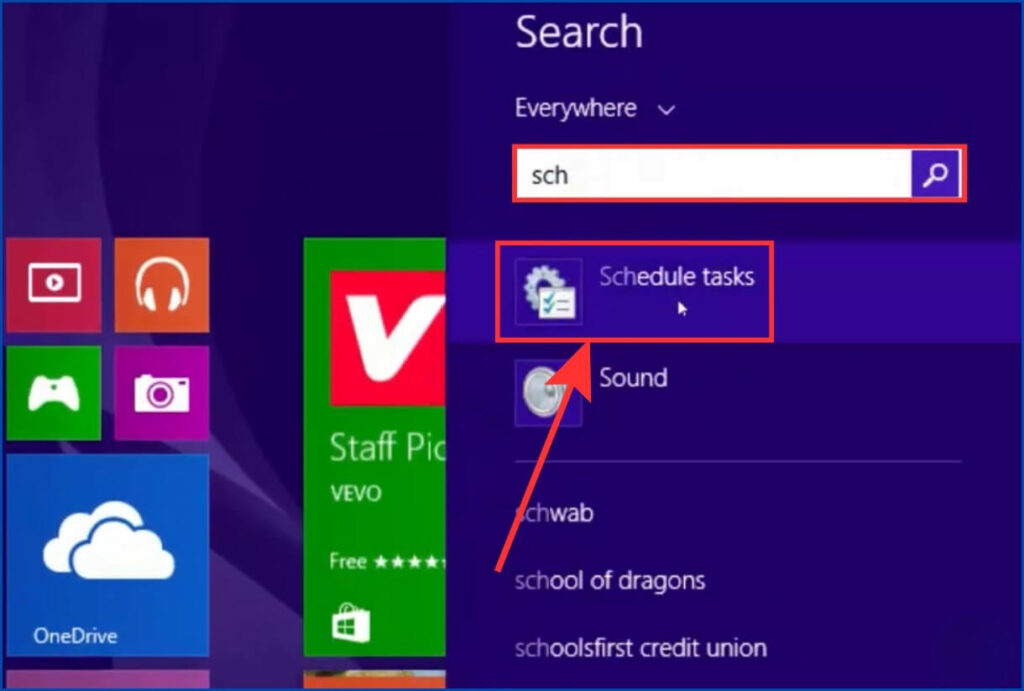
- Windows 8: Press the Windows key on your keyboard. Type schedule tasks into the search box and click on Schedule Tasks from the search results.
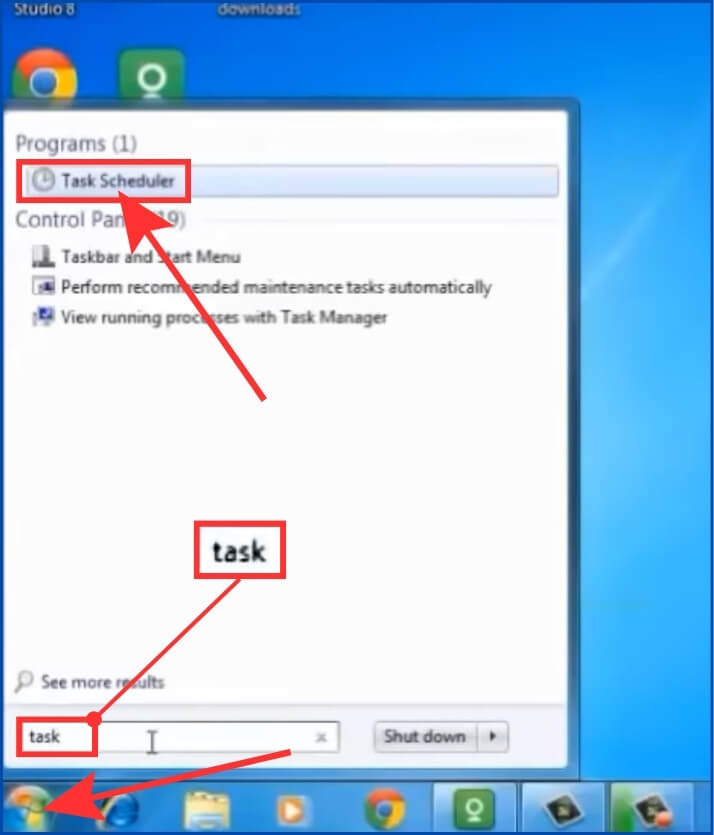
- Windows 7: Click on the Start icon. Type ‘task‘ into the search box at the bottom and click on the Task Scheduler program.
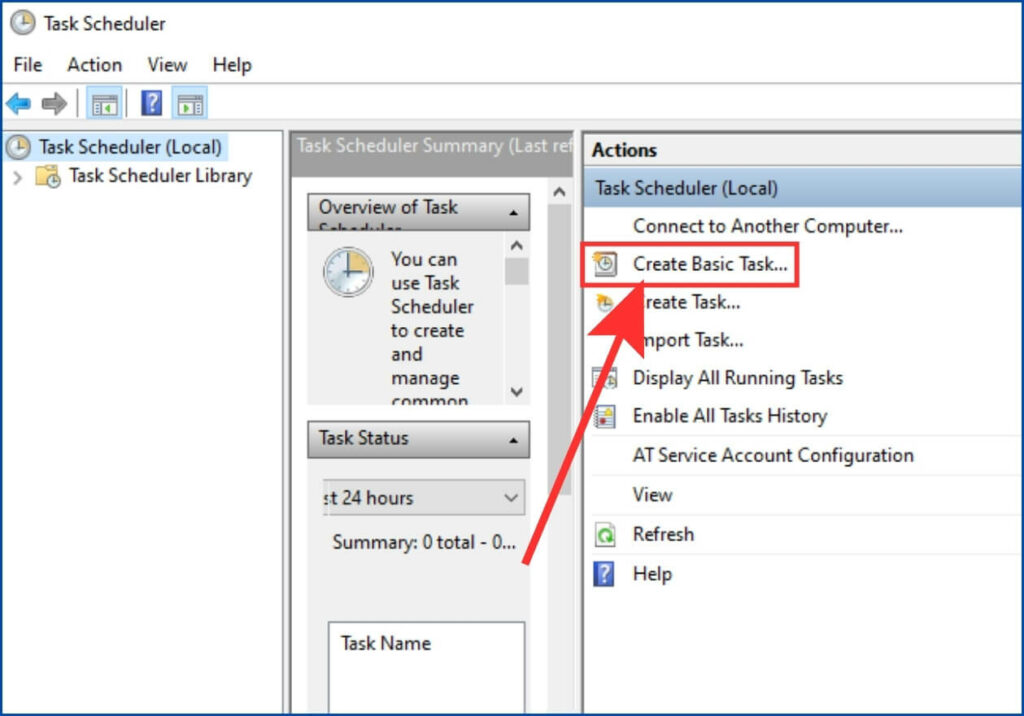
Step 2: Click Create Basic Task from the Actions menu which is on the right side of the window.
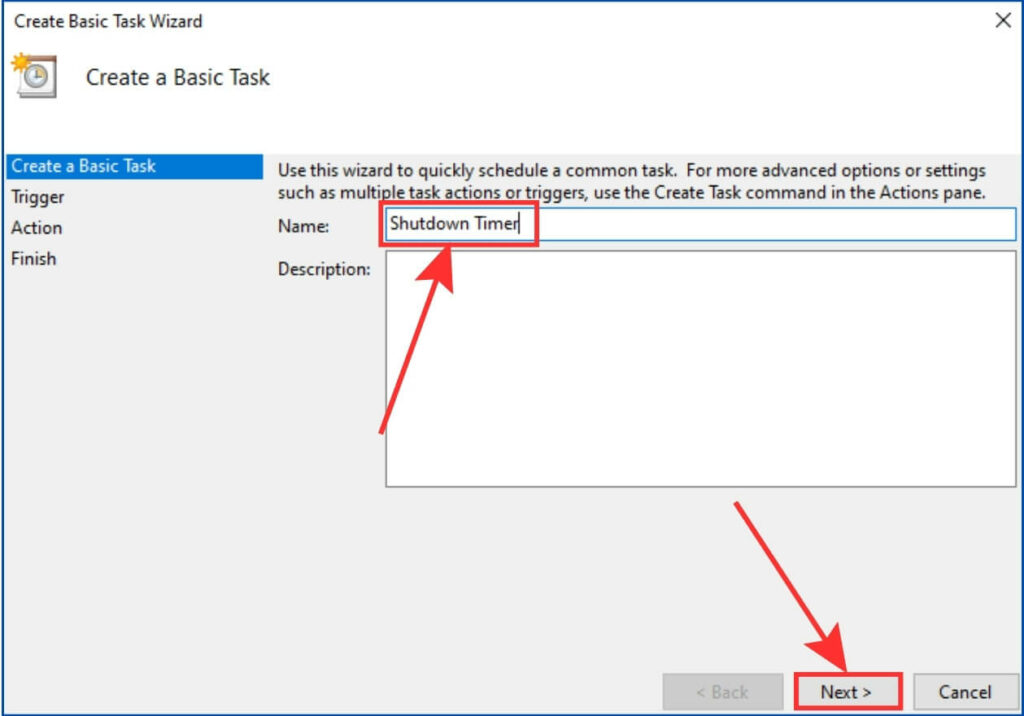
Step 3: A window will pop up to create a basic task. Name the task as you wish and click on Next.
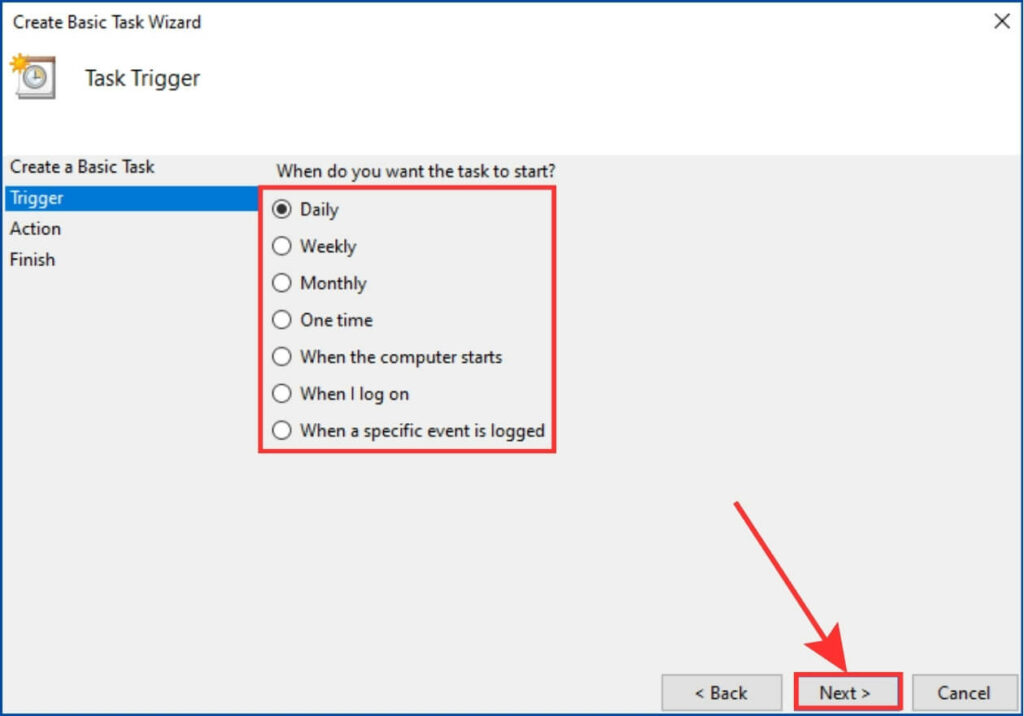
Step 4: After that, you will have the option to choose when you want to start your task, such as daily, weekly, monthly, etc. Select your preferred option and click on Next.
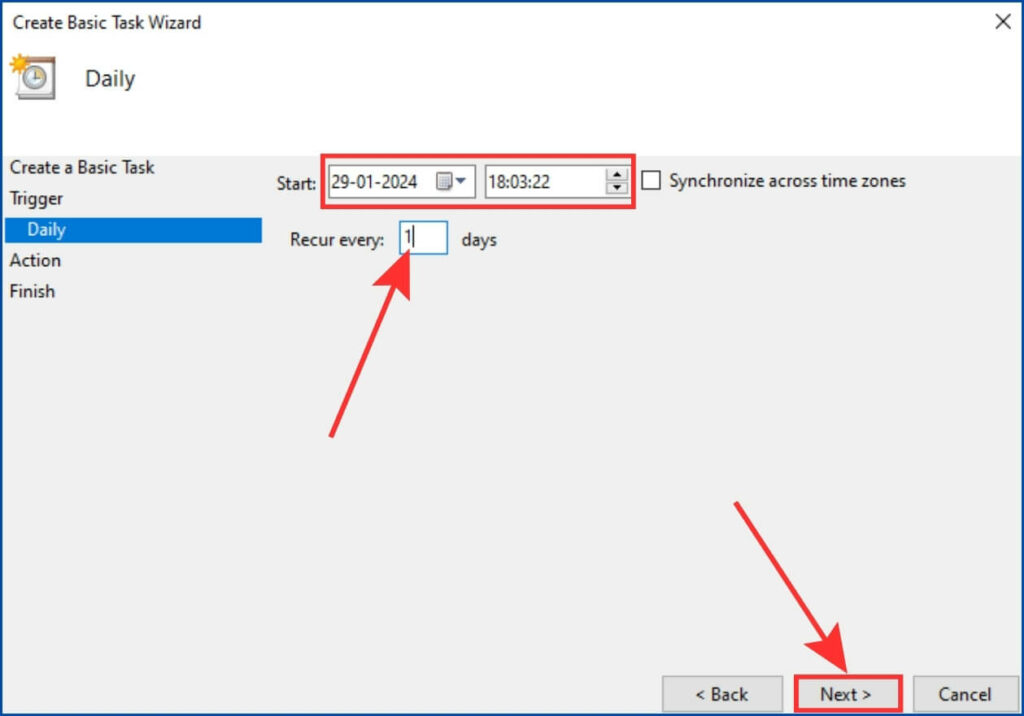
Step 5: Select the date and time you want to start your task. If you want the task to be repeated daily, keep the “Recur every: X days” settings to “1. ” After selecting the date and time, click on Next.
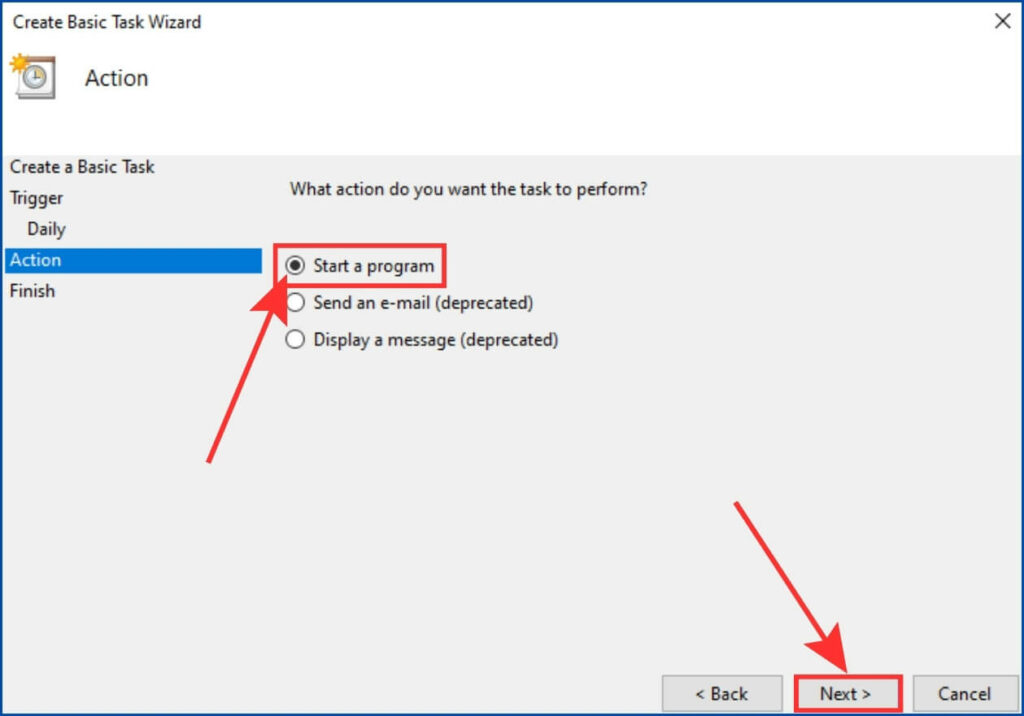
Step 6: Afterward, select the Start a Program option and click Next.
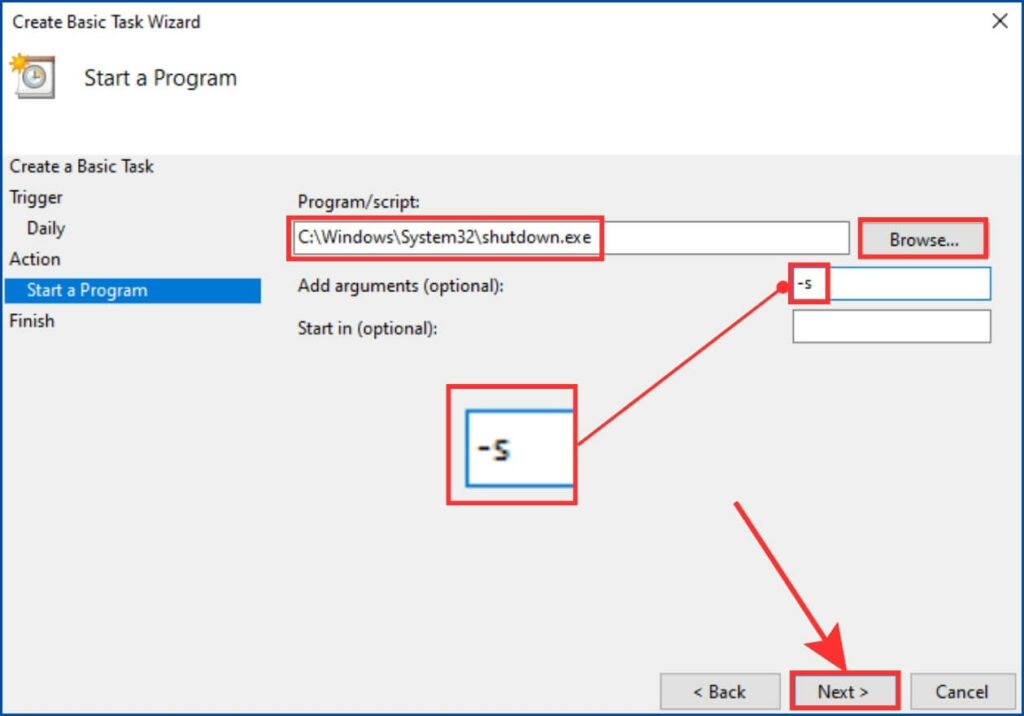
Step 7: Click Browse next to Program/script and choose shutdown.exe app or type the path C:\Windows\System32\shutdown.exe into the box. Next, type “-s” or “/s” into the Add arguments field and click Next.
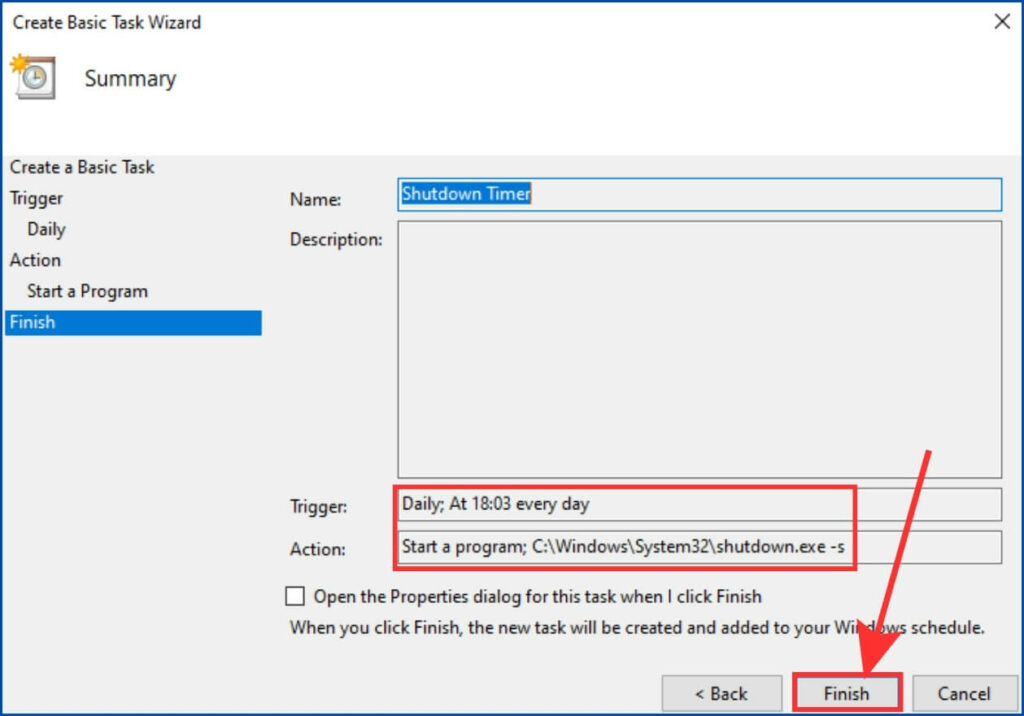
Step 8: Finally, review your task and click on Finish. The task will be created and added to the Windows schedule.
Edit or Delete Task Scheduler Scheduled Shutdown
Step 1: Press the Windows key on your keyboard. Type task scheduler into the search box and press Enter.

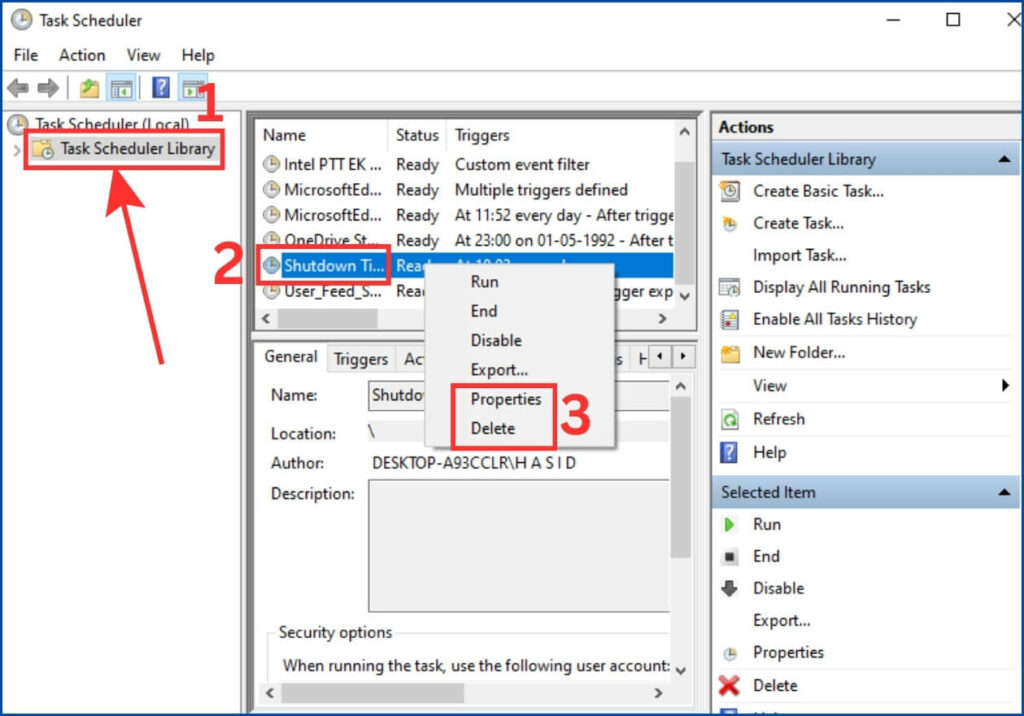
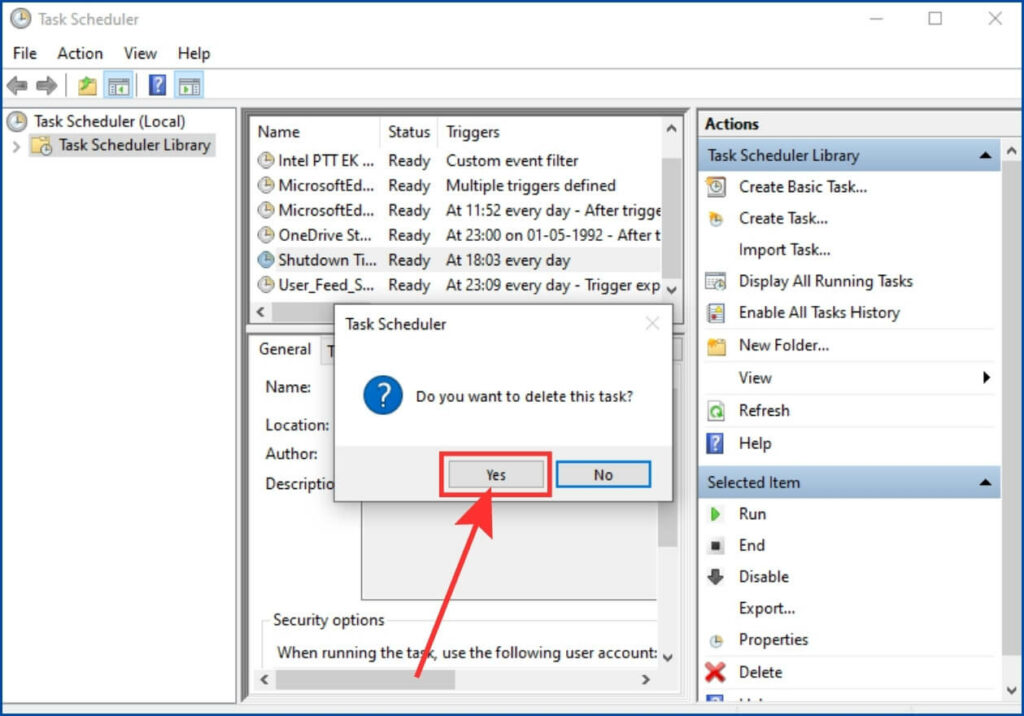
Step 2: Click on the Task Scheduler Library folder from the left panel. Look for the task you have created in the center panel. Once you find the task, right-click on it and select Properties to edit it or select Delete to delete it.
Step 3: A pop-up will appear for final confirmation to delete the task. Click on Yes.
4. Using a script
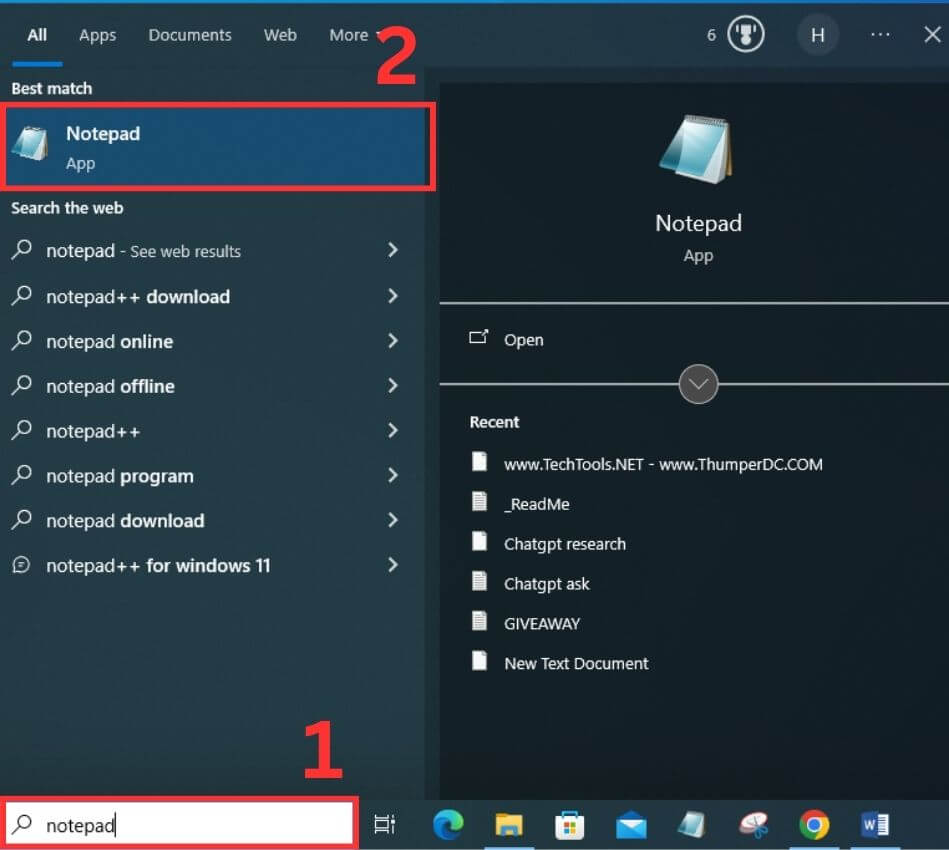
Step 1: Press the Windows key on your keyboard. In the search box, type ‘notepad‘ and click on the Notepad app.
Step 2: Enter the following code into your Notepad.
@echo off
:W
if %time%==22:45:00.00 goto :X
goto :W
:X
shutdown.exe /s /f /t 120 /c
Here, I have scheduled the shutdown at 10:45 PM in a 24-hour format. If you want to schedule at a different time, change the time as you wish, but remember to put the time in a 24-hour format. This script continuously monitors the time and, at 10:45 PM, initiates a computer shutdown, allowing a 120-second grace period.
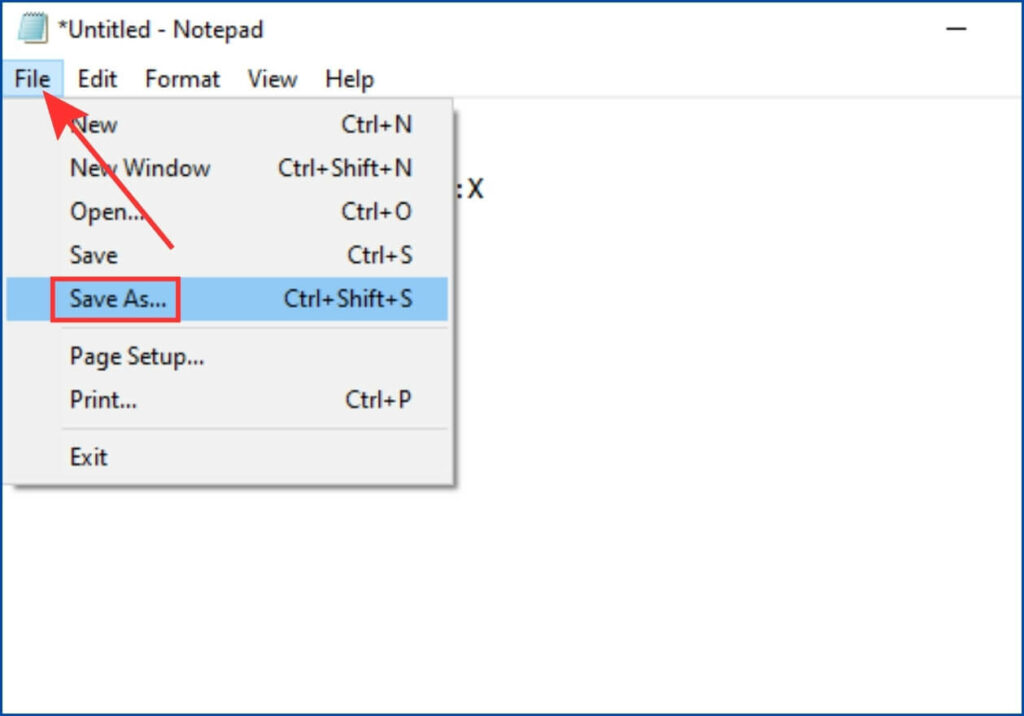
Step 3: Click on File at the top left corner and select the ‘Save as‘ option to save the file.
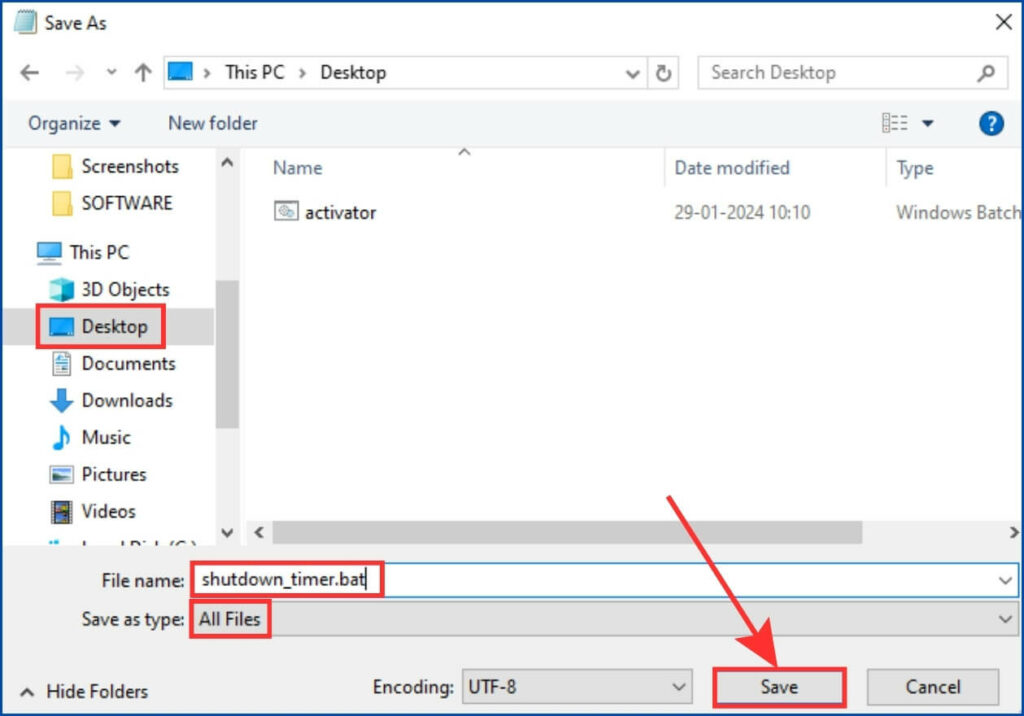
Step 4: Next, select Desktop by expanding the This PC menu from the left panel. After that, select All Files from the ‘Save as type‘ drop-down menu and type shutdown_timer.bat into the File name field. Lastly, click on Save, and your new script (.bat file) will be saved to your desktop.
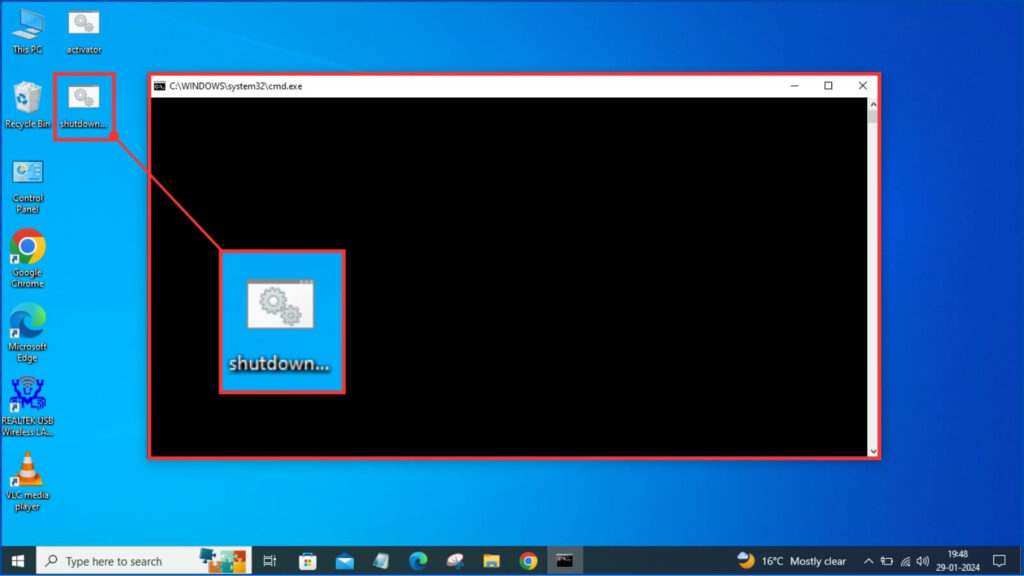
Step 5: Double-click the shutdown_timer.bat file from your desktop so that your shutdown can be scheduled. A blank command prompt screen will appear. You have to keep the window open so that your computer can shut down at the time specified by you. You will have only 120 seconds to save all your work as you have given 120 seconds of grace period. Once the time runs out, your system will automatically shut down.
- If you want to disable the script, press Windows + R on your keyboard. A Run box will open. Type
shutdown -aand click on OK. This will abort your scheduled shutdown.

FAQs
Can I cancel a scheduled shutdown?
Yes, you can cancel a scheduled shutdown before the set time by using the “shutdown /a” command in the Windows Command Prompt. This will abort the pending shutdown operation.
Can I reschedule a shutdown after already setting a time?
Yes, You can change or stop the shutdown time whenever you want by going to the shutdown settings.
Will a scheduled shutdown close all my applications?
Normally, Windows tries to close your open apps before shutting down. But it’s best to save work and close apps yourself first. This prevents you from losing anything important.
Let Windows handle closing apps. But first, make sure to save and manually close everything yourself. This avoids data loss from a shutdown.
IMPORTANT: If your laptop/computer lacks shutdown settings, contact customer service. They can repair it for free.
Also Read:
- How to Use ‘Find My Device’ in Windows? Easy Methods
- How to Get Live Wallpaper on Windows 11: Easy Steps
Final Words
Scheduling shutdown makes Windows more efficient. This automatically shuts down your computer.
Follow our step-by-step instructions to schedule a shutdown using your preferred method. We also explain how to cancel a scheduled shutdown.
Automating shutdown through scheduling makes using your Windows computer more convenient. This post equips you with the knowledge to set up automatic shutdown easily.
