Gadgets like laptops and smartphones have become essential in our lives. Whether you are an IT professional or a freelancer, these tools play a vital role in completing much of your work.
Technology is advancing rapidly and has become so experienced that if your gadgets get stolen or you forget them somewhere, you can use the “Find My Device” tool to track your device. In December 2019, this feature was added to the Windows operating system. It is a very helpful feature.
Read this article to the end to learn how to enable this feature on your Windows laptop or PC.
What is ‘Find My Device’?
Find My Device is a feature to find and secure your device if you lose it or it gets stolen.
It is used to track the location of your smartphone or laptop. The feature was launched on December 11, 2013, and is now available on many different platforms such as Android, iOS, and Windows 123.
Let’s say you have a Windows laptop that gets stolen, and you want to track it using the ‘Find My Device’ feature. This will give you the exact location of your device, making it a useful tool compared to other tracking features.
How to Enable/Disable ‘Find My Device’ in Windows?
There are many ways to enable or disable the “Find My Device” feature in your Windows 10 laptop. This feature is available for Windows 10 and 11 operating systems.
Registry Editor
The Registry Editor method is similar to the Local Group Editor method. The “Find My Device” feature is off, so you have to activate this feature manually. Before starting the process, make sure to turn on the location service (also known as GPS).
- Step 1: Press the “Windows and R” buttons at the same time, then hold it for a few seconds; a Run box will appear; there, you have to type “regedit” and click on the “Ok” option.
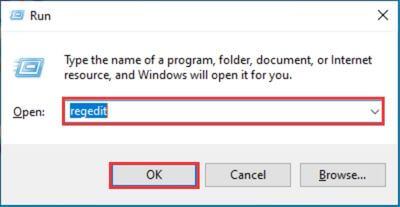
- Step 2: After that, it will ask permission to make some changes in your system, and you have to tap on the “Yes” option.
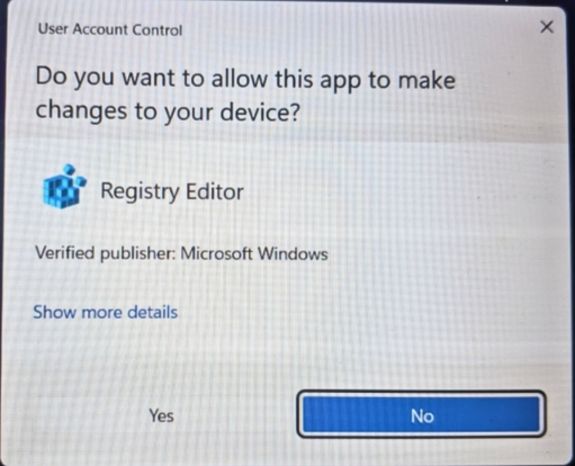
- Step 3: Now a “Registry Editor” window will appear on your display there, and you have to type “HKEY_LOCAL_MACHINE\SOFTWARE\Microsoft\MdmCommon\SettingValues” and then press the “Enter” button.
- Step 4: Move the mouse towards the right side, and right-click on the panel; you can see a “New” option; tap on it, then choose the “DWORD (32-bit) Value” option.
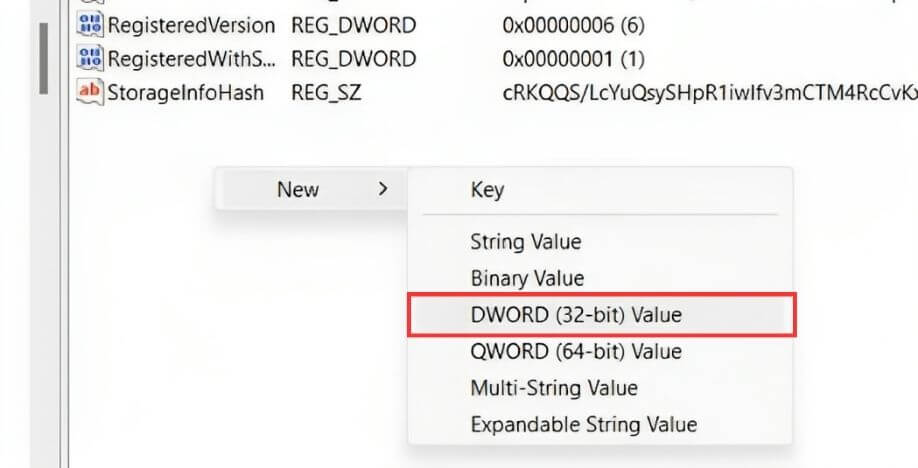
- Step 5: Now name it “AllowFindMyDevice”. Now double-tap on that option.
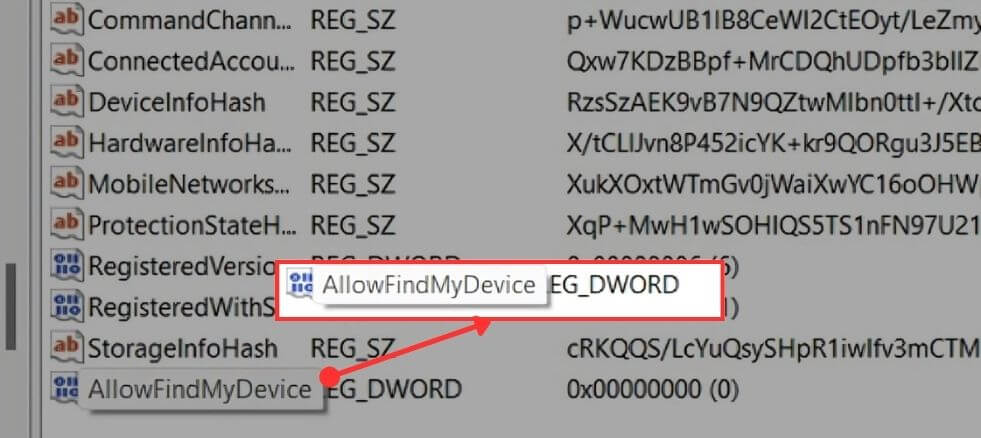
- Step 6: You can see a “Value data” option and must type 1. Now tap on the “Ok” option.
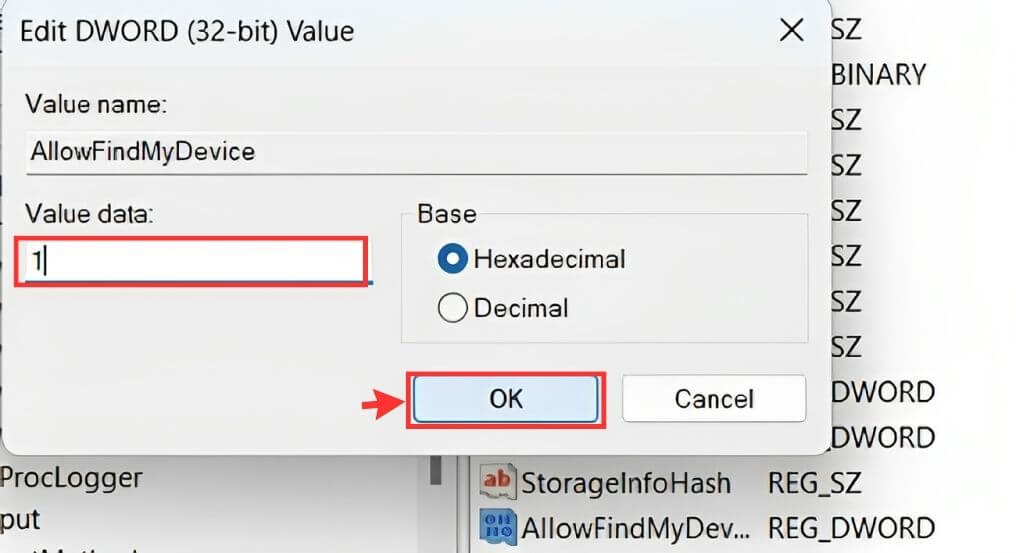
Important: If you change the value to 1, the “Find My Device” feature will be enabled, and if you change the value to 0, this feature will be disabled.
Through Windows Settings
Check out this method if the previous way is not working on your device. You can enable the “Find My Device” feature on your Windows machine from the settings. This method will work on most devices. If you don’t know how to activate or deactivate this feature, follow the below steps.
- Step 1: Press the “Windows” button, then on the left side corner, you will see a “Settings” option; click on it to open.
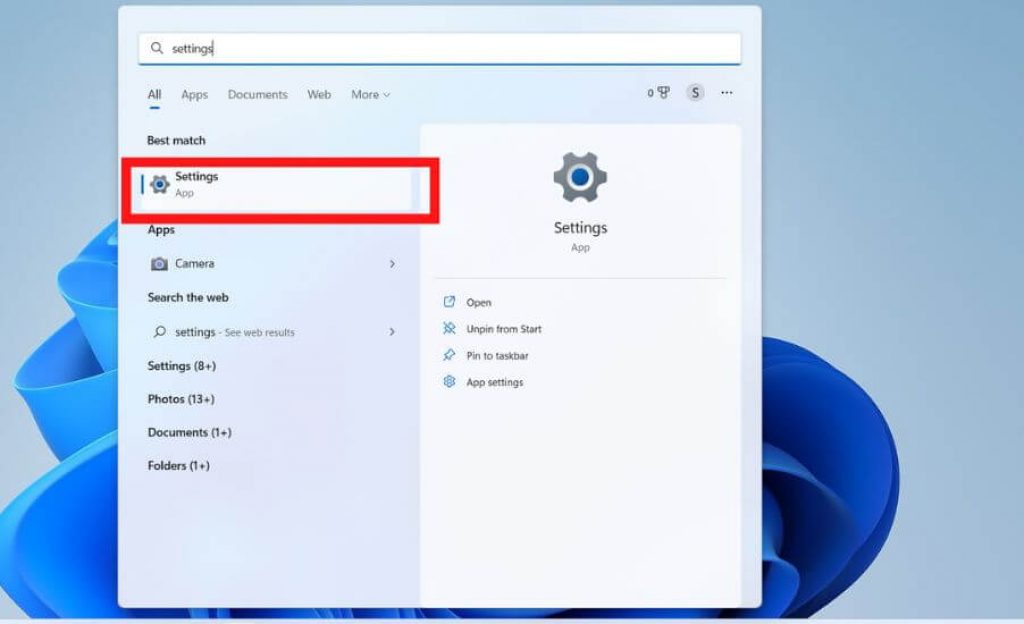
- Step 2: After that, you can see a “Privacy & Security” option; tap it to open.
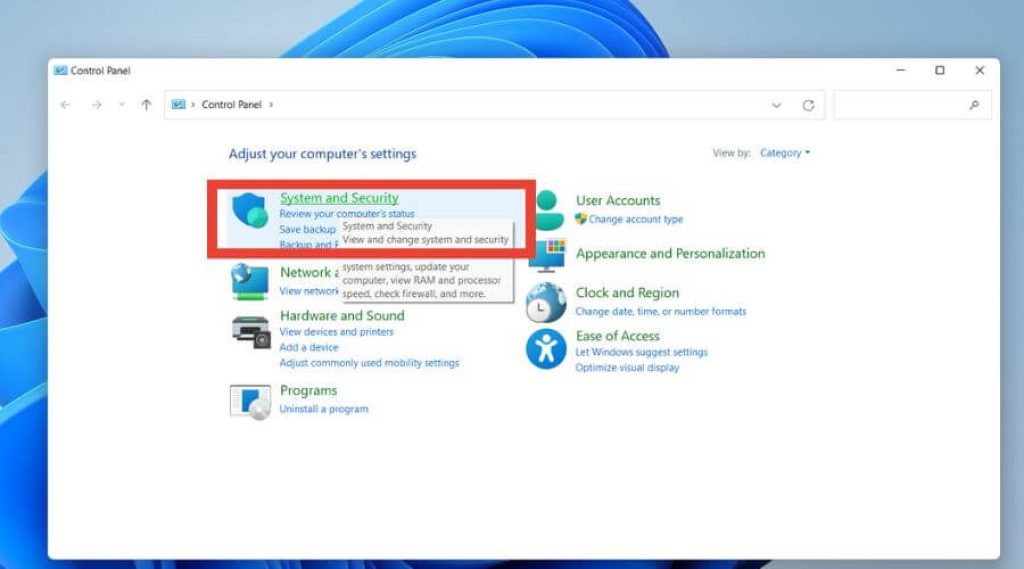
- Step 3: On the left side, you can see a “Find My Device” tab; click on it.
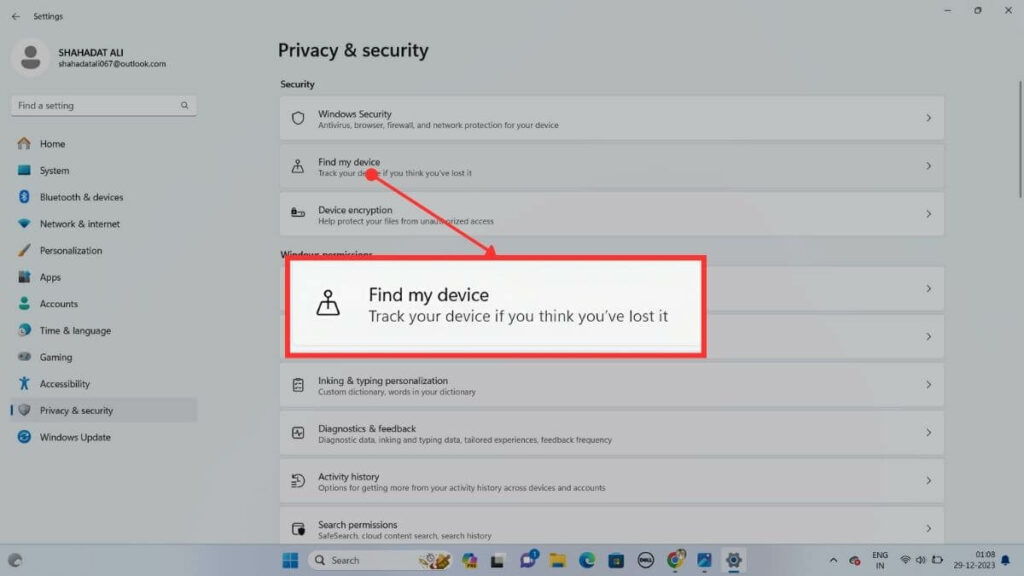
- Step 4: Look for the “Find My Device: ON/OFF” option below to see a “Change” option; tap on it to enable or disable this feature. This feature is usually disabled by default, so you have to enable this feature manually.
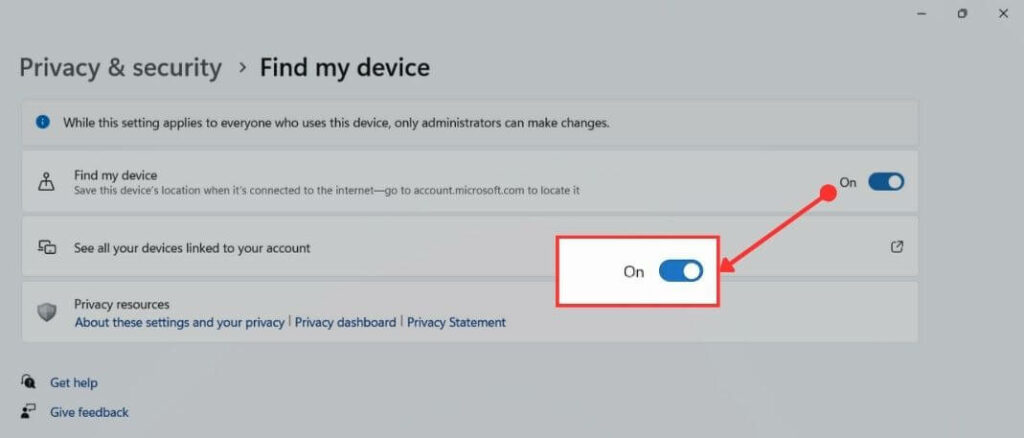
- Step 5: After that, you can see a “Turn off the location settings” option and tap on it to open.
- Step 6: Now look for the “Location access for this device” below to see a “Change” option; click on it and turn on the location settings.
Through Local Group Policy Editor
If the above methods are not working on your device, try the Local Group Policy Editor method. The Local Group Policy process is similar to the Registry Editor.
- Step 1: Press the “Windows and R” buttons at the same time, then hold it for a few seconds; after that, a Run box will appear; there, you have to type “gpedit.msc” and then look for an “Ok” button and tap on it.
- Step 2: On the left side, you can see an “Administrative Templates” option, then tap on it to open the file.
- Step 3: On the right side, you can see a “Windows Component” option; tap on it to open the file.
- Step 4: Now search the “Find My Device” option, then double tap to open the file.
- Step 5: Now you can see a “Turn On/Off Find My Device” option; double tap on that.
- Step 6: After that, by default, it is set to the “Not Configured” option; change it to the “Enable” option.
- Step 7: Now tap on the “OK” button to complete the process.
During Windows Setup
If the methods mentioned earlier are not working, check out this method; it might work for you. While installing Windows, you can enable the “Find My Device” feature.
- Step 1: While installing the Windows operating system, look for the “Choose privacy settings for your device option” and tap on it.
- Step 2: After that, you can see a “Find My Device” option and set it to “Yes.”
It will take just two or three steps to complete the process.
FAQs
If you want to track your laptop but need to know the process, follow the below steps.
– Go to the Microsoft official web page, then log in to your Microsoft account.
– After that, you can see a list of devices; between them, find your laptop brand and model name, then tap on it. Below, you can see a “Find My Device” option; tap on it.
– After completing all the steps, it will start tracking your device location.
1. Go to the Microsoft official web page, then log in to your account.
2. After that, you can see a list of devices; between them, find your device and tap on it; below that, you can see a “Find My Device” option; click on it.
3. Now, it will start tracking your device; when it shows the location on the map, select the “Lock” option and click the “Next” button.
4. After locking the device, you can reset your password.
Yes, an internet connection (either through mobile data or Wi-Fi) is required for Find My Device to provide real-time location tracking and perform remote actions.
Also Read:
Final Words
With the increasing need to protect our devices, the “Find My Device” feature has become a valuable asset for smartphone and laptop users. Introduced in 2013 and now available on various platforms including Windows, this tool provides peace of mind in case the device is stolen or lost.
By following the simple methods explained in this article, you can easily enable or disable the “Find My Device” feature on your Windows 7, 8, 10 or 11 operating system. With this powerful tracking tool, you can keep your device safe, secure, and always within reach. Don’t hesitate to try it and experience the convenience of staying connected with your precious gadgets.

![How to Factory Reset Acer Laptops? [Step-by-Step Guide]](https://pcvenus.com/wp-content/uploads/2024/04/How-to-Factory-Reset-Acer-Laptops-324x160.webp)

