Many Windows users prefer quick access to their drives and files directly from the desktop, but in the latest versions of Windows 11 and Windows 10, the familiar “This PC” (also known as My Computer) icon is no longer visible by default. Instead, you must manually enable it.
Adding the “This PC” icon makes it much easier to open File Explorer and access local drives, external storage, and connected devices without any additional clicks.
The good news is that Windows provides several easy ways to restore this icon, whether through Settings, the Control Panel, or a quick drag-and-drop shortcut.
In this guide, you’ll learn step-by-step how to show the “This PC” icon on your desktop in Windows 11, Windows 10, Windows 8.1, and Windows 7. We’ll also offer tips on renaming the icon, removing it, or pinning it to the Start menu for faster access.
Table of Contents
Steps to show This PC on Desktop in Windows
Method 1. Enable This PC Icon by Using Windows Settings
You need to manually add the ‘This PC‘ icon to your desktop. The process is simple; just follow a few steps to add it.
- Step 1: Click on the Start button (Windows icon) on the desktop taskbar. Once it opens, type ‘Settings’ in the search bar and click on the Settings.

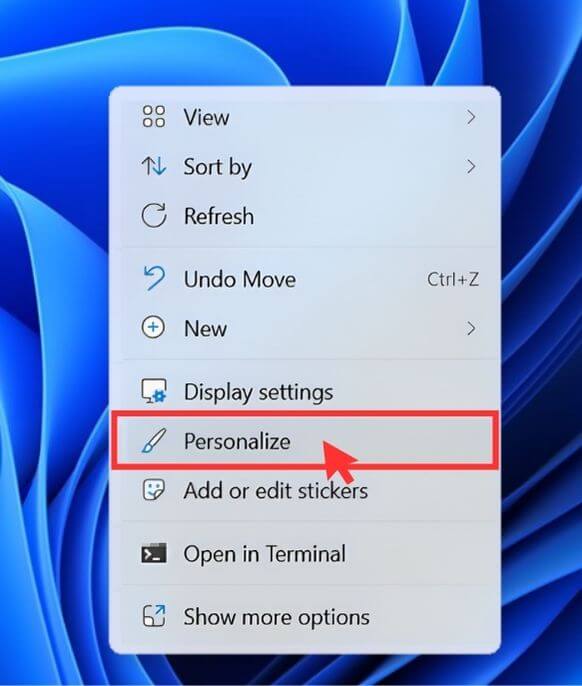
- Step 2: On the left side, you’ll see a menu – click on the ‘Personalization‘ option.
Alternatively, you can access the Personalization option by right-clicking on the desktop.
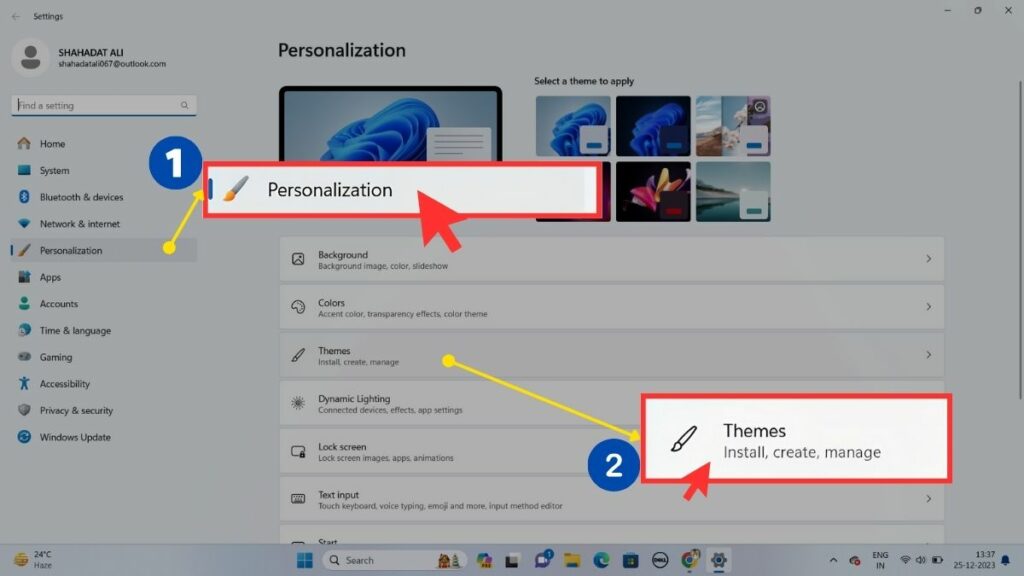
- Step 3: A list will appear, find the ‘Theme‘ option; Click on it.
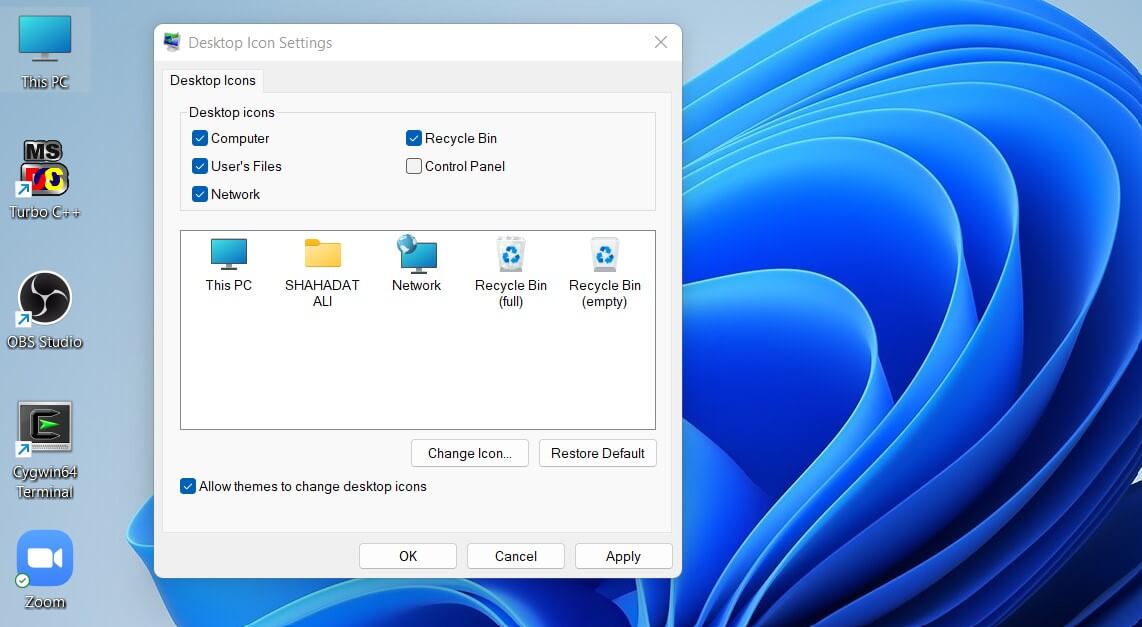
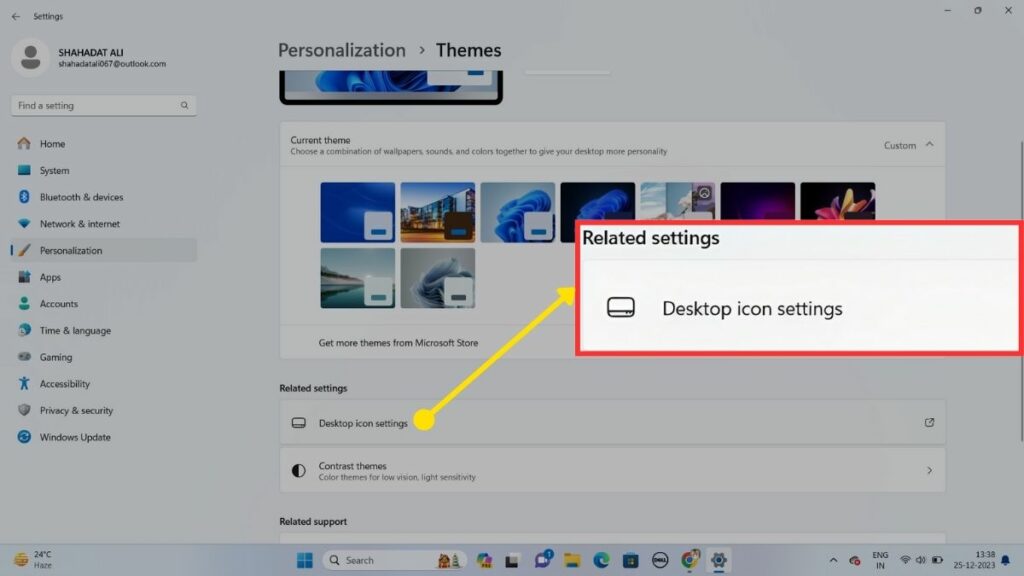
- Step 4: Scroll down a bit, and you’ll see a Related settings. Look for ‘Desktop icon settings‘ and click on it.
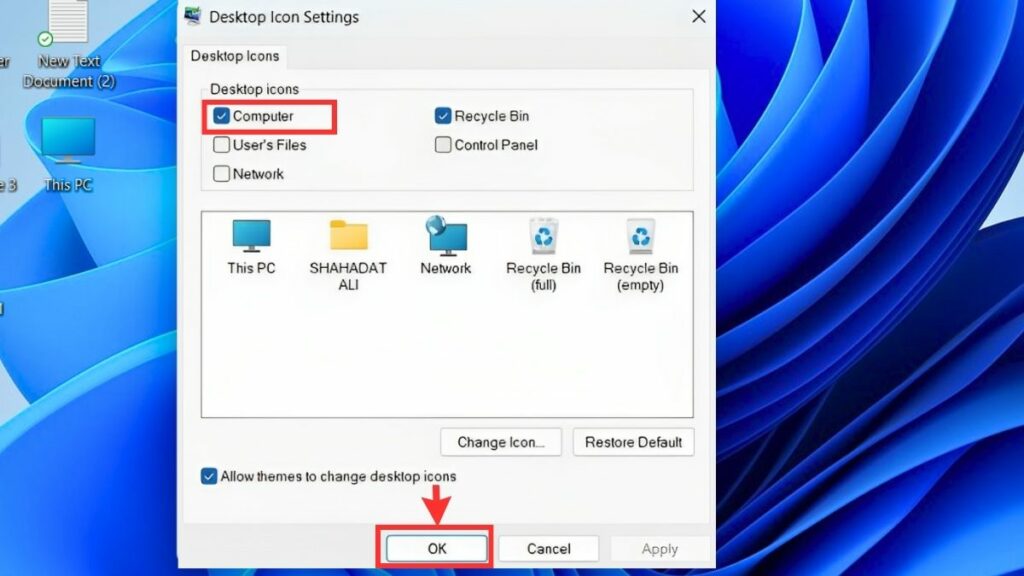
- Step 5: You’ll find several icons listed. Choose ‘Computer‘ and ‘Recycle Bin,’ and if you wish, right-click on them, then click ‘Apply’ or ‘OK’ to confirm the changes.
Also Read: How to Upgrade to Windows 11 for Free
Method 2. Enable This PC Icon by Using Shortcut
It is one of the easiest ways to add This PC icon on the desktop. Follow a few simple steps below to add this icon to the desktop.
- First, open any folder and a window on the screen.
- You will find the Restore icon on the top right side corner, then tap on it.
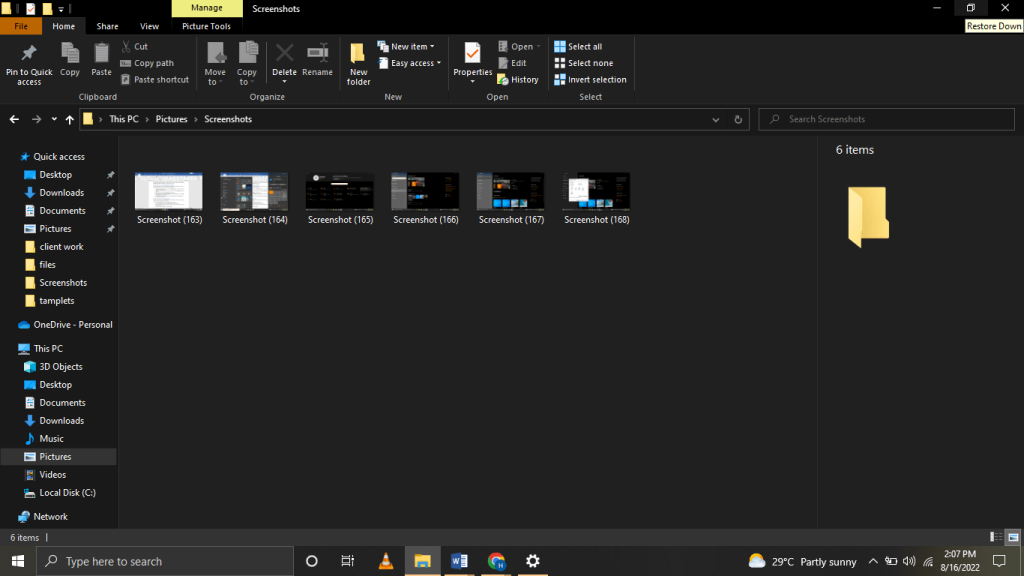
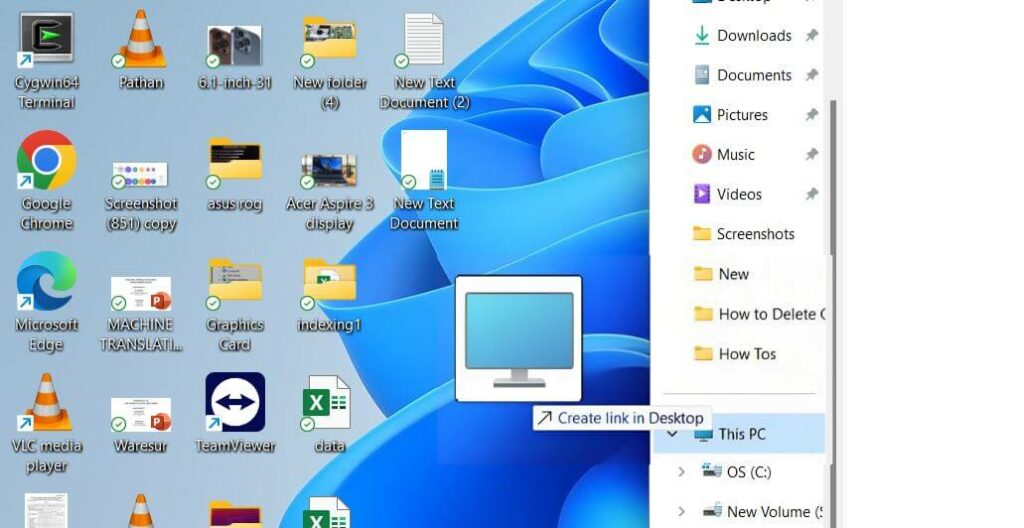
- On the left side, you will find the “This PC” tab click on the tab, hold it and drag it to the desktop then leave it.
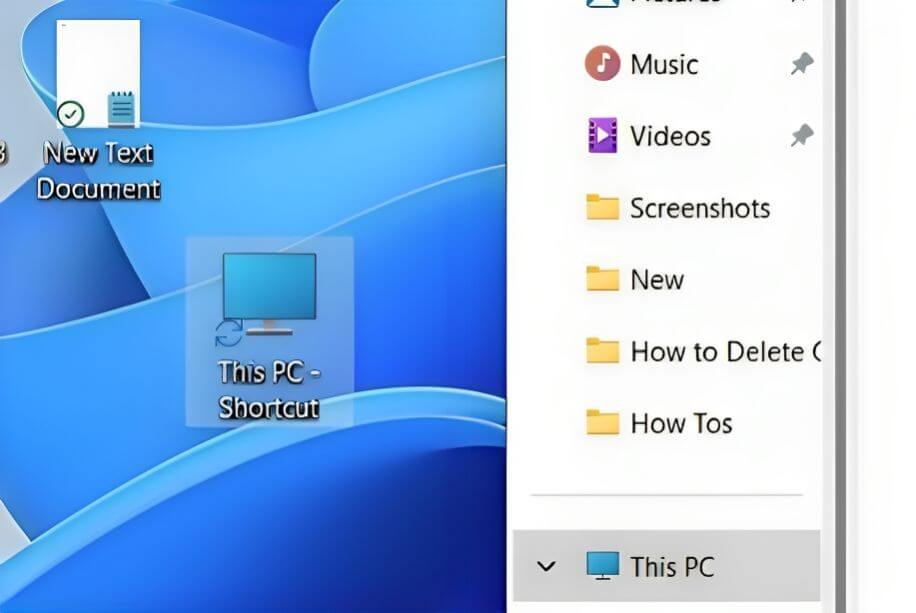
- Now you can see the “This PC” icon on the desktop.
Also Read: Best Free Antivirus for Windows 11
Method 3. Enable This PC Icon by Using Control Panel
If the previously mentioned methods are too complicated, check out this method. The process is quite simple; just follow a few simple steps to add This PC icon on the desktop.
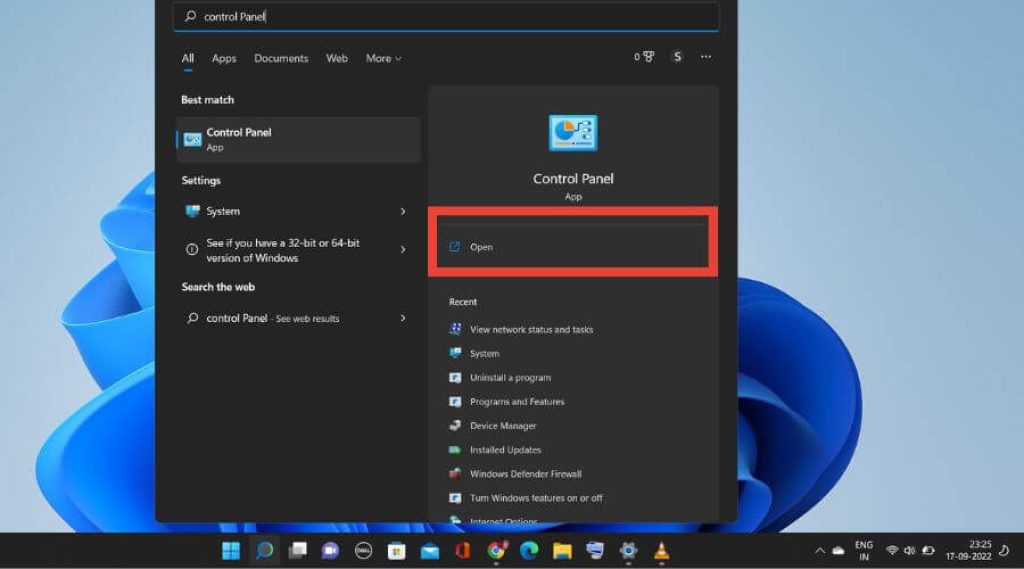
- Step 1: On the taskbar, you can see a Search box tap on it and type “Control Panel.”
- Step 2: A menu will pop up on the screen; look for the Control Panel option, then tap on it to open.
Step 3: A window will pop up on the screen in there top right corner; you can see a search box tap on it and type “File Explorer options”.
Step 4: You can see a “File Explorer Options” folder; tap on it.
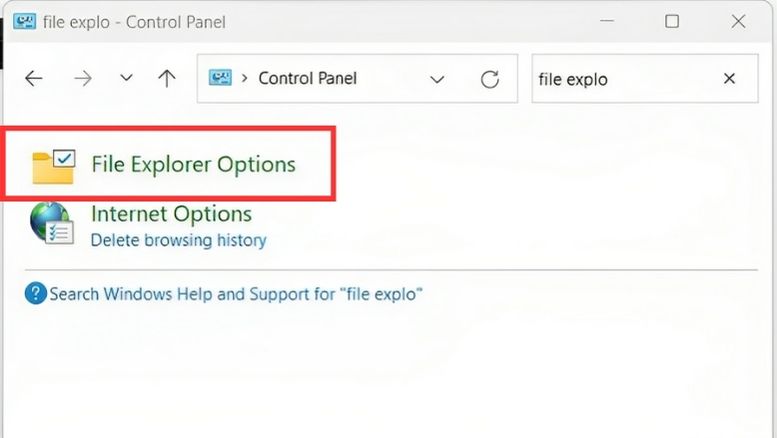
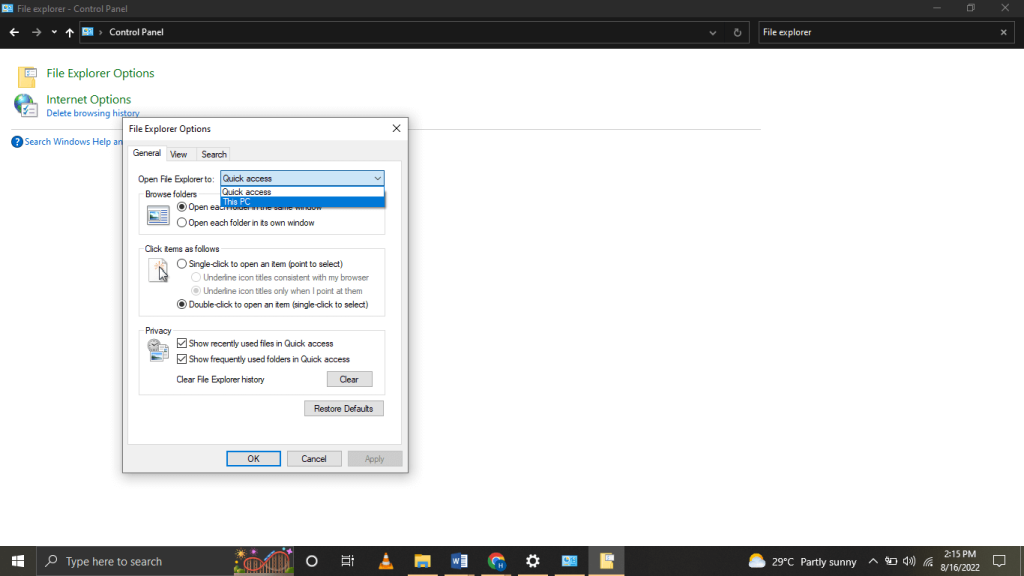
Step 5: Another window will pop up on the screen; tap on the General tab.
Step 6: Now look for the “Open File Explorer to” section. Besides that, you can see a Quick Access option set to “This PC,” then tap on the “Apply” option.
Step 7: Now, tap on the “Ok” option.
Method 4: Using Run Command
If you want a quick way to access your desktop folder and place the icon there:
Step 1: Press Win + R to open the Run dialog box.
Step 2: Type: shell:desktop
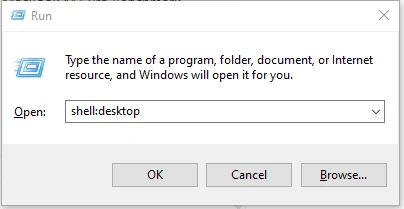
Step 3: Press Enter. The Desktop folder will open in File Explorer.
Step 4: From the left panel, drag the This PC icon into the Desktop folder.
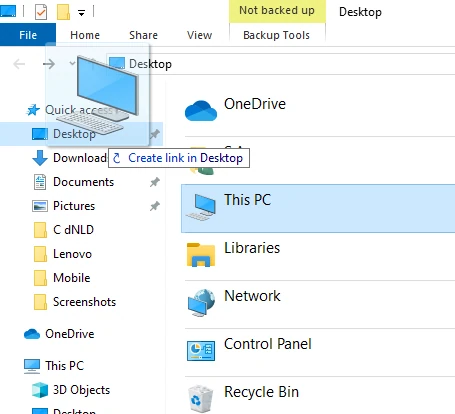
The icon will now appear on your desktop.
Method 5: Using Registry Editor (Advanced Users)
⚠️ Use this method only if you are comfortable editing the Windows Registry. Make sure to back up your registry before making changes.
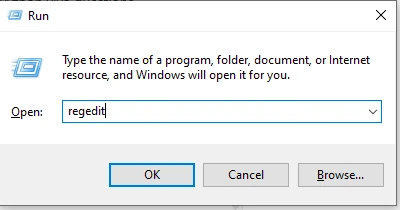
Step 1: Press Win + R, type regedit, and hit Enter.
Step 2: Navigate to this path: HKEY_LOCAL_MACHINE\SOFTWARE\Microsoft\Windows\CurrentVersion\Explorer\HideDesktopIcons\NewStartPanel
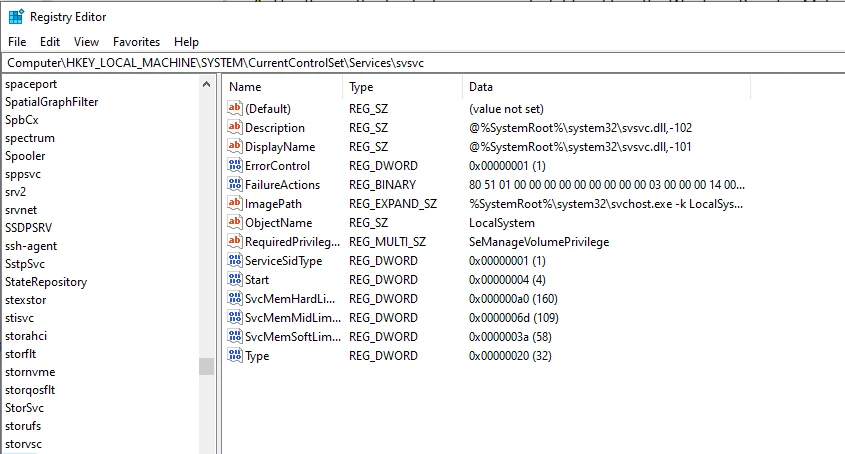
Step 3: Find the value: {20D04FE0-3AEA-1069-A2D8-08002B30309D}
Step 4: If the value is set to 1, it means the “This PC” icon is hidden.
Step 5: Double-click it and change the value to 0.
Restart your computer. The icon should now appear.
Method 6: Using Group Policy Editor (Windows Pro & Enterprise Only)
This method is especially useful if you are on Windows 10/11 Pro or Enterprise.
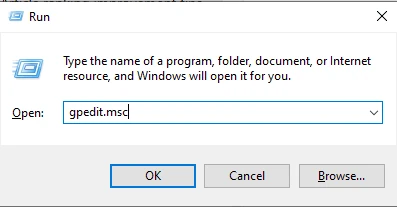
Step 1: Press Win + R, type gpedit.msc, and press Enter.
Step 2: Go to: User Configuration > Administrative Templates > Desktop
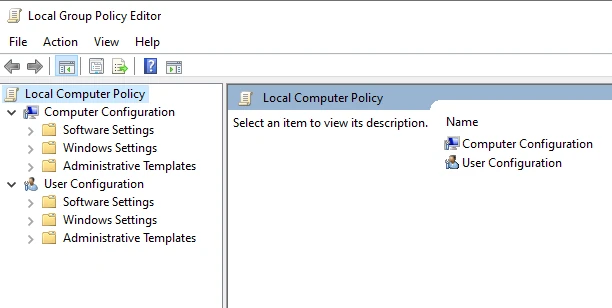
Step 3: Find Hide “This PC” icon on desktop.
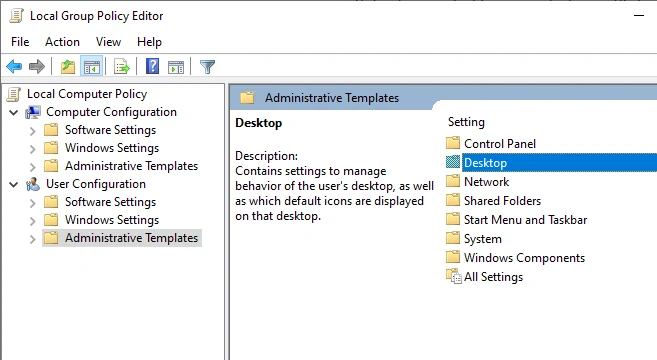
Step 4: Double-click it and select Disabled.
Step 5: Click Apply → OK.
Refresh your desktop or restart your PC to see the changes.
Also Read: How to Enable Desktop Stickers in Windows 11
How to Pin This PC Icon in Start Menu?
If you are a windows user, you will know that This PC icon is not available in Windows Menu. Follow a few simple steps to add This PC icon on the desktop manually.
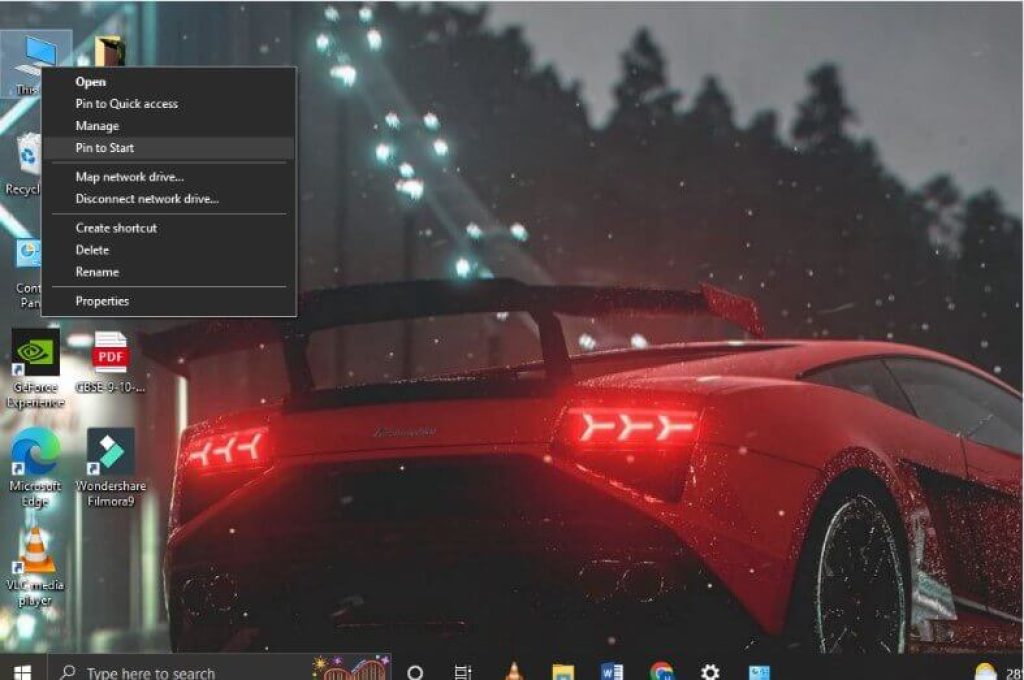
- Step 1: On the desktop, you can see a “This PC” icon; right-click on it.
- Step 2: A menu will appear on the screen; tap on the “Pin to Start” tab.
- Step 3: Now “This PC” icon is available on the Start Menu.
How to Rename This PC Icon
You can easily rename your This PC icon. Just follow a few simple steps to rename it.
- Step 1: Look for the This PC icon on the desktop, then right-click on it.
- Step 2: A menu will pop up on the screen; look for the “Rename” tab, then tap on it.
- Step 3: Now you can change the name and press the “Enter” button. The name has been changed.
Remove the Desktop Icon
The best way to remove This PC icon from the desktop is to delete it. If you don’t know how to delete it, follow a few simple steps below.
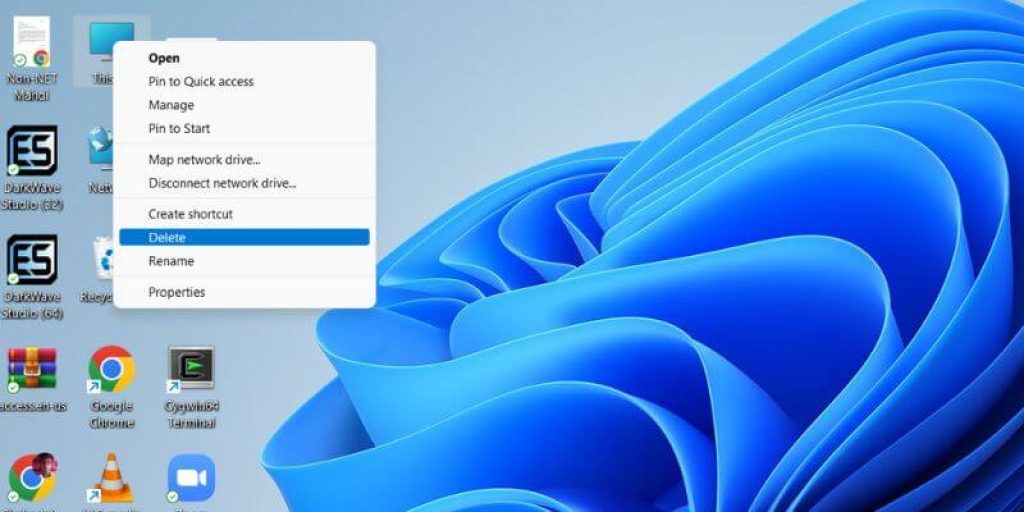
- Step 1: Close all the windows, look for the This PC icon, and right-click on it.
- Step 2: A menu will pop up on the screen; tap on the Delete tab.
Also Read: Windows 10 vs Windows 11
Troubleshooting Tips
If you still can’t see the “This PC” icon after trying the above methods:
Option greyed out? Restart Windows Explorer from Task Manager (Ctrl + Shift + Esc → right-click Windows Explorer → Restart).
Icon keeps disappearing after restart? Check Registry or Group Policy settings — sometimes system optimization tools or IT policies override them.
Control Panel missing? Use the Run command: rundll32 shell32.dll,Control_RunDLL desk.cpl,,0 This opens Desktop Icon Settings directly.
Final Words
Now you know several ways to restore the “This PC” (My Computer) icon to your desktop in Windows 11, 10, 8.1, and 7. Whether you want to use Settings, Control Panel, the Run command, or advanced options like the Registry and Group Policy, each method is easy once you follow the steps.
Keeping the “This PC” icon visible makes it much easier to access drives, files, and system folders with just one click. If the icon doesn’t appear or disappears repeatedly, try the troubleshooting tips above.
Are you still experiencing problems or have any other Windows-related questions? Share your problem in the comments, and we’ll help.
Frequently Asked Questions (FAQs)
Q1. Why is “This PC” missing in Windows 11 and 10?
By default, Microsoft hides the icon to give the desktop a cleaner look. You need to enable it manually.
Q2. Will renaming “This PC” affect my files?
No, renaming only changes the shortcut name. It does not impact your drives, folders, or files.
Q3. What if the “This PC” option is still not showing?
Check Group Policy or Registry Editor settings. On some devices, third-party optimizers or corporate policies may hide it.
Q4. Can I show “This PC” on Windows 7 and 8.1 desktops?
Yes, both versions allow you to enable it from Control Panel > Personalization > Change Desktop Icons.
