The Domain Name System (DNS) server is vital to internet connectivity.
In Windows, the DNS server used for Wi-Fi and LAN connections is often set to the default DNS server provided by the internet service provider (ISP).
However, many Windows users are unaware that using the default DNS server can have drawbacks, including potential data tracking by the ISP, slower internet speeds, and security risks such as DNS hijacking and cache poisoning.
It’s advisable to use a custom DNS server to enhance security and internet speed.
This article provides instructions on how to change DNS settings in Windows 11.
What is DNS?
A Domain Name System (DNS) is often likened to a phonebook for the internet. When you attempt to access a website on your Windows 11 laptop, it automatically connects to a DNS server to retrieve the website’s IP address.
Since most users can’t easily remember the complex IP addresses of websites, DNS servers serve as a crucial translation tool.
Various DNS servers are available, including those provided by ISPs, OpenDNS, Cloudflare, and others. Each DNS service provider claims to be the fastest and most reliable. Some also offer enhanced security features like DNS-over-TLS.
A recent article by Beebom highlighted the importance of Windows 11 users switching from their default DNS servers to custom DNS servers.
Default servers may lack security and potentially expose users to data tracking by their ISPs. Custom DNS servers typically offer enhanced security, do not log your queries, and provide quicker information retrieval.
Free DNS Servers for Windows 11
These days there are hundreds of DNS servers available on the internet. A limited number of servers are available for free of cost, and most of the servers ask for subscription fees.
Don’t worry.
Here are a few free and reliable DNS servers for your Windows 11 laptop.
Cloudflare
- Preferred DNS: 1.1.1.1
- Alternative DNS: 1.0.0.1
- Preferred DNS: 8.8.8.8
- Alternative DNS: 8.8.4.4
Open DNS
- Preferred DNS: 208.67.222.222
- Alternative DNS: 208.67.220.220
Comodo Secure DNS
- Preferred DNS: 8.26.56.26
- Alternative DNS: 8.20.247.20
Quad9 DNS
- Preferred DNS: 9.9.9.9
- Alternative DNS: 149.112.112.112
Ways to Change DNS Settings in Windows
Method 1: Change the DNS Server from the Settings
There are many different methods to change the DNS server, and between all those methods, it is the simplest and easiest way to modify your DNS server. Follow the steps below to change the DNS server in your Windows 11.
Step 1: Open the Settings menu
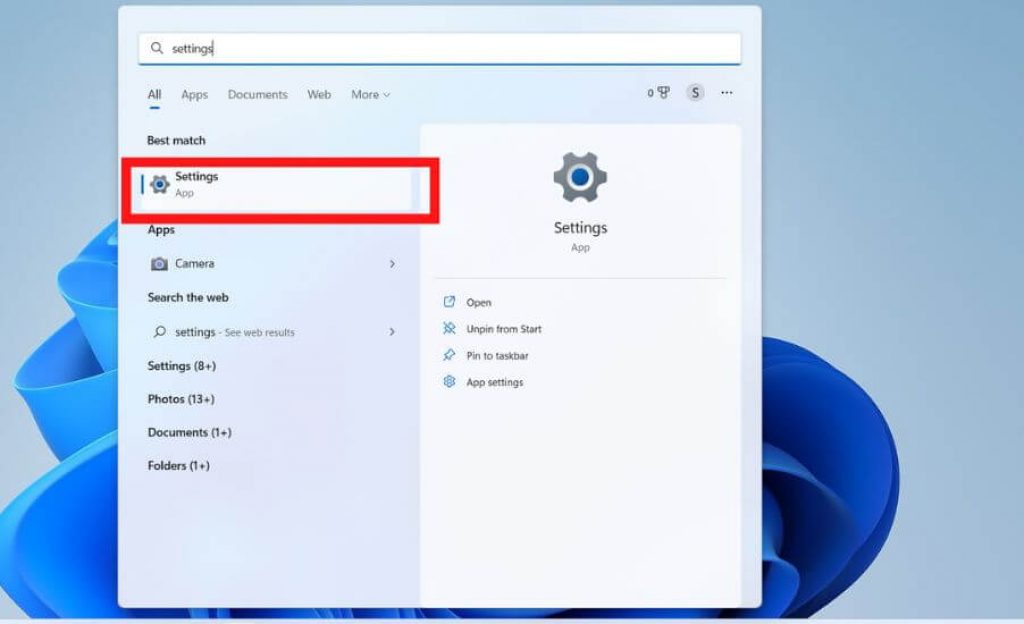
Press the “Windows button” and “I button” at the same time or Go to the search bar and search Settings, and then a “Settings menu” will appear on the screen.
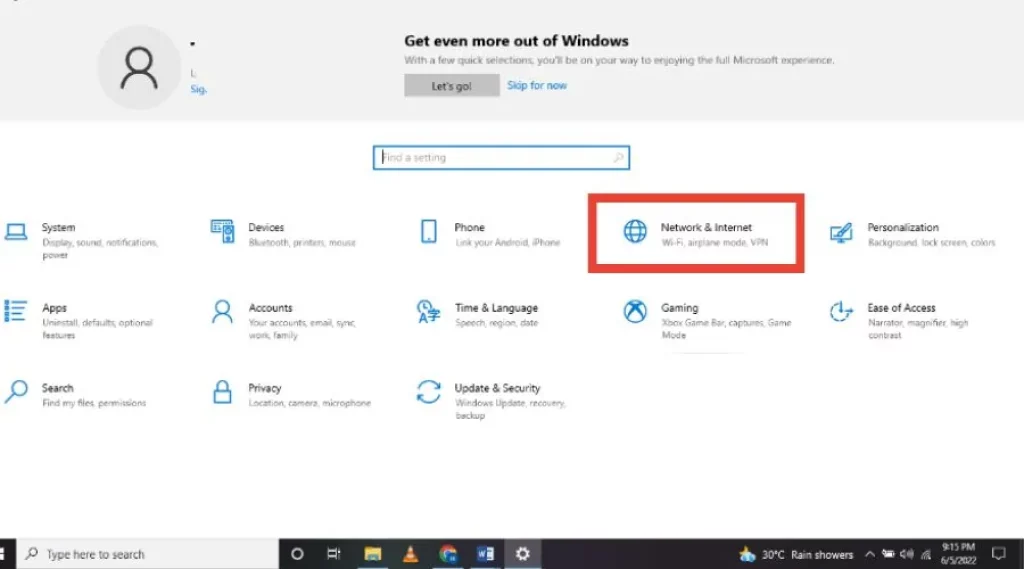
Step 2: Go To “Network & Internet”
On the left-side corner, you will find the “Network & Internet” tab; click on it.
Step 3: Turn on Wi-Fi
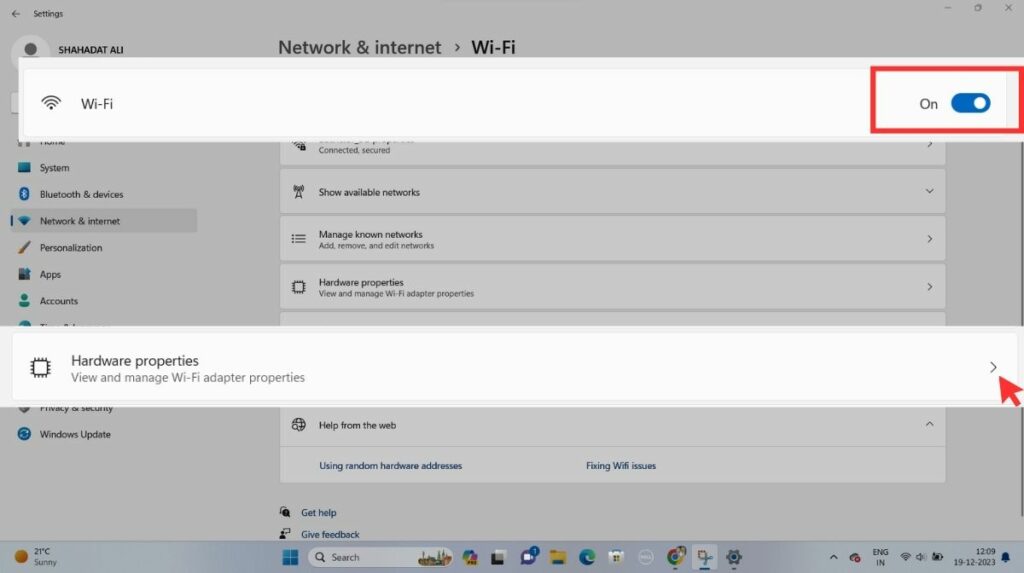
Click on Wi-Fi; on the right side of the screen, you can see a “Wi-Fi” option set to “ON.”
Now scroll downwards to find the “Hardware Properties” tab, then click on it to open.
Step 4: Click on the “DNS server assignment”
- After that, look for “DNS server assignment.” then, on the right side, you can see an “Edit” option; tap on it.
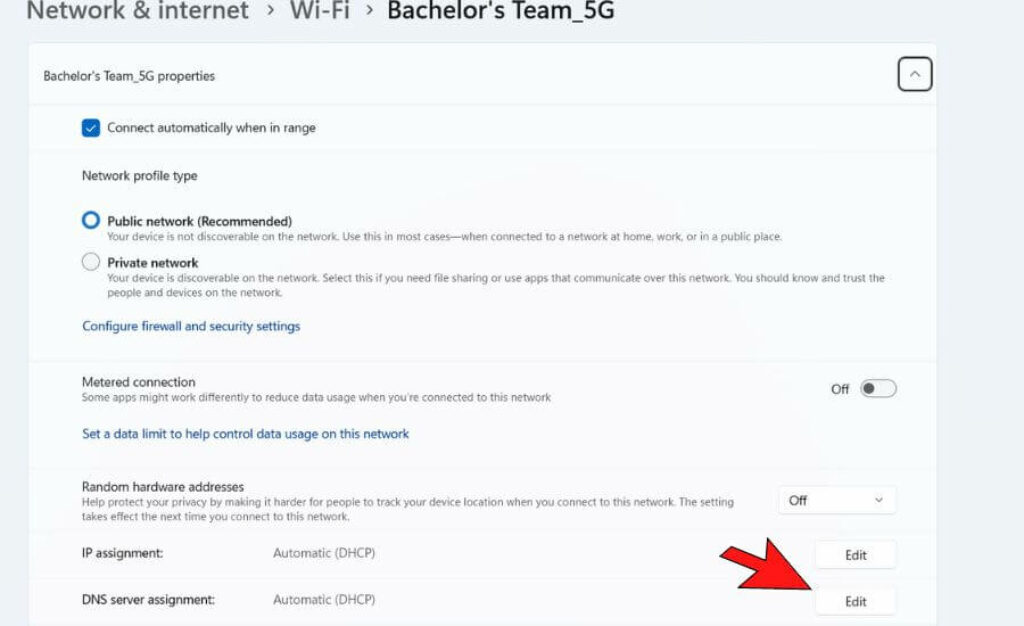
- By default, it is set to Automatic, which means internet service providers choose the DNS server.
Step 5: Edit network DNS server settings
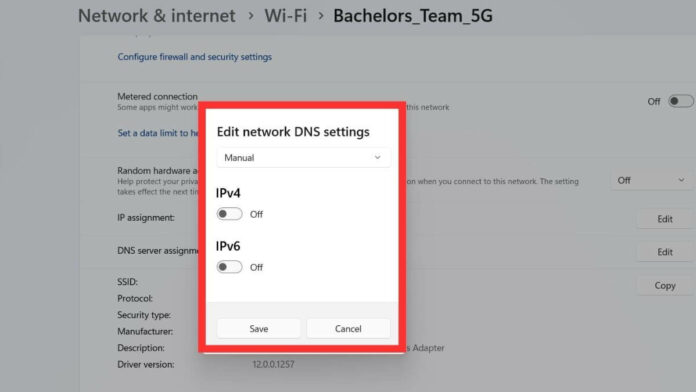
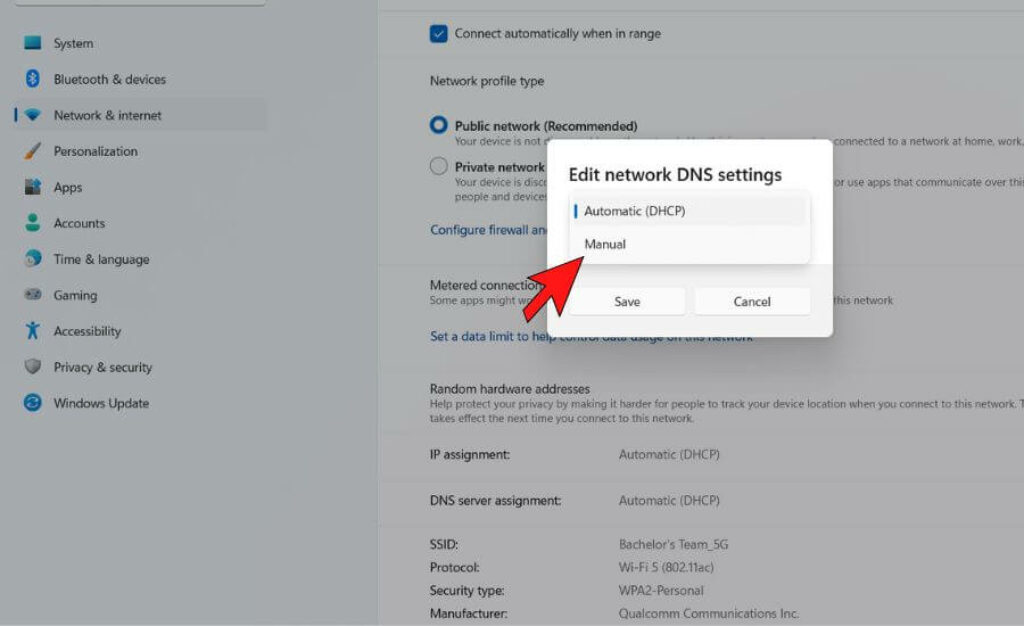
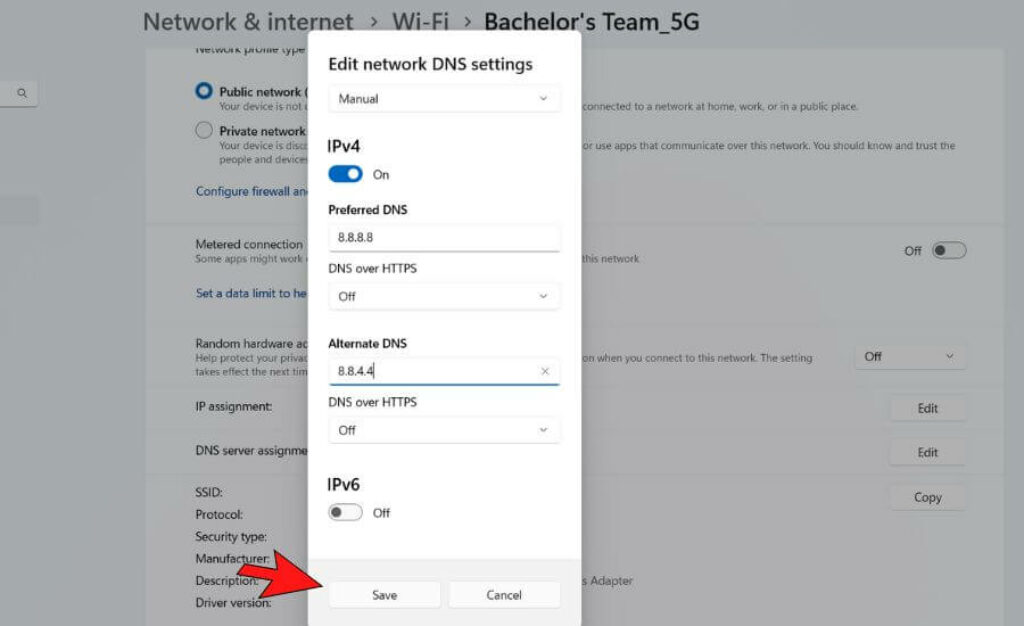
- Now, an ‘Edit DNS settings” box will appear on the screen there, and you will see the “Automatic (DHCP)” option; tap on it, then set it to “Manual.”
Step 6: Fill Preferred DNS and Alternative DNS
- After that, turn on either “IPv4 or IPv6”; it depends on your need.
Above, I mentioned a few free-of-cost DNS servers, so I chose one and typed the IP address here in Preferred DNS and Alternative DNS. For example, if I choose the Google DNS server, Preferred DNS is 8.8.8.8, and Alternative DNS is 8.8.4.4.
Below, you can see a “Save” option” tap on it. Now, your DNS server has been changed.
Method 2: From the Control Panel
You can also have the option to change the server from the Control Panel. Don’t worry; the process is quite simple; follow a few simple steps to change the DNS server.
Step 1: Open the Run box
First, press the “Windows button” and “R button” simultaneously, and then a Run box will appear on the screen.
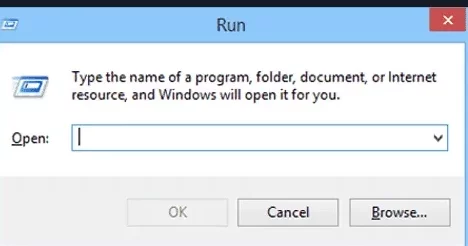
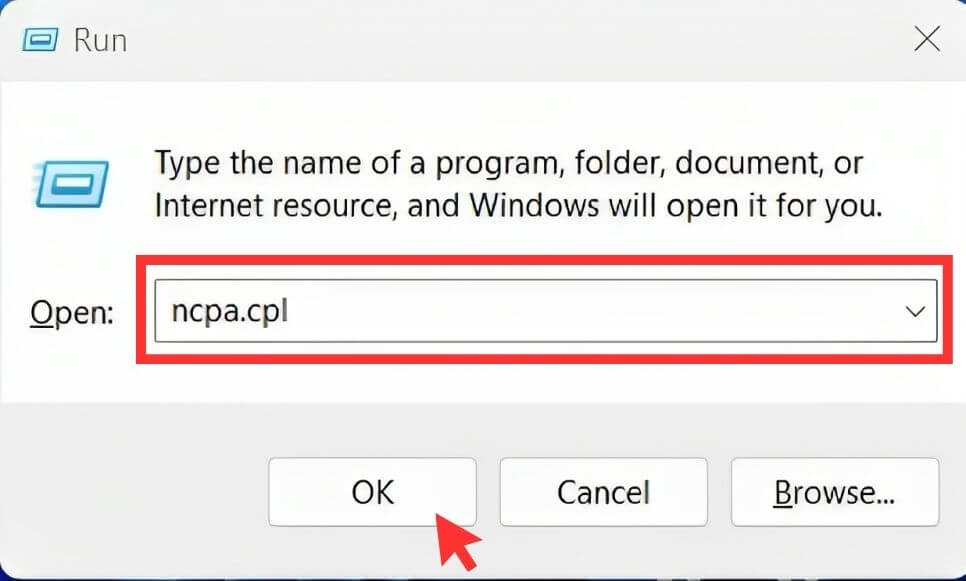
- Now, type “ncpa.cpl”; then, you can see an “Ok” option; tap on it.
Step 2: Click on Network & Internet
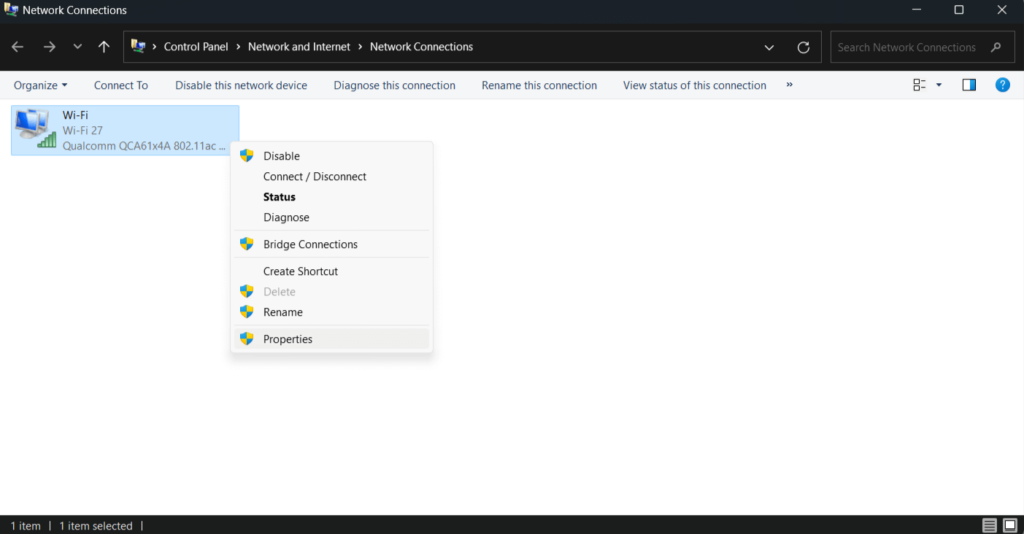
- After that, a “Network Connection” window will appear on the screen. It will directly open the “Network & Internet” tab inside the Control Panel.

Step 3: Go to Wi-Fi Properties
Now look for a “Wi-Fi” option, then click on it.
After that, a menu will appear on the screen; there, find the “Properties” option, then tap on it.
Step 4: Internet Protocol Version 4 (TCP/IPv4)
- Now, a “Wi-Fi Properties” window will pop up on the screen; there, scroll downwards and look for the “Internet Protocol Version 4 (TCP/IPv4)” option, then tap on it.
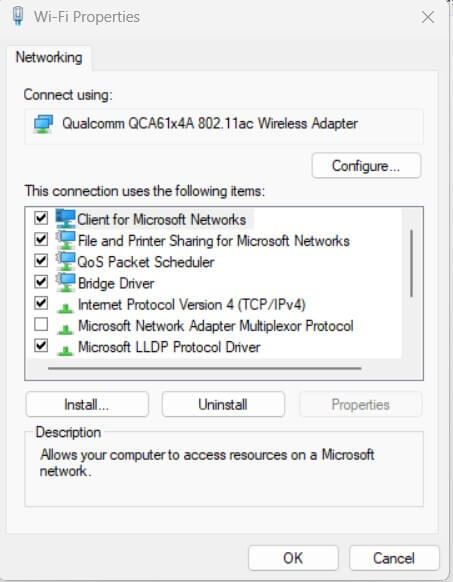
Step 5: Fill Preferred DNS and Alternative DNS
- After that, another window will appear on the screen; look for the “Use the following DNS server address” option, then tap on it.
- Now look for “Preferred DNS server” and “Alternative DNS server,” which I mentioned above; choose a server, then paste it here. For example, let’s assume I want to use Cloudflare’s DNS server. Then Preferred DNS is 1.1.1.1, and Alternative DNS is 1.0.0.1; isn’t it quite simple?
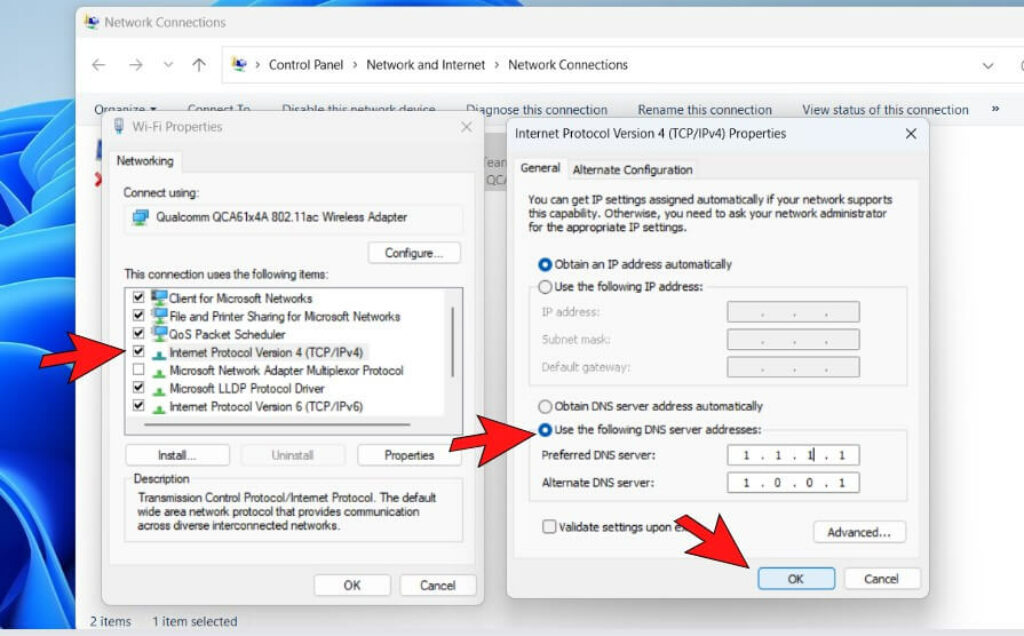
- After completing all these steps, tap on the “OK” button. Now, the DNS server has been changed.
Method 3: Using Command Prompt (CMD)
It will take a few simple steps, so follow the procedure below.
- Step 1: On the Taskbar, you can see a “Search box.” tap on it, then type “cmd,” and a menu will appear on the screen. Now, on the right side of the menu, you can see a “Run as administrator” option; tap on it.
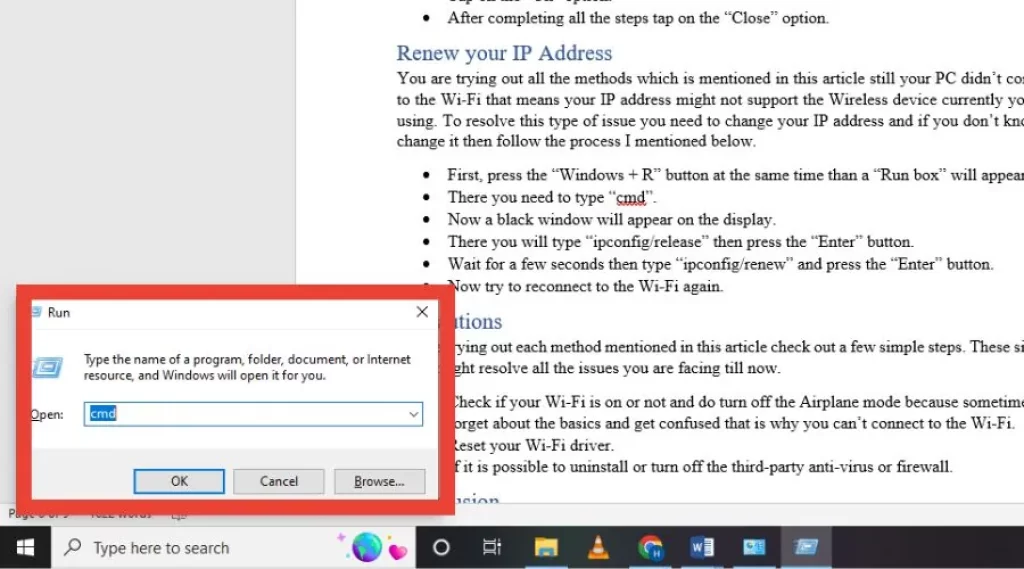
- Step 2: Now, a window will pop up on the screen there, and you have to copy-paste the code of Preferred DNS and Alternative DNS.
For example, I want to use the Google server, so instead of typing 8.8.8.8 as Preferred DNS, copy and paste the code- “netsh interface ipv4 set DNS servers Wi-Fi Static preferred primary”.
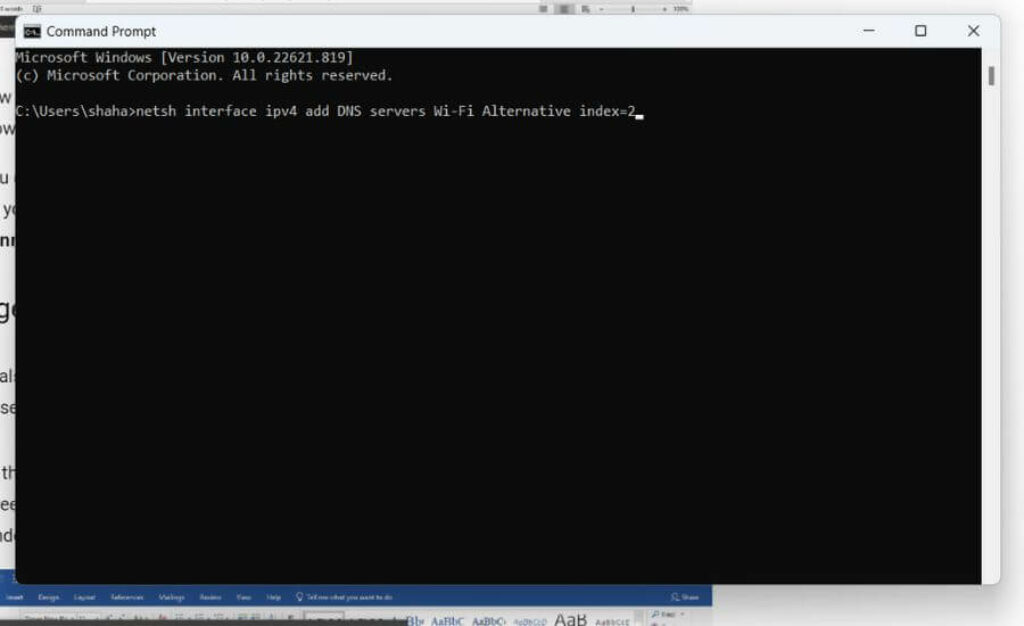
- Step 3: Instead of typing 8.8.4.4 as Alternative DNS, copy and paste the code- “netsh interface ipv4 add DNS servers Wi-Fi Alternative index=2“. After this, press the “Enter” button.
- Step 4: Now go to “Settings” on the left side; you can find a “Network & Internet” tab, then tap on it to open.
- Step 5: Now scroll downwards, and you can see a “Hardware Properties” option; tap on it to open the tab.
There, you can see that the “DNS server assignment” is updated manually and connected to the Google server. If you want to reset the DNS settings, copy and paste the code- “netsh interface IP set DNS “Local Area Connection” DHCP” in the Command Prompt.
Method 4: Using PowerShell
You can also change the DNS server by using the PowerShell method. Follow a few simple steps to change the DNS server in your Windows 11 laptop.
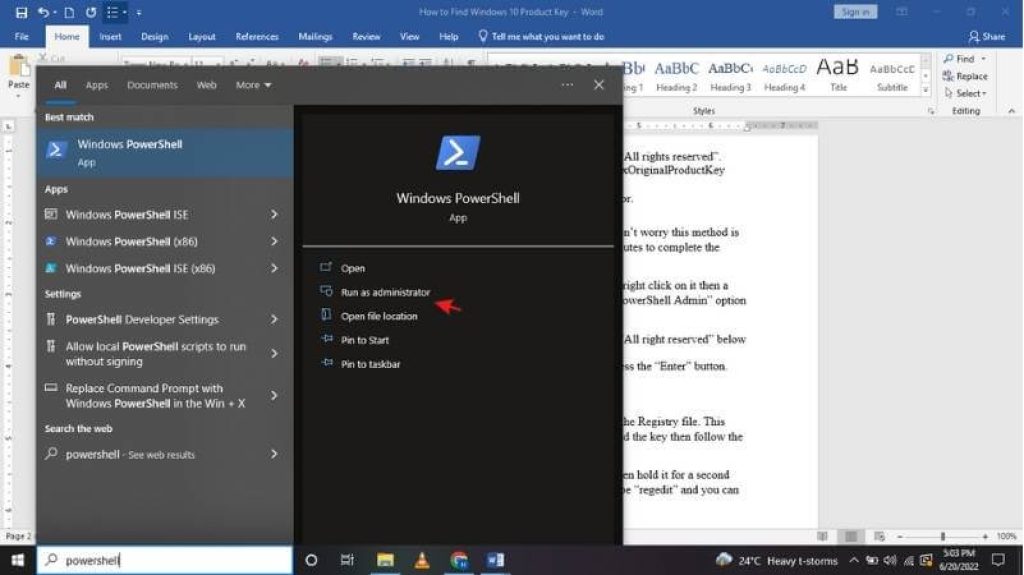
- Step 1: On the Taskbar, you can see a “Search box.” Type “PowerShell,” and a menu will appear on the screen. Now look for the “Run as Administrator” option, then tap on it to open the PowerShell window.
- Step 2: After that, look for the InterfaceAlias and InterfaceIndex below these options; copy & paste the code- DnsClientServerAddress -InterfaceIndex N -ServerAddresses(“Preferred, “Alternative “) then press “Enter.” Now DNS server has been changed.
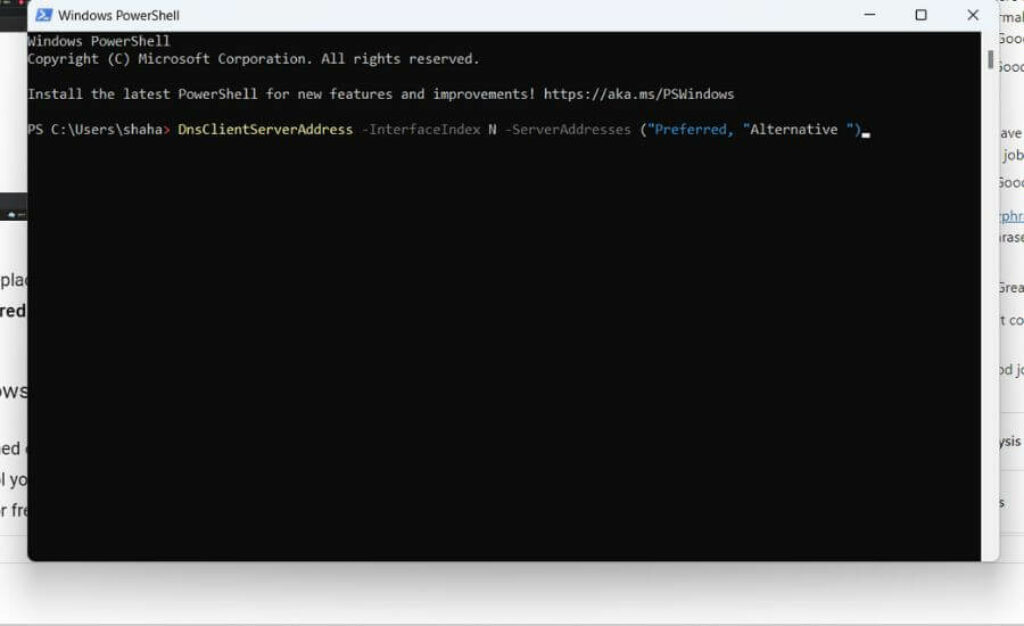
- Step 3: Remember that you need to replace the value; for example, if you want to connect to the Google server, instead of “Preferred,” just put the value 8.8.8.8, and instead of “Alternative,” just put the value 8.8.4.4.
Method 5: Using DNS Jumper.
If all the methods mentioned earlier are complicated, you can use a third-party app to change the DNS server. If you ask me which tool you should use, I suggest trying the “DNS Jumper.” you can download this app from the Microsoft Store for free.
- Step 1: Download the DNS Jumper app and double-click on it to open it.
- Step 2: After that, you have to select a “DNS server.” then, on the left side, you can see an “Apply DNS” tab and tap on it to change the server (Here, given all the DNS servers are free to use and secure).
- Step 3: Now, the DNS server has been changed. You also have the option to customize the server.
- Step 4: Below the “Choose a DNS Server” option, you can see a “Customize DNS Server.” tap on it and type the IP address of the server to which you want to connect.
You Might Also Like
FAQs
A DNS server is a tool where you can find the IP address of a website you want to connect. For example, let’s say that you type Google.com. The DNS server looks for the IP address of the Google server and then tries to connect it.
Google and Cloudflare are the best in terms of internet speed and security.
Yes, you can change the DNS server from the Control Panel, and the process is also quite simple. Above, I already mentioned this method so you can check it out.
Final Words
This article explored various methods for changing the DNS server in Windows 8, 10, and 11. Try each method this article outlines to determine which works best for your device.
If you encounter any issues while implementing these methods, please comment below.
