These days the internet is the basic need for people. Let’s say you have an urgent meeting, and for that, you are trying to connect your laptop with the Wi-Fi connection, but, for some reason, you can’t connect with it; I know it is annoying.
For the past couple of years, I’ve been using a Lenovo laptop, and there have been a few times I can’t connect with the home Wi-Fi, so I did some research, and I found that there are millions of people using this brand of laptop. Between them, many people are facing similar types of issues.
Read this article till the end to find out how you can resolve this type of issue. I will give you some tips, so you don’t have to worry about this type of technical issue in the future.
- Methods to Fix Lenovo Laptop Won’t Connect to Wi-Fi
- Make sure the wireless switch is ON
- Disable Airplane Mode
- Then restart your laptop and see if it connects to Wi-Fi
- By Resetting Network Configuration
- Forget Wi-Fi Network
- Running Troubleshooter
- Update Wireless Network Driver
- Enable the Wireless Adapter
- Enable WLAN AutoConfig Service
- Enter DNS Server Address Manually
- Renew your IP Address
- Precautions to Fix Lenovo Laptop Won’t Connect to Wi-Fi
- Final Words
Methods to Fix Lenovo Laptop Won’t Connect to Wi-Fi
If your Lenovo laptop doesn’t connect to the Wi-Fi, then don’t worry. There are a lot of ways to solve this type of issue. Below I mentioned a few simple methods to resolve this type of issue. I suggest you try each one to know which solution works for you.
Make sure the wireless switch is ON
I know you might be thinking everyone does that, but, for some reason, sometimes we forget to switch on the router. It is the first thing you should do.
Disable Airplane Mode
Sometimes by default, Airplane mode is on your laptop, and you did not notice that, so keep that in mind.
Then restart your laptop and see if it connects to Wi-Fi
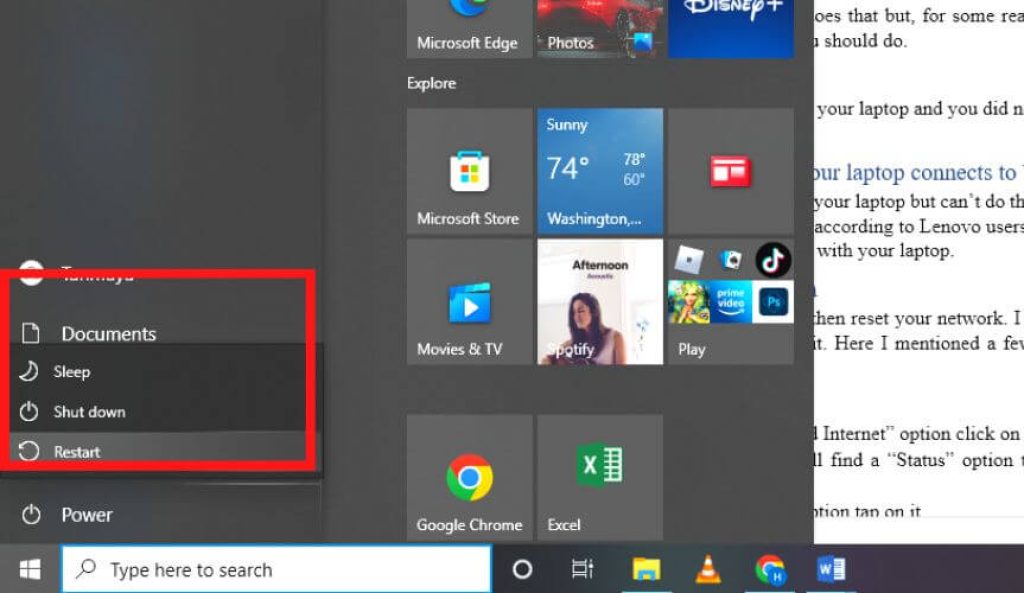
If you are trying to connect the Wi-Fi with your laptop but can’t do that because of some technical issues, then you should restart your computer; according to Lenovo users, this trick works most of the time. Now, you can try to reconnect Wi-Fi with your laptop.
By Resetting Network Configuration
If you still can’t connect to the Wi-Fi then reset your network. I know it sounds complicated, but the process is simple, and Anyone can do it. Here I mentioned a few simple steps to reset your network configuration.
- First, go to “Settings”.
- There you will find a “Network and Internet” option; click on it.
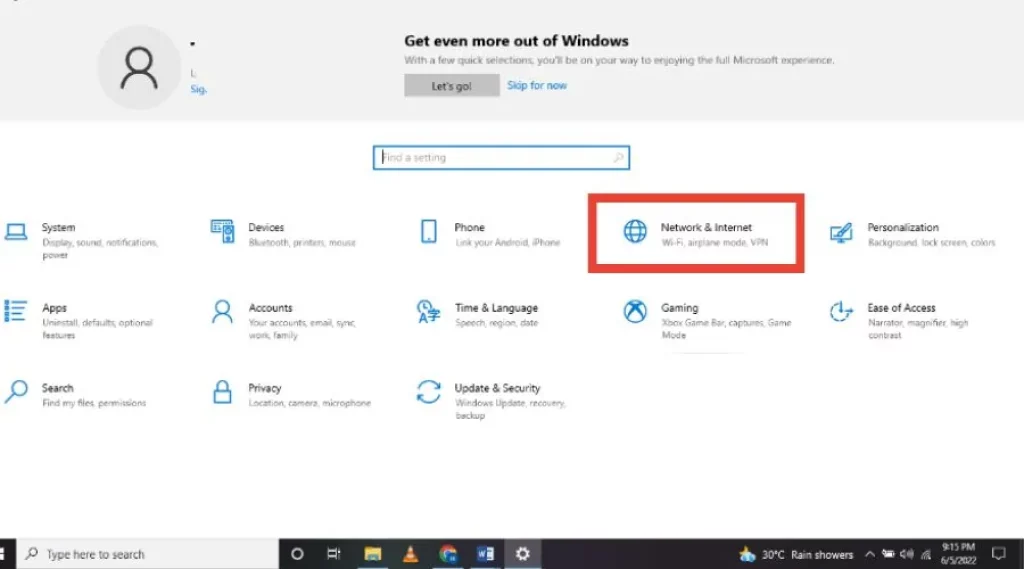
- After that, on the left side, you will find a “Status” option tap on it. Then click on the “Network Reset link”.
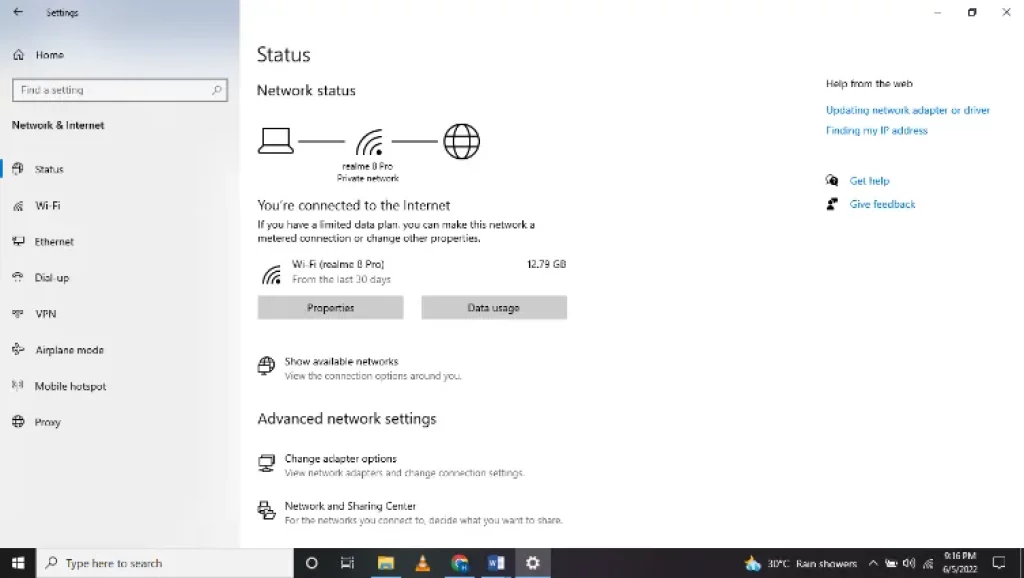
- Now you can see a “Reset Now” option tap on it.
- It will ask permission to reset the network, then tap on the “Yes” option.
- After completing these steps, you will get a warning it says the computer will be shut down.
- Now, your network resetting configuration is completed.
- Now, you can reconnect your laptop with Wi-Fi.
Forget Wi-Fi Network
If you use the same Wi-Fi network regularly, you will notice that your Lenovo laptop will remember the Wi-Fi connection. Still, a few times, the device will automatically disconnect at that moment, and you have to connect to the laptop manually. If you don’t know how to connect your laptop to Wi-Fi, then follow the simple steps I mentioned below.
- Go to the “setting”.
- There you will find a “Network & Internet” option tap on it.
- On the left side, you can see a “Wi-Fi tab” click on it.
- Now you can re-connect your device.
Running Troubleshooter
You should run a network troubleshooter if you still face issues and can’t connect to your older and newest Windows 11, 10, 8, and 7 laptop Wi-Fi. Follow the steps I mentioned below to learn how you can run troubleshooting.
- First, go to “Settings”.
- Then tap on the “Network & Internet” option.
- After that, click on the “Status tab,” which is placed on the left side.
- Then scroll downwards there you will notice a “Network Troubleshooter” option tap on it.
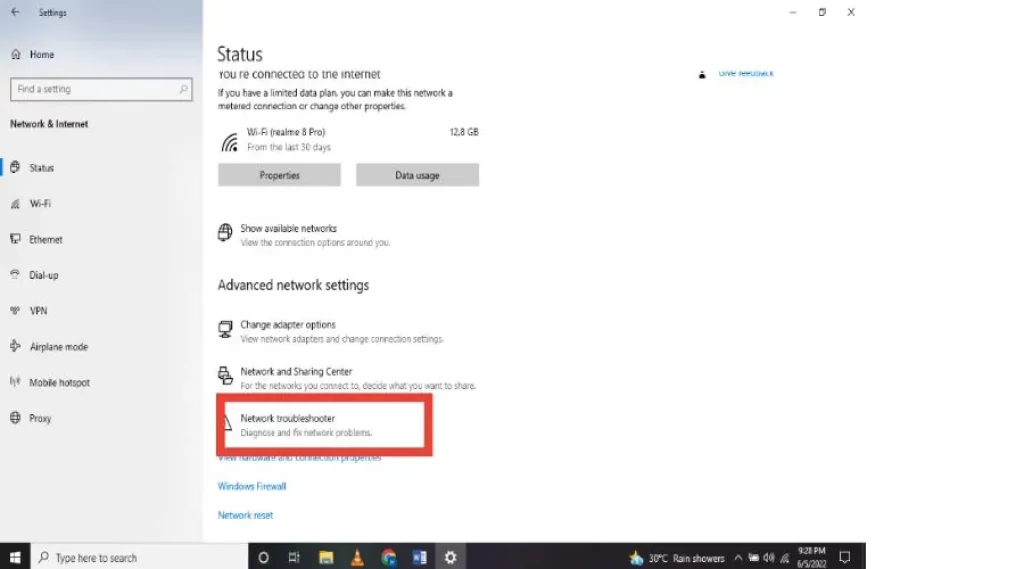
- If your laptop has any related issues, it will inform you.
Update Wireless Network Driver
If your laptop can’t connect to the Wi-Fi, it happens for many reasons. One of the common issues is your network drive might be corrupted. To prevent this type of issue, update your wireless network driver. There are two ways to automatically and manually update your wireless network driver.
Manually
Manually updating is a simple and easy process; you just need to download the latest version from the developer’s official website and install it.
Automatically
If you don’t have time to check the driver updates, then you can set it to automatic download, but remember, for this, you need additional software, “Drive Easy”. This additional software automatically scans your system and then figures out which drives need an update and will start the update.
It comes with a paid and free version, and the paid version interface is much easier than the free version.
- First, search the app and then download it.
- Now, open the App.
- You can see a “Scan Now” option; click on it.
- After that, a list of drivers will appear on your display, asking you for updates.
- Then click on the “Update” option.
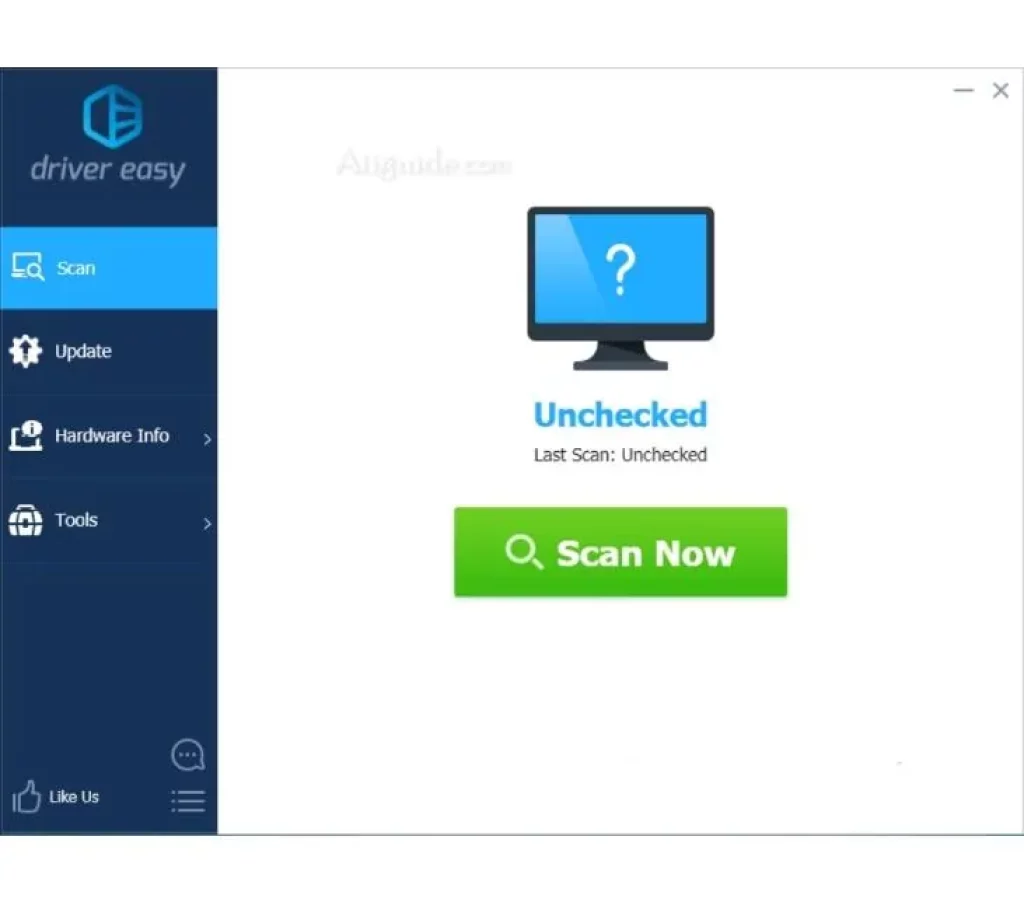
- Now, it will automatically update your driver.
- After completing all the steps restart your laptop.
- Now, try to reconnect your PC with the Wi-Fi.
Enable the Wireless Adapter
Sometimes by default, your laptop wireless adapter has been disabled; that is the reason your laptop can’t detect the Wi-Fi connection. Make sure to enable the wireless adapter. If you don’t know how to enable the wireless adapter, follow the easy steps below.
- First, press the Windows key and R button at the same time.
- Then a run box will appear.
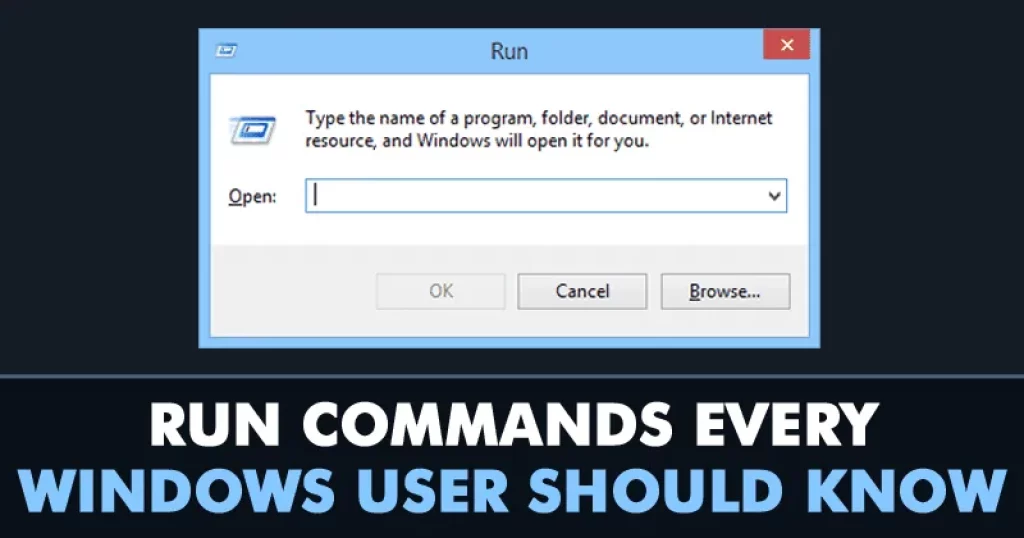
- Now, type devmgmt.msc then tap on the ok”.
- A window will appear on display; then, scroll down and find the “Network adapter” option.
- Now, you can enable the Network adapter option.
- After completing, all these steps, restart your laptop, then try to re-connect your laptop with the Wi-Fi connection.
Enable WLAN AutoConfig Service
WLAN AutoConfig is an important process that helps you to detect a wireless network and then connect to that network. Before going into any further details, check if it is running or not. If you don’t know how to check the WLAN AutoConfig service, follow the steps I mentioned below.
- First, press the “Windows + R button” simultaneously, and then a “Run” box will appear.
- Then type “services.msc” and tap on the “Ok” option.
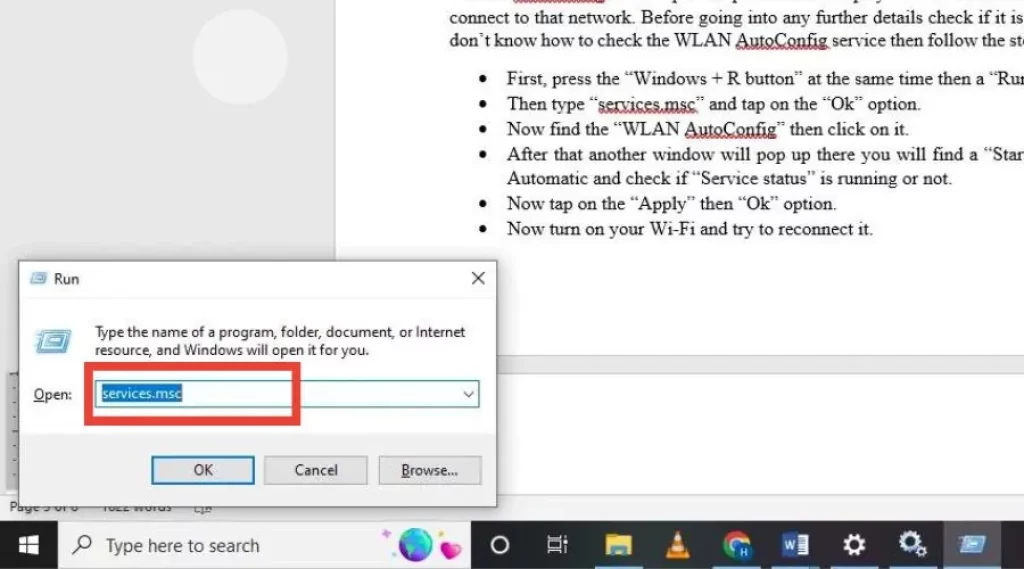
- Now find the “WLAN AutoConfig” and then click on it.
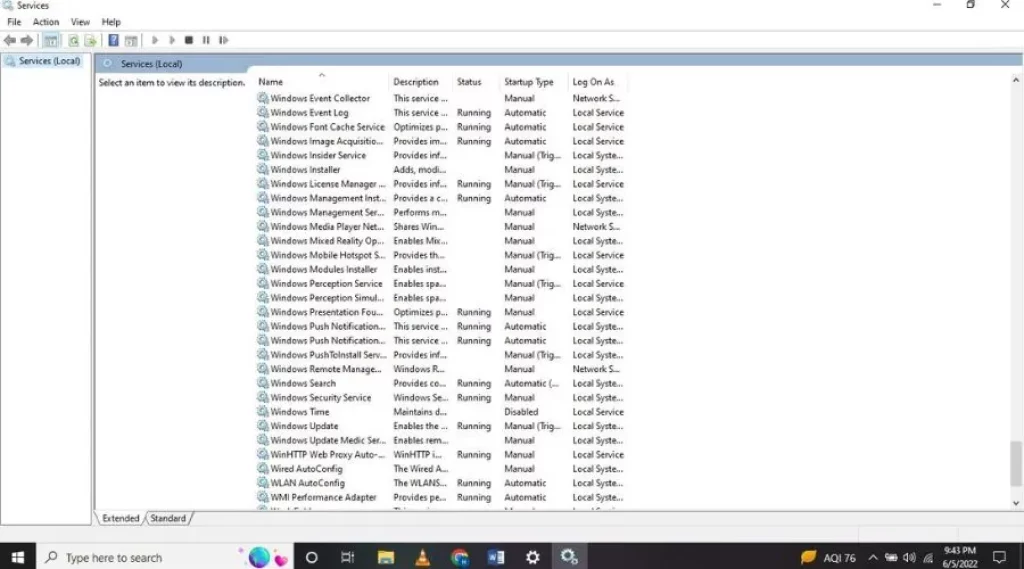
- After that, another window will pop up there, and you will find a “Startup” type option set to Automatic and check if “Service status” is running or not.
- Now tap on the “Apply” then “Ok” option.
- Now turn on your Wi-Fi and try to reconnect it.
Enter DNS Server Address Manually
DNS is an essential part of the internet. It works as a converter; for example, if you are searching YouTube.com, then DNS will transfer the language to an IP address so the internet can understand and give you the result you are looking for. Follow the steps I mentioned here so you can enter the DNR server manually.
- First, go to the “Control Panel.”
- There you will find a “Network and Internet” option tap on it.
- Now you will see a “Network and Sharing Center” option tap on it.
- On the left side, you will find a “change adapter settings” tap on it.
- Now right-click on the Active “Network Interface” and select the “Properties” option.
- Now Ethernet Properties-1 window will appear there, and you will find an Internet Protocol Version 4 (TCP/IPV4) option, then click the “Properties” option.
- You will find a “Following DNS Server Address” tap on it and set Prefer DNS server to 1.1.1.1, Google Public DNS to 8.8.8.8, and Open DNS 208.67.222.222, then click “Ok.”
- Now click on the “Advanced” option.
- Tap on the “DNS” tab, then click on the “Add” option.
- Write the DNS server addresses.
- Tap on the “Ok” option.
- After completing all the steps, tap on the “Close” option.
Renew your IP Address
You are still trying out all the methods mentioned in this article, but your PC didn’t connect to the Wi-Fi, which means your IP address might not support the Wireless device you are currently using. To resolve this type of issue, you need to change your IP address and if you don’t know to change it, then follow the process I mentioned below.
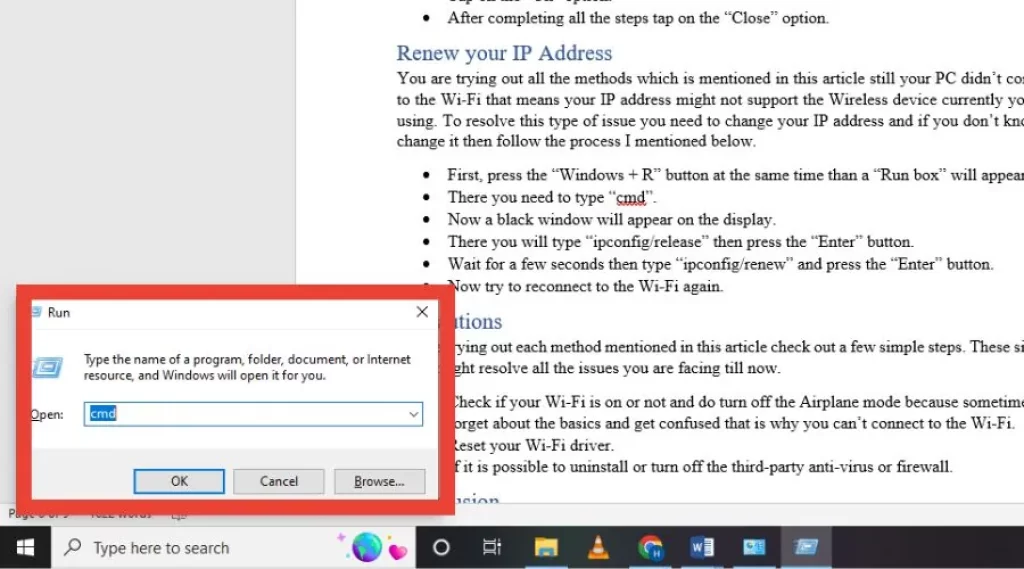
- First, simultaneously press the “Windows + R” button, and a “Run box” will appear.
- There you need to type “cmd”.
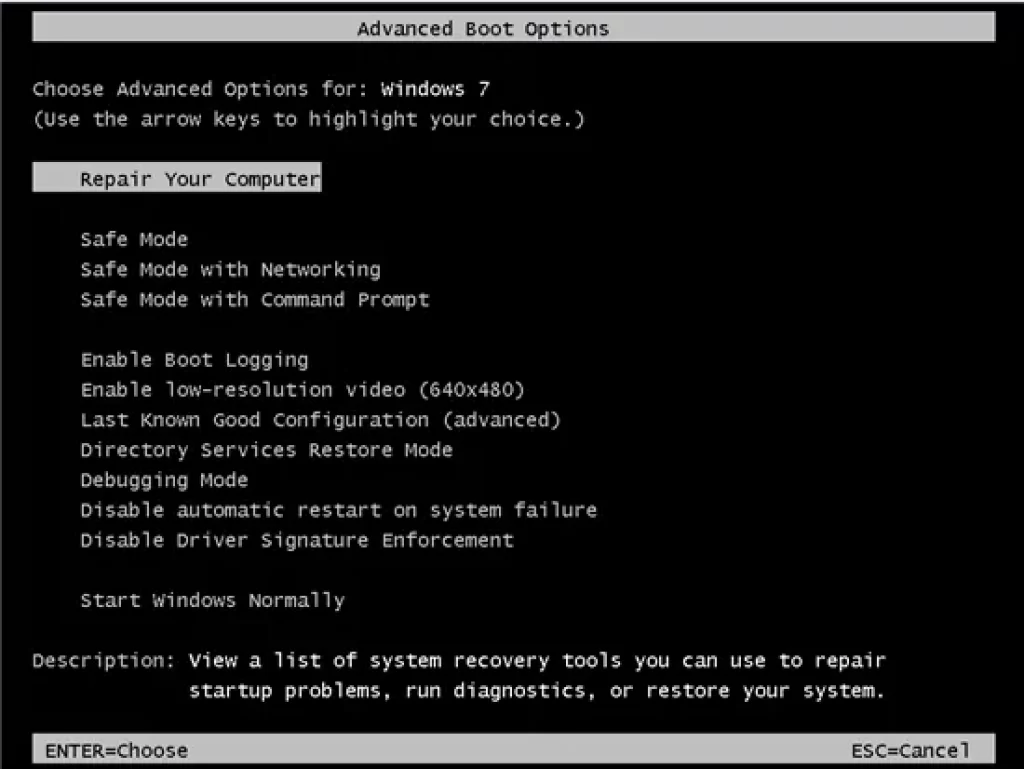
- Now a black window will appear on display.
- You will type “ipconfig/release” and press the “Enter” button.
- Wait for a few seconds, then type “ipconfig/renew” and press the “Enter” button.
- Now try to reconnect to the Wi-Fi again.
Precautions to Fix Lenovo Laptop Won’t Connect to Wi-Fi
Before trying out each method mentioned in this article, check out a few simple steps. These simple steps might resolve all the issues you have faced.
- Check if your Wi-Fi is on or not, and turn off the Airplane mode because sometimes we forget about the basics and get confused; that is why you can’t connect to the Wi-Fi.
- Reset your Wi-Fi driver.
- Is it possible to uninstall or turn off the third-party anti-virus or firewall?
Frequently Asked Questions
There are several reasons why your laptop might not be able to connect to wifi.
One common problem is that your computer’s network settings are wrong. Check that your wifi is enabled and correctly configured using the network connection wizard.
If you are still unable to connect, your router may malfunction. Check for any issues between A device and router to connect wifi; if so, resolve them as soon as possible.
It is dependent on the laptop and wifi adapter you are using.
Some laptops, particularly those running Windows 11 or 10, include a built-in wifi adaptor. Some older operating systems, particularly Windows 7 and XP, require an additional tuner or card to connect wirelessly.
Furthermore, some latest routers support direct connections between devices without the use of additional hardware.
If you’re unsure how to perform this, contact your ISP or router manufacturer for assistance.
Final Words
This article discussed how you could fix your Lenovo, Acer, ASUS, HP, and all windows 7, 8, 10, and 11 laptops if it doesn’t connect to Wi-Fi. Here I mentioned various solutions you might check out and try because you never know which method will work for you. If you still have questions, please tell us in the comment section.

![How to Factory Reset Acer Laptops? [Step-by-Step Guide]](https://pcvenus.com/wp-content/uploads/2024/04/How-to-Factory-Reset-Acer-Laptops-324x160.webp)

