Most people want to learn Python, one of the most popular programming languages. To do that, first, install the Python software.
Recently a few media houses reported that most Windows 11 users don’t know how to install it. If you are one of them, check out this article to learn how to install Python on your Windows 11 PC.
There are a lot of ways to install this software on your system. You can visit their official webpage or a third-party webpage to download this software, so read this guide to download the latest version.
How can I check if Python is installed on my Windows computer?
Python is a popular programming language mainly used for technical work like web development, technical analysis, automation data science, data analysis, etc. If we compare it with other programming languages, it is much easier to learn; that’s why people from non-technical backgrounds are also trying to learn Python.
Follow a few simple steps below to check if Python is already installed.
- Step 1: On the taskbar, look for a search box, then type “PowerShell,” and a menu will pop up on the screen.
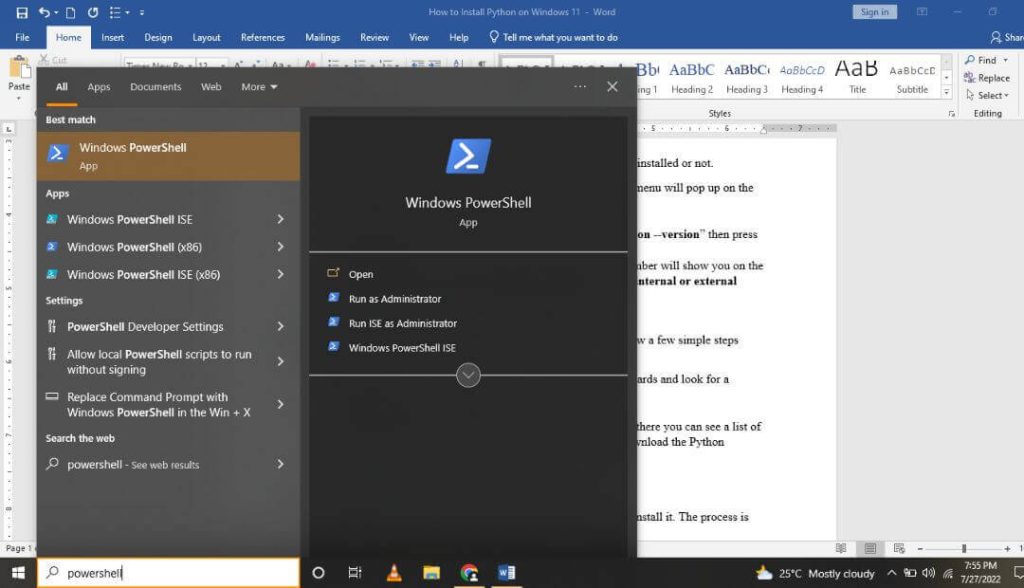
- Step 2: Now, look for a “Run as Administrator” option, then tap on it.
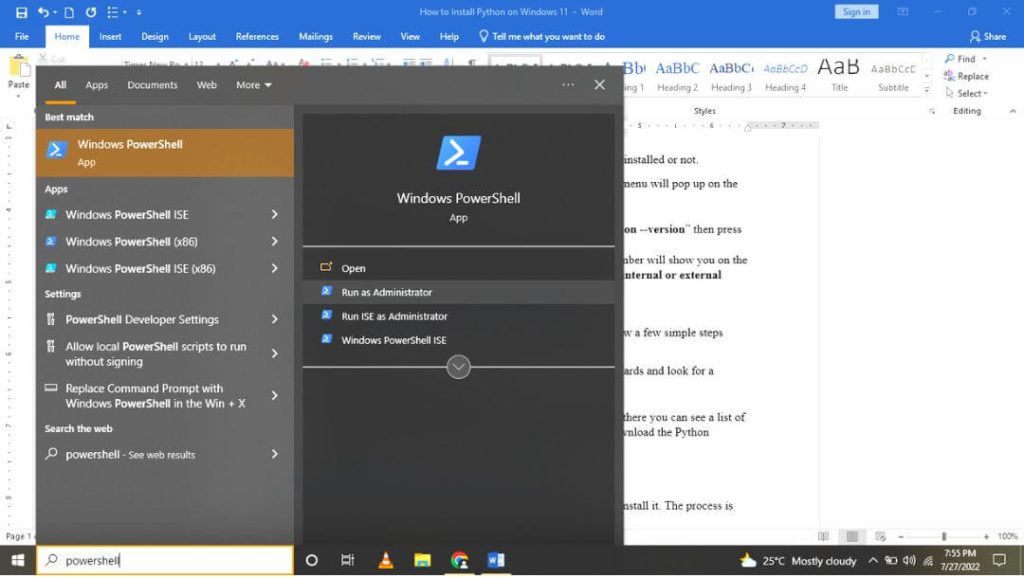
- Step 3: Now PowerShell window will pop on the screen and type “python –version” then press the “Enter” button.
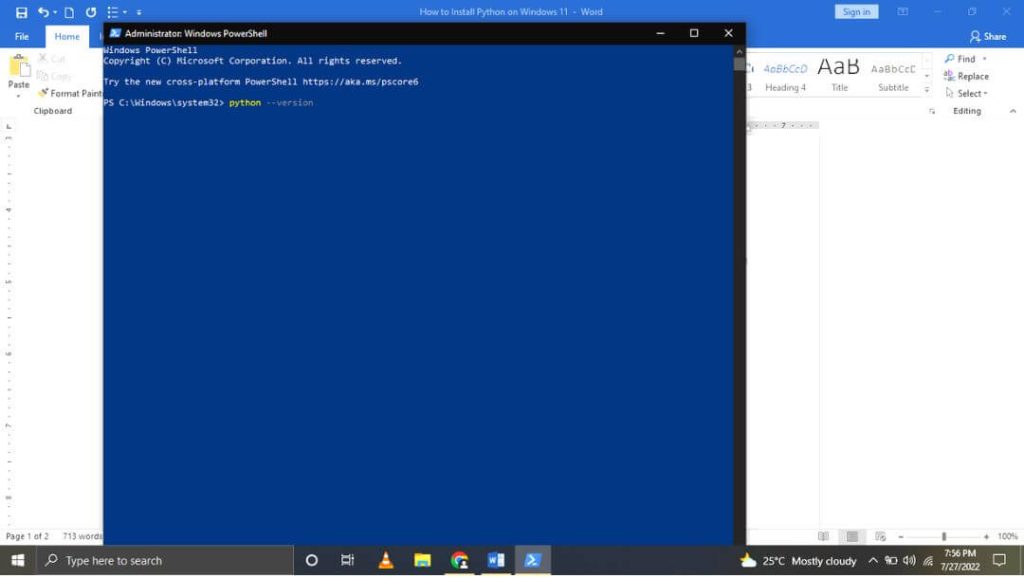
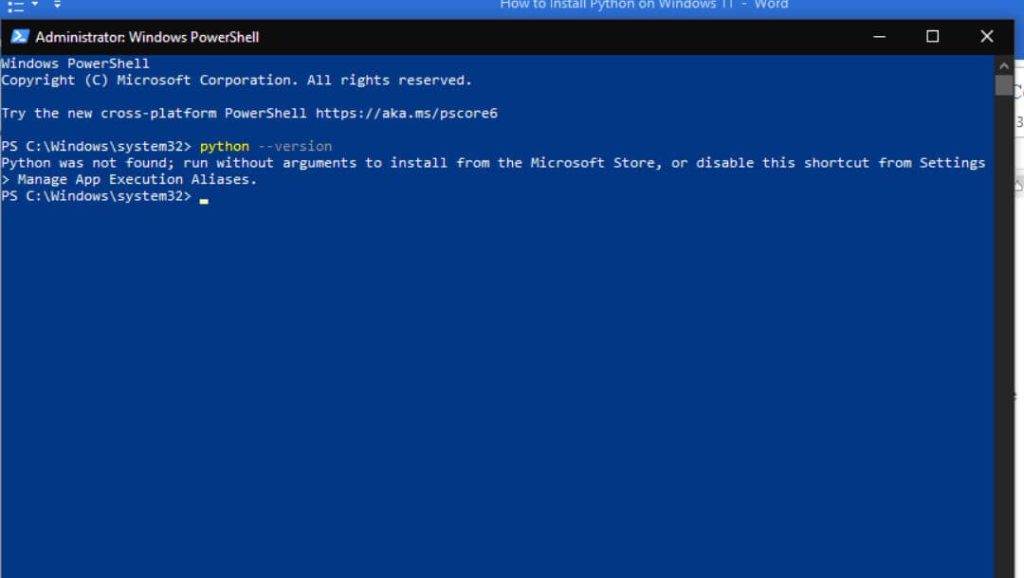
- Step 4: If Python is installed, then Python version number (as 3.10.2) will be shown on the screen. If it is not installed, then, Python was not found command message will appear on the PowerShell window.
How to Download Python on Windows 11 OS?
The process to download Python’s latest version is quite simple: follow a few simple steps mentioned below.
- Step 1: Visit the official webpage, then scroll downwards and look for a Download section.
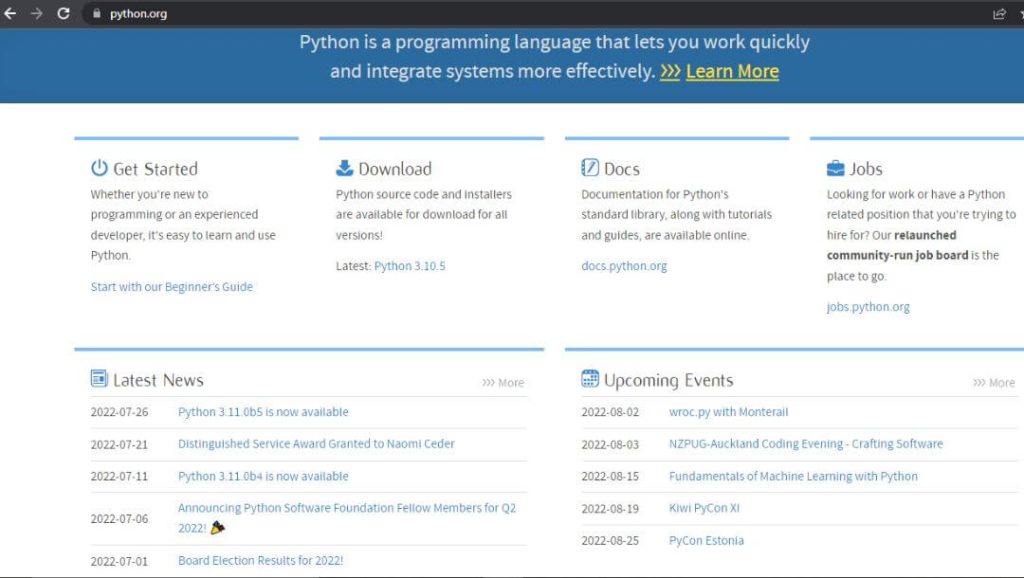
- Step 2: Now tap on the Python Version option (In our case- 3.10.2).
- Step 3: Scroll downwards and look for a Files section; from there, you can see a list of devices. Between them, please choose your device, then tap on it to download the Python software.
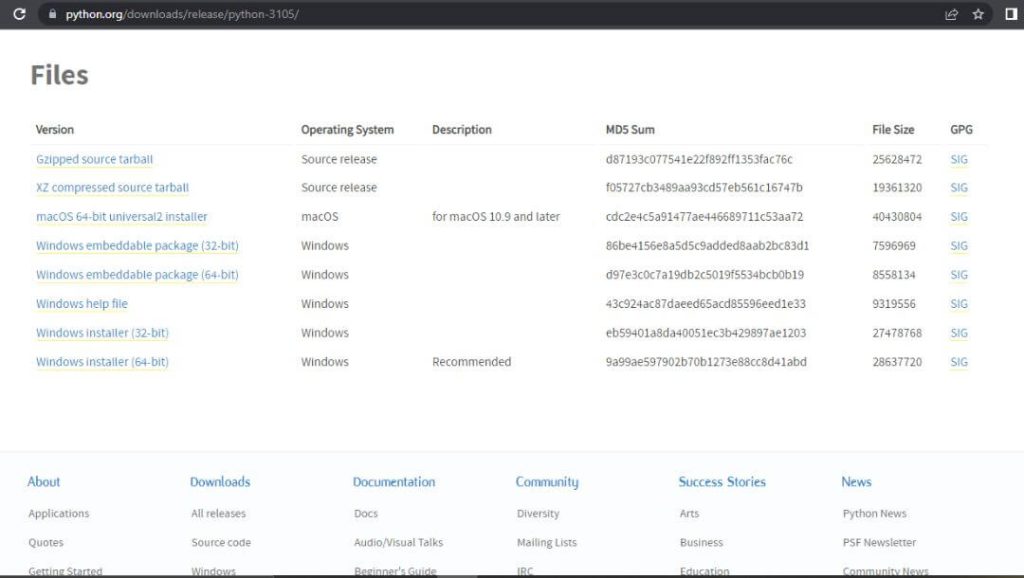
After that, wait for a while to complete the download.
You Might Also Like
How to Free up Space on Windows 11?
How to Install Python on Windows 11 OS?
After downloading, you can install it on your Windows 11. The process is simple; follow a few simple steps to install this software.
- Step 1: Open the file you just installed. An installation wizard will pop up on the screen, then look for the Customize installation option and click on it.
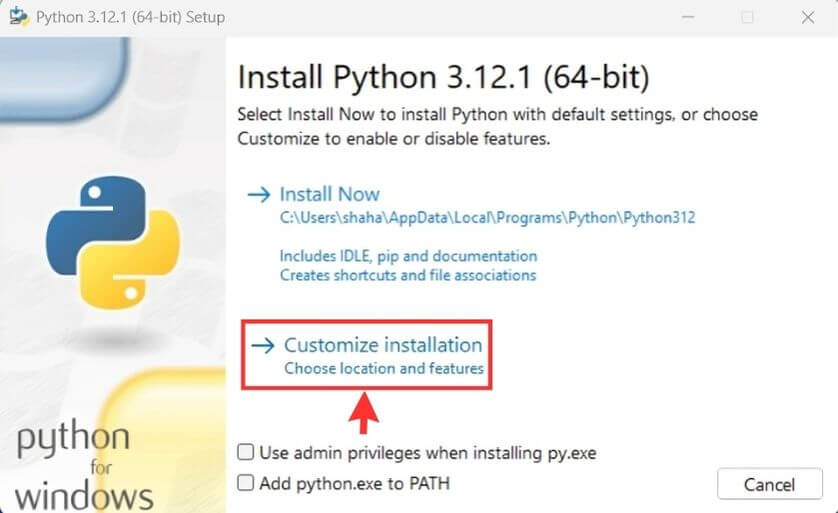
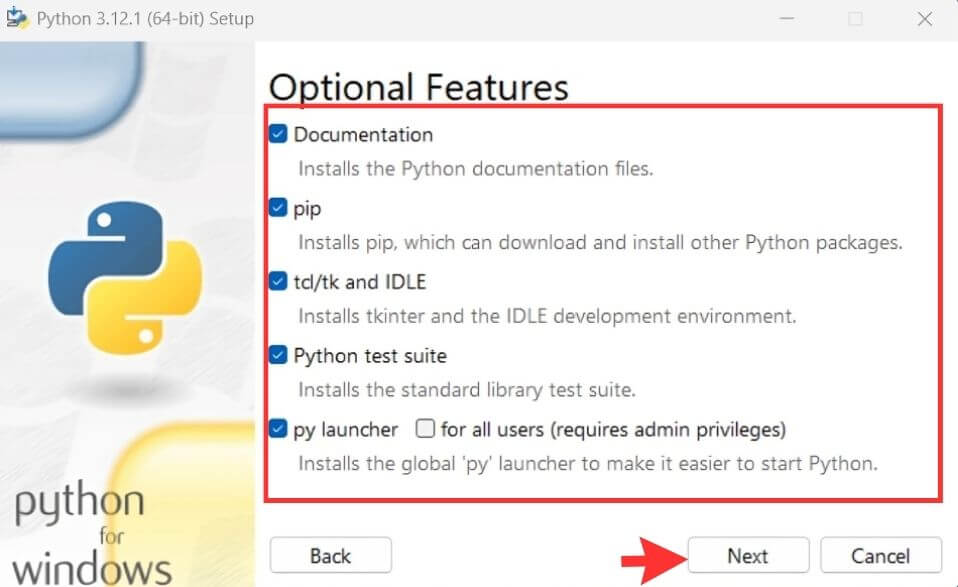
- Step 2: Now you can see different options like pip or Documentation, so check on all the options and tap the Next tab.
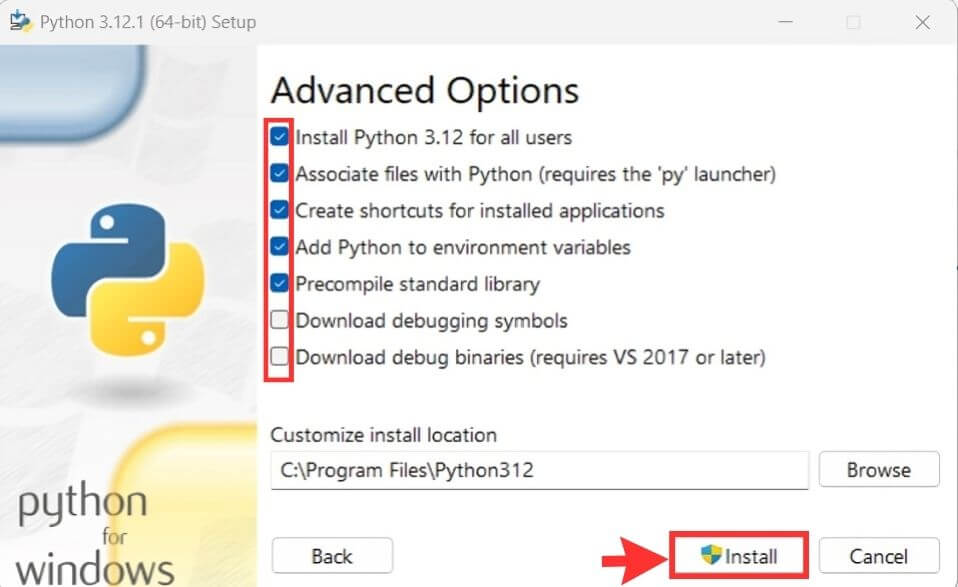
- Step 3: Check the Advanced Options for the first five choices. After that, pick where you want to put the Python files. Finally, click ‘Install‘ to start the process.
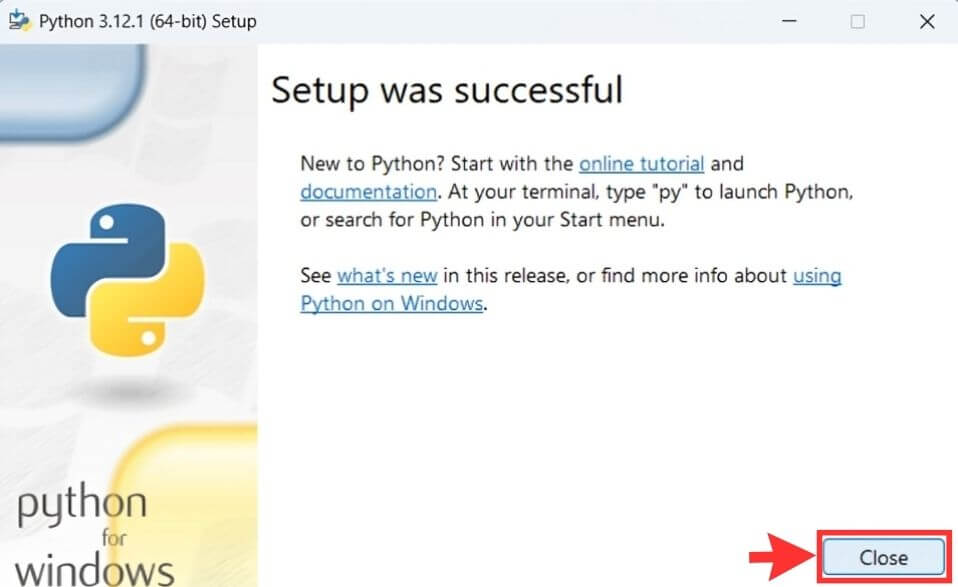
- Step 4: After that, wait a while to complete the process and tap the Close tab.
How to verify Python version in Windows?
- On the taskbar, you can see a Search box; tap on it and type CMD then a menu will appear on the screen.
- Now, look for a “Run as Administrator” option and tap on it.
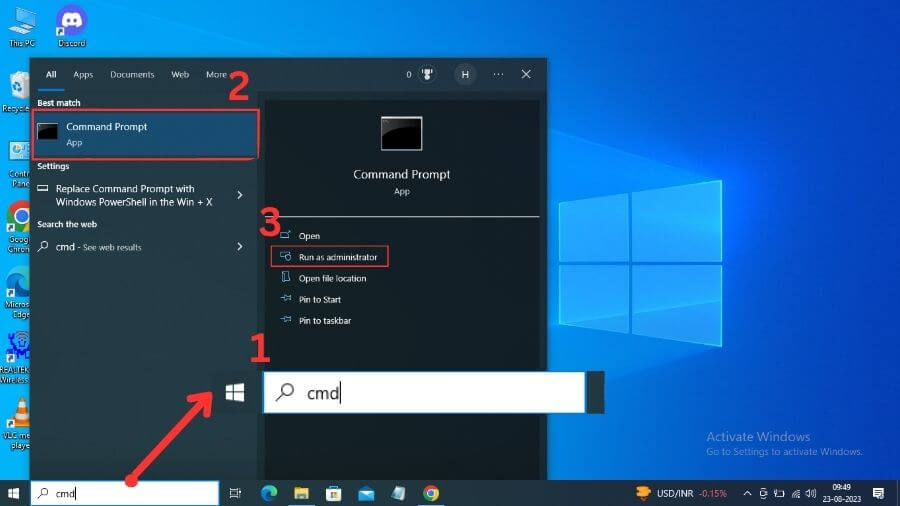
- A pop up notification will appear, Click on Yes button.
- After that, a command prompt window will appear on the screen; there, type python –version and press the Enter button.
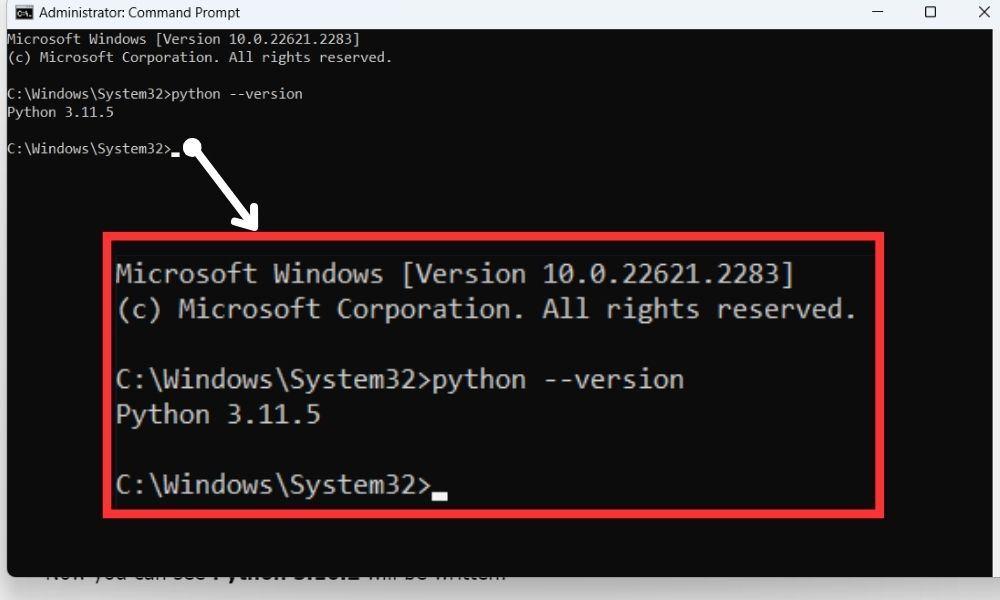
- Now you can see Python 3.11.5 is written in our windows 11 pc.
Running Python in Windows
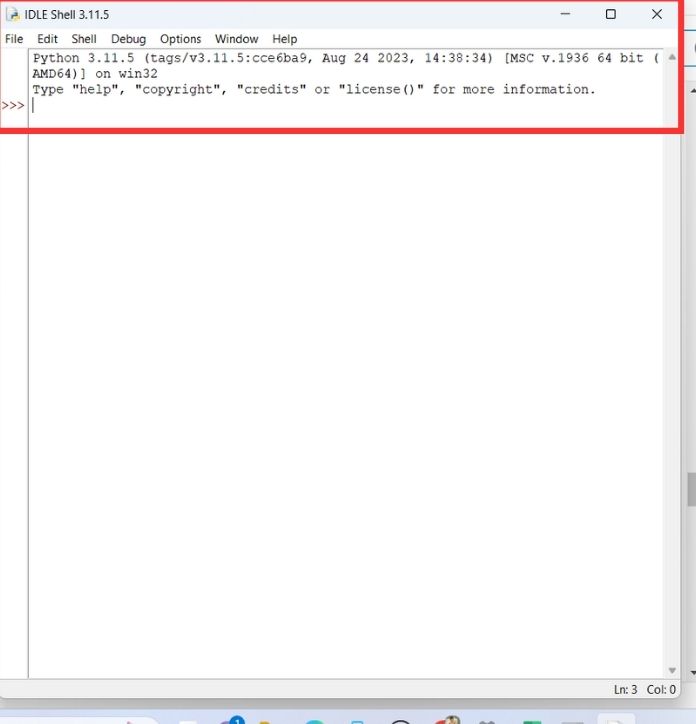
After completely installing Python on your Windows 11, follow a few simple steps to run it.
- On the taskbar, you can see a Search box; tap on it and type IDLE then a menu will appear on the screen.
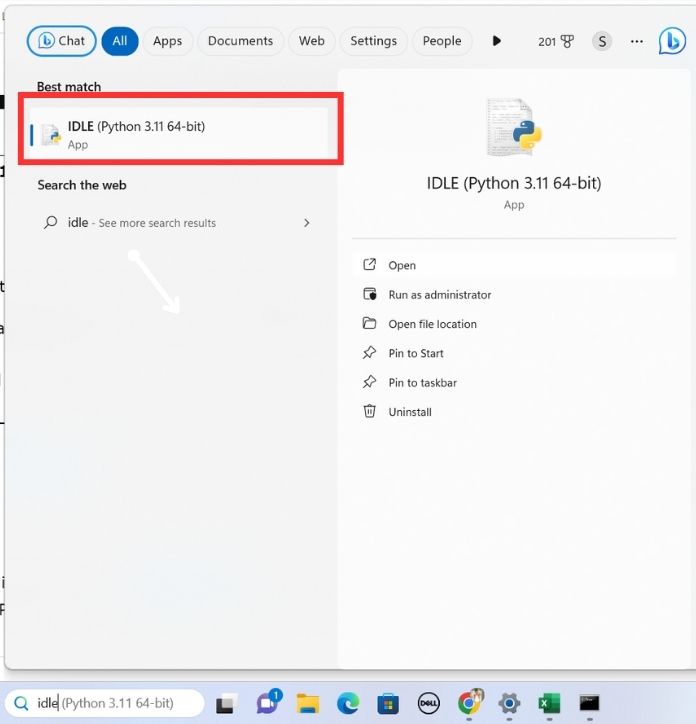
- Now click on the IDLE Shell option to open it.
You Might Also Like
How to Make Partition in Windows: Easy Methods
How to Use ‘Find My Device’ in Windows
FAQs
Gaming requires a high-end GPU like the dedicated NVIDIA RTX series, programming tasks typically rely more on a powerful CPU. A mid-range GPU should be sufficient for Python programming.
If your Windows operating system is 64-bit, installing the 64-bit version of Python Installer is always a better option. This ensures a smoother integration with the operating system. However, if you need to install the 32-bit installer for a specific reason, you can still proceed with the installation.
Yes, you can install different Python versions. We installed two different versions- 3.12.1 and 3.10.2. Some projects require a specific Python version. Use tools like virtual environments to handle multiple Python installations.
Python recommends using a virtual environment manager such as venv or pyenv to manage multiple versions and avoid conflicts.
Yes, you can get Python from the Microsoft Store, but it’s better to download it from python.org for more control. The latest version may take time to reach the Microsoft Store. You’ll get the latest version if you download it from the official website.
Yes, installing Python on Windows 11 usually requires administrator privileges, which ensures that the necessary files and configuration can be added to the system. So, switch to an administrator account if you’re using a non-admin one.
Final Words
This guide covered installing Python on your Windows 11 PC. After reading this, you can install Python easily. If you find it useful, feel free to share with friends. If you have any problems with Python or other programming languages, let us know in the comments.
